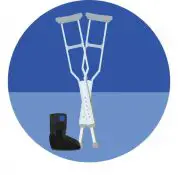
Crutches can cause underarm soreness, wrist pain, and back strain if not used correctly. Nearly 50% of crutch users experience discomfort, and improper use leads to 41,000 emergency room visits annually. Here’s how to avoid pain and improve your recovery:
Quick Tips:
- Adjust Crutch Height: Leave a 2-3 finger gap under your armpits and maintain a 30° elbow bend.
- Add Padding: Use memory foam, gel pads, or sheepskin to reduce pressure points.
- Fix Handgrips: Align grips with your wrist crease and consider ergonomic replacements.
- Distribute Weight Properly: Avoid leaning on armpits; use hands and arms for support.
- Maintain Good Posture: Keep your back straight and walk with a steady rhythm.
- Wear Comfortable Clothes: Choose breathable fabrics and avoid abrasive materials.
- Use Attachments: Add tips for wet, icy, or uneven surfaces and storage bags for essentials.
- Explore Alternatives: Consider forearm crutches or hands-free designs for long-term use.
Quick Comparison of Crutch Types:
| Crutch Type | Best For | Benefits |
|---|---|---|
| Underarm | Short-term injuries | Easy to use, minimal strength needed |
| Forearm | Long-term use | Better mobility, less strain |
| Hands-Free | Active lifestyles | Frees up hands, natural motion |
These adjustments can make a big difference in comfort and safety. Start with proper fit and padding, then explore advanced options if discomfort persists.
1. Get the Right Crutch Fit
Setting the Correct Height
Getting the height of your crutches right is key to avoiding nerve issues and maintaining good posture. Here’s how to adjust them:
- Leave a 2-3 finger width gap between the top pad and your armpit while standing upright.
- Position the crutch tips 5-8 inches away from your feet to ensure stability.
Here’s a quick guide:
| Adjustment Point | Target | Watch Out For |
|---|---|---|
| Armpit Gap | 2-3 finger widths | Pressure under the arms |
| Side Position | 5-8 inches from feet | Feeling wobbly or unsteady |
| Elbow Angle | ~30° bend when gripping | Slouching or hunching |
Stand tall with your shoulders relaxed to check the fit. If you notice pressure in your armpits, lower the crutches right away.
Positioning the Handgrips
Proper handgrip placement can help distribute weight better and reduce wrist strain:
- Align the handgrips with the crease of your wrist when your arms hang naturally.
- Aim for a 30-degree bend in your elbows when holding the grips.
- Make sure both grips are set at the same height.
Once adjusted, secure the spring buttons and tighten the collars to lock everything in place. Check these adjustments weekly or whenever a change in footwear alters your posture. Adding extra padding (covered in the next section) can also help ease pressure points.
2. Add Extra Padding
Types of Padding and Materials
Using the right padding can greatly ease discomfort and help prevent crutch palsy (nerve damage caused by underarm pressure). Here’s a quick comparison of popular padding materials:
| Material Type | Features |
|---|---|
| Memory Foam | Molds to your body for a custom fit |
| Gel Pads | Absorbs shocks effectively and keeps its shape |
| Sheepskin | Allows airflow and manages moisture well |
| Neoprene | Resists water, making it ideal for any weather |
| Silicone | Non-allergenic and simple to clean |
For example, the Vive Crutch Pads feature memory foam for added comfort, while the Crutcheze Comfort Kit includes underarm and hand grip covers with antimicrobial properties.
How to Install Padding
To make the most of your padding and ensure it lasts, follow these steps:
- Prepare the crutches: Clean the crutch surfaces thoroughly and measure the padding. Add an extra inch for underarm overlap.
- Attach the padding: Wrap the padding tightly around the crutch tops. Use adhesive tape or Velcro to secure it. Aim for a thickness of 1-2 inches to provide enough cushioning.
- Add grip covers: Slide gel grip covers snugly over the handgrips to minimize pressure.
Need a quick fix? Try wrapping foam pipe insulation or towels around the crutch tops. This temporary solution can help prevent skin irritation until you find a more permanent option.
Still feeling discomfort in your hands after padding adjustments? Check out the next section for tips on improving handgrip comfort.
How To Make Sure Your Crutches Fit Properly
3. Fix Uncomfortable Handgrips
If adjusting the padding (see Section 2) hasn’t solved your hand discomfort, it might be time to explore grip-specific options.
Best Replacement Grips
A survey of 500 crutch users revealed that 78% experienced hand discomfort with standard grips. Pairing proper grip replacements with height adjustments (see Section 1) can help avoid long-term strain.
| Grip Type | Features | Ideal For |
|---|---|---|
| Gel-Based | Absorbs shock, reduces fatigue | Long daily use |
| Memory Foam | Molds to hand shape for support | Personalized comfort |
| Silicone | Durable and weather-resistant | All-weather use |
| Ergonomic Contoured | Reduces strain with anatomical design | Hand/wrist issues |
The Ergobaum Replacement Grips are a great option, offering an ergonomic design that many users say eases palm pressure significantly. If you have arthritis or limited hand strength, consider forearm platform attachments. These devices shift weight from your hands to your forearms, offering a more comfortable experience. They also work well with the weight-balancing methods covered in Section 4.
Quick Grip Fixes
If you need immediate relief without investing in replacements, try these simple solutions:
- Wrap the grips with tennis racket overgrip tape for extra cushioning and to absorb sweat.
- Use talcum powder to minimize friction and reduce irritation.
For lasting comfort, check out the weight distribution strategies in Section 4.
4. Balance Your Weight Correctly
Once you’ve adjusted your grip for comfort (see Section 3), the next step is managing your weight distribution. Proper weight management works hand-in-hand with padding and grip adjustments to help avoid additional injuries.
Weight-Bearing Approaches
Your weight-bearing method should match your specific injury and your doctor’s advice. Here’s a quick breakdown:
| Weight-Bearing Type | What It Means |
|---|---|
| Non-Weight Bearing | Your arms take all the weight – no foot contact. |
| Partial Weight-Bearing | Only partial foot contact, as directed by your doctor. |
| Gradual Weight-Bearing | Slowly increasing foot contact as you heal. |
Important: Avoid letting your armpits carry your weight. This can cause nerve damage and block circulation.
Proper weight distribution will also tie into the posture techniques discussed in Section 5.
Navigating Stairs Safely
Weight distribution becomes even more crucial when tackling stairs. Here’s how to do it:
Going Up:
- Step up with your stronger leg first.
- Move the crutches and injured leg together afterward.
Going Down:
- Place the crutches down first.
- Follow with your injured leg.
If there’s a handrail, hold it with one hand while keeping both crutches on the opposite side.
sbb-itb-bbf8bc0
5. Keep Good Form While Moving
Building on the weight management tips from Section 4, using crutches with proper form is key to staying comfortable and promoting recovery.
Keep Your Back Straight
Maintaining good posture is crucial. Keep your spine straight and your shoulders relaxed. This helps spread the weight evenly and reduces the chance of muscle strain.
Walk Smoothly
Here’s a simple sequence to follow:
- Place the crutches slightly ahead of you and lean forward, supporting your weight with your hands.
- Swing your body forward between the crutches.
- Step forward with your uninjured foot.
- Move the crutches forward again to repeat the motion.
Helpful tips for movement:
- Keep your elbows close to your body for better control.
- Look forward, not down, to maintain balance.
- Stick to a steady, even rhythm.
- Be mindful of obstacles in your path.
Using these techniques, along with the weight distribution strategies from Section 4, can help reduce strain and avoid further discomfort. For best results, pair these methods with clothing that allows for a full range of motion (see Section 6).
6. Choose the Right Clothes
Pairing proper movement techniques (see Section 5) with the right clothing can make a big difference in comfort and mobility. The right clothing works hand-in-hand with padding (Section 2) and good posture (Section 5) to minimize irritation and improve your overall experience.
Best Fabrics to Wear
When selecting fabrics, aim for materials that reduce friction and keep you comfortable. Here are some great options:
- Cotton blends for breathability
- Moisture-wicking synthetics like polyester or nylon
- Bamboo fabrics for a soft feel and moisture control
Avoid abrasive materials like wool, which can cause chafing, especially in sensitive areas like underarms. For added comfort, look for clothing with seamless underarm designs to reduce irritation.
Helpful Clothing Details
Just as grip attachments (Section 7) improve usability, certain clothing features can enhance your daily comfort. Keep an eye out for these:
| Feature | Benefit |
|---|---|
| Reinforced underarm areas | Helps reduce friction in sensitive spots |
| Side zippers or Velcro closures | Makes it easier to access injuries or braces |
| Strategically placed pockets | Keeps essentials within easy reach |
| Adjustable sleeve lengths | Simplifies dressing and adjustments |
| Elastic waistbands | Adds flexibility and ease when dressing |
Loose-fitting pants are ideal, as they won’t restrict your crutch movements. Stretchy athletic wear is another solid choice, offering both comfort and mobility.
When it comes to footwear, prioritize stability. Pick slip-resistant shoes with Velcro closures and proper arch support to keep you steady. For added comfort during longer periods of crutch use, consider layering breathable fabrics for temperature control and wearing compression socks to aid circulation.
"Prioritize comfort and ease of movement over style. Choose clothes that don’t interfere with wound sites or medical devices", recommend physical therapists who work with crutch users.
7. Add Helpful Attachments
To enhance crutch functionality, consider adding attachments that address specific challenges. These additions, much like grip replacements mentioned earlier, can improve both comfort and safety without compromising mobility.
Grip and Safety Add-ons
Attachments designed for specific surfaces can make a big difference in safety and usability. Here are some options to consider:
| Surface | Attachment | Purpose |
|---|---|---|
| Wet | Rain Tips | Reduces slipping |
| Ice/Snow | Retractable Picks | Improves traction |
| Indoor | Wide-Base Tips | Adds stability |
| Uneven | All-Terrain Tips | Ensures better grip |
Make sure attachments are securely fastened and test them for stability before use. Also, inspect tread patterns regularly to ensure they’re not worn out. These upgrades work well alongside the posture techniques discussed in Section 5.
Storage Solutions
Carrying items while using crutches can be tricky, but storage attachments can help. Options like crutch bags or clip-on accessories make it easier to keep essentials within reach. For example, the Vive Crutch Bag provides hands-free storage for daily necessities:
| Attachment Type | Ideal For |
|---|---|
| Crutch Bags | Everyday items |
| Water Bottle Holders | Staying hydrated |
| Clip-on Baskets | Larger items |
To maintain balance, keep the weight of attachments to no more than 10% of your body weight. Heavier items should be positioned lower on the crutch shaft for better stability.
For added safety at night, consider attaching LED strips or reflective tape. These visibility aids are easy to install and align with the safe movement strategies highlighted in Section 5.
8. Look at Other Mobility Options
If adjustments like padding and attachments (see Section 7) aren’t enough to ease discomfort, it might be time to explore different mobility aids. Modern designs cater to various injuries and lifestyles, offering options that work well alongside earlier solutions like grip replacements (Section 3) and posture improvements (Section 5).
Comparing Crutch Types
Underarm crutches aren’t the only choice. Forearm crutches, also called Lofstrand crutches, spread weight more evenly and can make extended use much more comfortable. In fact, research shows they can increase walking speed by up to 25% compared to underarm crutches.
| Crutch Type | Best For | Key Benefits |
|---|---|---|
| Underarm | Short-term use | Easy to use, requires minimal strength |
| Forearm | Long-term use | Greater mobility and comfort |
| Platform | Weak hands/wrists | Offers forearm support, reduces hand strain |
Physical therapists often suggest forearm crutches for long-term use because they allow better movement. Keep in mind, though, they require more upper body strength and practice to get the hang of.
Newer Crutch Designs
Innovative mobility aids, like hands-free crutches, offer a fresh approach to comfort and functionality. The iWALK2.0, a popular hands-free option, straps to your leg and mimics a natural walking motion.
Another option is the Freedom Leg. Here’s how these newer designs stack up against traditional crutches:
| Feature | Traditional Crutches | Hands-Free Alternatives |
|---|---|---|
| Weight Distribution | Focuses on upper body | Supports the leg more naturally |
| Daily Activities | Limits hand use | Frees up your hands completely |
| Learning Curve | Moderate | Steeper at first |
| Terrain Handling | Works on most surfaces | Best on flat surfaces |
"Studies show that ergonomic or hands-free crutches often lead to better adherence to physical therapy and a quicker return to daily activities. For example, forearm crutch users reported 15% less muscle atrophy in the injured limb compared to underarm crutch users over six weeks".
Talk to your healthcare provider to determine the best option based on your injury and mobility needs. These alternatives can be especially helpful for long-term users still experiencing strain, complementing the earlier adjustments discussed.
Conclusion: Tips for Better Crutch Use
Making crutches more comfortable involves smart adjustments and proper movement techniques. These ideas go hand in hand with the padding tips (Section 2) and grip adjustments (Section 3).
Here’s a quick look at key areas to focus on:
| Focus Area | Benefit |
|---|---|
| Proper Fit | Helps avoid nerve pressure |
| Weight Management | Cuts down on fatigue |
| Surface Prep | Improves stability |
When using crutches, keep your back straight and avoid pressing into the armpit pads too much. Pair these basics with the movement tips from Section 5 for the best experience. Don’t forget to inspect your crutches regularly, as outlined in Section 7.
If comfort remains an issue, consider the alternative crutch options detailed in Section 8. Ongoing discomfort might mean another mobility aid could work better for you.