Getting the right fit for crutches is essential for safety and comfort. Improperly adjusted crutches can cause discomfort, strain, and even injuries. Here’s a quick guide to ensure your crutches fit correctly:
- Choose the right type of crutch: Axillary crutches for short-term use; forearm crutches for long-term needs.
- Wear your everyday shoes: Adjust crutches while wearing the shoes you’ll use most often.
- Set the height: Crutch pads should be 1.5–2 inches below your armpits, with 2–3 finger widths of space.
- Adjust handgrips: Align with your wrist crease when arms hang naturally, keeping a slight elbow bend (15–30°).
- Test and maintain: Ensure weight rests on your hands, not armpits. Regularly check rubber tips, padding, and grips for wear.
Properly fitted crutches improve mobility, reduce strain, and support recovery. Always consult a healthcare professional for personalized adjustments.
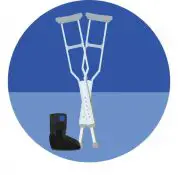
HOW TO Walk with Crutches Safely and EASILY | Fit, Use, Gait Patterns
1. Before You Start
Getting ready with these initial steps ensures your crutches are set up correctly for a comfortable and safe fit. You’ll be better prepared for the adjustments outlined in the next sections.
Select Your Crutch Type
Picking the right type of crutch is key to meeting your mobility needs. Here’s a quick guide to help you decide:
Axillary Crutches are best suited for:
- Short-term injuries requiring weight off your leg
- Recovery periods after surgery
- Temporary mobility support
- Those who need underarm assistance
Forearm Crutches are ideal for:
- Long-term mobility challenges
- Conditions where added stability is necessary
- Greater ease in maneuvering
- Support without underarm pressure
Put On Regular Shoes
Before adjusting your crutches, wear the shoes you’ll use most often during recovery. This ensures the crutches are set to the right height and fit. Here’s what to do:
- Slip on your everyday shoes
- Make sure your shoelaces are tied securely
- Check that the heel height matches what you typically wear
- Confirm the shoes provide solid support and comfort
Know Your Crutch Parts
Familiarizing yourself with the parts of your crutches makes adjustments much easier. Locate the adjustment mechanisms – these are often spring-loaded buttons or wing nuts – on each section of the crutch.
| Component | Purpose | Adjustment |
|---|---|---|
| Underarm Pad | Offers upper body support | Adjustable for height |
| Handgrip | Helps bear body weight through arms | Adjustable for proper grip |
| Shaft | Main structural support | Adjustable for overall length |
| Rubber Tip | Ensures traction on the ground | Replaceable when worn out |
Understanding these parts now will save you time and effort when fine-tuning your crutches later.
2. Set the Height
Getting the height just right is key to avoiding discomfort and potential injuries. A proper adjustment helps distribute your weight evenly and supports good posture.
Measure the Space Under Your Armpit
Stand up straight with your arms relaxed by your sides:
- Place the top of the crutch about 1.5–2 inches below your armpit.
- Check that there’s enough room for 2–3 finger widths between your armpit and the crutch pad.
Signs Your Crutches Are the Wrong Height:
- If fewer than two fingers fit between your armpit and the pad, the crutches are likely too tall.
- If you’re hunching or leaning forward while using them, they might be set too low.
Once the armpit spacing feels right, move on to positioning the crutches for optimal support.
Position the Crutches
Positioning the crutches correctly improves stability and balance. Use these tips:
| Position Check | Correct Setup | Common Mistake |
|---|---|---|
| Side Distance | 6 inches away from your body | Too close or too far away |
| Forward Angle | Slightly ahead of your body | Positioned directly under your arms |
Stand with the crutch tips about 6 inches to the side of your feet and slightly ahead of you for better stability.
Quick Tip for Height Check: When holding the handgrips, your elbows should have a slight bend. If they’re fully straight or bending too much, adjust the crutch height accordingly.
3. Adjust the Handgrips
Getting the handgrips set up correctly is key to avoiding wrist strain and ensuring stable support.
Match Wrist Height
Use the following checks to ensure proper alignment:
| Position Check | Correct Setup | Warning Signs |
|---|---|---|
| Wrist Level | Handgrips align with the wrist crease when arms hang naturally | Wrists bent upward or downward |
| Elbow Angle | 15-30° bend when gripping | Elbows locked straight or overly bent |
| Arm Position | Arms hang relaxed and naturally | Shoulders are raised or hunched |
Pro Tip: Stand naturally with your arms at your sides. The handgrips should line up with your wrist crease without forcing your arms into an awkward position.
Make sure your wrists are properly aligned before testing how comfortable the grips feel.
Check Grip Comfort
Once the handgrips are positioned, take a moment to confirm they’re secure and comfortable for long-term use:
- Grip Security: Shake each handgrip gently to check for any wobbling or looseness.
- Wrist Alignment and Pressure: Hold the grips and ensure your wrists stay straight, with pressure evenly distributed.
Tighten any loose adjustments to avoid accidents.
If you notice discomfort or your wrists bending unnaturally, make small tweaks until your arms feel naturally supported. For extra comfort during prolonged use, consider adding padded grip covers. Properly adjusted grips not only improve control but also help reduce fatigue over time.
sbb-itb-bbf8bc0
4. Test the Fit
Once you’ve adjusted your crutches, it’s time to test them out. This step is crucial to ensure they’re safe, comfortable, and properly fitted. A good fit not only helps avoid injuries but also makes your recovery process more manageable.
Check Weight Distribution
When using crutches, most of your weight should rest on your hands – not your armpits. Stand still and gradually shift your weight onto the crutches. If you feel any discomfort under your arms, adjust the height so your hands take the load. Also, double-check that all parts of your crutches are in good condition for added safety.
Inspect the Components
Before you move around, take a moment to check these key parts:
- Rubber Tips: Look for wear, cracks, or any damage. Damaged tips can reduce traction, so replace them if needed.
- Hardware: Make sure all bolts, screws, and nuts are secure and tight.
- Handgrips: Ensure the grips are securely attached and feel comfortable in your hands.
Once everything is in good shape, you’re ready to test how they perform.
Practice Basic Movements
Start by walking slowly on a flat surface. Practice stopping in a controlled way and try both small and wide turns. Pay attention to how your weight shifts – your hands should bear the load, and your movements should feel stable and smooth.
If you experience any discomfort or feel unsteady, revisit the adjustment steps to refine the fit. Taking the time to test your crutches thoroughly is a key part of staying safe and recovering effectively.
5. Regular Upkeep
Once you’ve ensured everything fits properly, keeping up with regular maintenance is vital for both safety and performance. Consistent care helps avoid accidents and keeps everything functioning as it should.
Replace Worn Parts
Take time to inspect key components like rubber tips, padding, and hand grips for any signs of wear and tear:
- Rubber Tips: Check for cracks, uneven wear, or reduced grip. Replace them if they no longer provide stability.
- Padding: Look for signs of compression or damage that could affect comfort.
- Hand Grips: Ensure they’re firmly attached and free from cracks or deterioration.
Staying on top of these checks will help maintain reliability and comfort over time.
Clean and Store
Keeping your equipment clean and properly stored is just as important as making adjustments. Here’s how:
- Use a damp cloth to wipe down surfaces, and for tougher grime, mild soap works well. Always dry thoroughly to prevent moisture damage.
- Store your crutches upright in a cool, dry place, away from direct sunlight, to avoid unnecessary wear.
Get Help When Needed
Don’t hesitate to seek professional advice if something feels off. Your healthcare provider can address persistent issues and ensure your setup remains safe and effective. Regular check-ins can make a big difference in long-term usability.
Conclusion
Getting the right fit for your crutches is essential for safe and comfortable movement. This involves choosing the right type of crutch, adjusting the height properly, and positioning the handgrips correctly. Each step plays a key role in ensuring a secure and comfortable experience.
Don’t forget to maintain your crutches regularly to keep them in good condition and provide reliable support. If you feel any discomfort or have doubts about your adjustments, it’s always a good idea to reach out to a healthcare professional.
For more detailed advice, check out World Crutches for helpful guides on fitting and maintaining your crutches.
FAQs
How do I decide between axillary crutches and forearm crutches for my recovery?
When deciding between axillary crutches (underarm crutches) and forearm crutches, it’s important to consider your injury, comfort, and how much mobility you need.
Axillary crutches are often the go-to option for short-term situations, like recovering from surgery or a temporary injury. They’re straightforward to use and provide solid stability, making them ideal for those new to crutches. On the flip side, forearm crutches are a better fit for long-term use or for people managing chronic conditions. They allow for greater freedom of movement and are easier on the underarms, reducing discomfort over time.
If you’re unsure which type suits you best, it’s a good idea to talk to your healthcare provider or physical therapist. They can guide you toward the option that aligns with your recovery plan and personal needs.
What should I do if my crutches cause discomfort or feel awkward to use?
If your crutches are causing discomfort or feel awkward, it’s crucial to address the problem quickly to prevent strain or injury. Start by checking the height adjustment of your crutches. Your elbows should have a slight bend – about 15 to 30 degrees – when you’re holding the handgrips. Additionally, there should be around 1 to 2 inches of space between your armpits and the top of the crutches. Make sure the handgrips are positioned so that your weight is supported by your hands, not your underarms.
If you’re still uncomfortable, try adding padded covers or grips to ease pressure and make the crutches more comfortable to use. Always focus on maintaining proper posture and using the correct technique while walking with crutches, and don’t hesitate to take breaks when needed. If the discomfort continues, it’s a good idea to consult a healthcare professional for advice tailored to your situation.
How often should I inspect and adjust my crutches to ensure they are safe and comfortable to use?
To keep your crutches in good condition and safe to use, make it a habit to inspect them regularly. Start by checking the rubber tips – if they’re cracked or worn thin, replace them immediately, as they’re essential for grip and stability. Next, examine the hand grips to ensure they’re secure and haven’t become too worn. Lastly, double-check that the height adjustments are properly locked and correctly aligned.
A quick daily check is a smart practice, especially if you rely on your crutches often. For a more thorough inspection, aim to examine them every couple of weeks. This routine maintenance not only helps you avoid accidents but also keeps your crutches comfortable and dependable.