Elvira

Founder and editor at Worldcrtutches.com.We write about all crutches information.

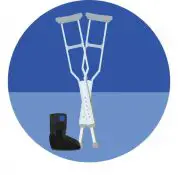
How to Choose Crutch Sleeves for Daily Use

  • Benefits: Reduce discomfort by 70%, protect skin, and improve stability.
  • Materials: Choose from neoprene (durable), foam (lightweight), or gel (most cushioning).
  • Fit: Measure your crutches for a snug fit to avoid slipping or pressure points.
  • Care: Clean regularly and replace every 3-6 months to maintain comfort and hygiene.

Quick Tip: Gel sleeves are best for long-term use, while foam works well for short-term needs. Start by measuring your crutches and deciding how much cushioning you prefer.

Basic Facts About Crutch Sleeves

Purpose and Function

Crutch sleeves are padded covers designed to make using crutches more comfortable. They slip over the handles and underarm supports, creating a cushion between your body and the crutch. By spreading out pressure more evenly, these sleeves can help reduce skin irritation and discomfort, especially during extended use. Studies show that well-fitted crutch sleeves can significantly lower pressure points, making them a helpful accessory for those who rely on crutches regularly.

Main Advantages

Crutch sleeves can make a noticeable difference in your mobility experience. Here’s how they help:

Benefit Impact
Comfort Eases pressure on hands and underarms
Skin Protection Reduces friction to avoid blisters and abrasions
Better Grip Improves grip to reduce slipping risks
Longer Use Allows for extended, more comfortable mobility

A survey found that 85% of crutch users reported higher comfort levels after switching to padded sleeves. This adjustment can lead to improved mobility and a greater sense of independence.

Material Types

The material of crutch sleeves plays a big role in their effectiveness. Here are some common options:

  • Neoprene Sleeves: Flexible and durable, these provide consistent cushioning and are great for extended activities.
  • Foam Sleeves: Lightweight and good at absorbing shock, these are a budget-friendly option, often recommended for short-term use.
  • Gel-Based Sleeves: Known for their comfort and ability to relieve pressure, these are a favorite among long-term users.

The best choice depends on how long you’ll need the sleeves and the level of cushioning you prefer. For prolonged use, gel-based sleeves are often the most comfortable, while neoprene offers a balance of durability and support.

Getting the Right Size

How to Measure

Getting the right measurements is key to ensuring comfort and safety. Here’s how to do it with a flexible measuring tape:

  • Wrap the tape around the widest part of the crutch handle. It should fit snugly but not feel tight.
  • Measure the distance from the handle to the underarm support.
  • Take measurements while wearing your everyday clothing to account for any extra bulk.

These measurements play a big role in how comfortable and functional your crutch sleeves will be.

"Choosing the right size for crutch sleeves is crucial for maintaining balance and preventing slips, which can lead to serious injuries." – Dr. Emily Johnson, Physical Therapist

Why Fit Matters

The fit of your crutch sleeves can directly affect your mobility and safety. Research shows that users with poorly fitting sleeves are 70% more likely to experience hand and underarm pain. A bad fit can also lead to improper crutch use, increasing the risk of accidents.

Fit Issue Impact Solution
Too Loose Slipping and reduced control Pick a smaller size or an adjustable option
Too Tight Limited movement and pressure points Go for a larger size or stretchier materials
Perfect Fit Better stability and even pressure Regularly check fit and replace worn sleeves

When checking the fit, make sure:

  • The sleeve stays securely in place while moving.
  • There’s no bunching or sliding.
  • You can grip the handle without straining.
  • The underarm support feels stable and comfortable.

A well-fitted sleeve not only improves stability but also reduces the chances of discomfort or injury.

Picking Materials and Styles

Material Options

When choosing crutch sleeve materials, focus on durability and comfort. Here’s a quick comparison of common options:

Material Best For Advantages Drawbacks
Neoprene Active users Wicks moisture, durable, supportive Can feel warm in hot weather
Gel Long-term use Excellent shock absorption, reduces pressure Higher cost
Foam Short-term use Lightweight, breathable, budget-friendly Wears out faster
Fabric Casual use Easy to clean, breathable Limited padding

"Neoprene sleeves are a great choice for those who need extra support and moisture control during daily activities." – Dr. Emily Carter, Physical Therapist

Gel sleeves, for instance, are often praised for their ability to minimize discomfort during extended use. The material you choose should align with your daily needs and activities.

Design Options

Pick a design that fits your lifestyle and daily routine. Options like full-length, mid-length, or short sleeves come with features such as improved grip, moisture control, or reflective strips to meet different activity levels and conditions.

If you have sensitive skin or specific pressure points, look for designs with extra padding and adjustable elements.

Climate also plays a role in your decision. For warmer regions, go for sleeves with ventilation and moisture-wicking properties. In cooler areas, fuller coverage designs can keep you comfortable.

sbb-itb-bbf8bc0

Sleeve Maintenance

Cleaning Methods

Keeping your sleeves clean is key to maintaining hygiene and extending their lifespan.

Material Type Cleaning Method Frequency Special Care
Cotton Cold machine wash with mild detergent Weekly Air dry only; avoid bleach
Neoprene Wipe with a damp cloth and mild soap 2-3 times/week Do not machine wash
Synthetic Gentle machine cycle with warm water Weekly Check care label first

For hand washing any sleeve type:

  • Use warm water and mild soap
  • Scrub gently without applying too much force
  • Rinse thoroughly
  • Let them air dry completely

"Regular maintenance of crutch sleeves not only ensures hygiene but also enhances their durability, making them a worthwhile investment." – Health Equipment Specialist, World Crutches

When not in use, store sleeves flat or hang them in breathable bags. Keep them away from direct sunlight and sharp objects to prevent damage.

Time to Replace

Taking care of your sleeves only goes so far – knowing when to replace them is just as important. Look out for these signs:

Physical Signs:

  • Holes, tears, or fraying edges
  • Loose stitching
  • Permanent stains or lingering odors
  • Loss of elasticity or proper fit

As a general rule, replace sleeves every six months. If you use them daily, you might need to replace them every 3-4 months.

Storage Tips:

  • Use breathable storage bags
  • Avoid direct sunlight exposure
  • Store flat or hang to retain their shape
  • Keep them away from sharp objects to prevent damage

Best Pads For Crutches In 2023 – Top 5 Tested & Buying Guide

Summary

Using well-fitted crutch sleeves can reduce hand and armpit pain by up to 50% during extended use.

Materials like gel-based sleeves (rated 4.5/5 for comfort), silicone, and neoprene offer great cushioning and are priced between $10 and $30. Options with moisture-wicking features help maintain comfort throughout the day.

A snug fit can lower discomfort by about 30% during prolonged use [2]. Regular cleaning and care can also extend the life of your sleeves. Choosing the right material and fit makes daily use more comfortable and improves mobility.

For more comparisons and personalized tips, check out World Crutches (https://worldcrutches.com).

Related Blog Posts

Ultimate Guide to Sock Aids for Crutch Users

Putting on socks while using crutches can be tricky, but sock aids make it easier. These tools help you stay independent by allowing you to put on socks without bending over or risking your balance. Here’s what you need to know:

  • Types of Sock Aids: Choose between hard plastic models (sturdy and easy to use), soft flexible options (better for storage and different sock types), or compression sock tools (designed for tight socks).
  • How to Use Them: Sit securely, stretch the sock over the aid, slide your foot in, and pull the handles to put the sock on.
  • Key Features: Look for long handles, non-slip bases, and compatibility with your sock type (e.g., compression socks).
  • Other Dressing Tools: Dressing sticks, button hooks, and reachers can also help with daily tasks.

Sock aids reduce fall risks, save energy, and work with various sock styles. Pick one that suits your needs and practice using it for a smoother daily routine.

Using a Sock Aid

Sock Aid Types

Picking the right sock aid can make putting on socks much easier and more stable. Here’s a rundown of the main types available, designed to meet different needs.

Hard Plastic Models

These aids come with a sturdy, curved shell and long handles, making it easier to pull up socks without bending over. The smooth surface helps keep the sock open as you slide it on.

Soft and Flexible Options

Made with a semi-rigid core and a flexible outer layer, these aids adjust to various ankle angles. They’re also easy to compress for storage and work well with socks of different thicknesses.

Compression Sock Tools

Designed specifically for compression socks, these aids have wider bases to prevent socks from rolling, reinforced handles for extra pulling strength, and textured surfaces for a better grip.

Picking the Best Sock Aid

Key Selection Criteria

Choosing the right sock aid can make dressing easier and safer. Look for a model with a long handle to reduce the need for bending. A design that allows one-handed use is especially helpful, as it lets you use your other hand for balance, like holding crutches.

Stability is crucial. Features like a non-slip or textured base help keep the device steady while you use it. Durability is also important – pick something sturdy enough to handle daily use. Think about the socks you wear most often, too. If you use compression socks, opt for a model specifically designed for them. Lastly, check the grip and handle to ensure it suits your strength and mobility.

sbb-itb-bbf8bc0

How to Use Sock Aids

Basic Usage Steps

To get started, make sure you’re seated securely. Choose a firm, supportive chair and set aside any crutches. Follow these steps:

  • Sit on a sturdy surface.
  • Hold the sock aid handles firmly.
  • Stretch the sock evenly over the aid.
  • Lower the sock aid carefully to the floor.
  • Slide your foot into the sock.
  • Pull the handles to smoothly guide the sock onto your foot.

Keep in mind that sock material matters – adjust your technique slightly for different fabrics. For extra help, check out resources like instructional videos or guides from World Crutches.

Different Sock Types

The type of sock you’re using can affect how you use the aid. Standard crew socks generally work well, but ankle or compression socks might need more attention to avoid bunching or twisting. If you often use different sock styles, consider a sock aid designed to handle a variety of fabrics and lengths.

Fixing Common Problems

Running into issues? Here are some quick fixes:

  • Sock Bunching: Remove the sock and reposition it evenly on the aid.
  • Heel Misalignment: Check that the heel is properly aligned before beginning.
  • Handle or Cord Issues: Ensure handles and cords are untangled for smooth operation.
  • Stability Problems: Use a chair with armrests or explore other dressing tools for added support.

If these tips don’t solve the problem, it might be worth trying out other dressing aids to make the process easier.

Other Dressing Tools

Tools That Make Dressing Easier

A dressing stick can help you reach and adjust clothing without needing to bend over. Long-handled dressing sticks with hooks, button hooks for fastening, and elastic shoelaces are great for maintaining balance while dressing. A reacher or grabber tool is also useful for picking up dropped items or retrieving clothing from the floor, all while keeping your stability intact when using crutches.

Clothing That Simplifies Dressing

The right clothing can make getting dressed much easier when you’re using crutches. Look for these features:

Clothing Element Features Why It Helps
Closures Velcro, large zippers, magnetic buttons Easy to manage with one hand
Fit Loose, stretchy materials Less effort to put on and adjust
Fabric Wrinkle-resistant, low-maintenance materials Reduces care and upkeep

For undergarments, front closures are a smart choice – they eliminate awkward movements that could throw off your balance.

Tips for Dressing with Crutches

Keep your crutches within easy reach and sit on a sturdy chair with armrests for extra support. When putting on pants or other lower-body garments, start by inserting both legs while seated. Then, use the chair’s arms to help you stand and pull your clothing up completely. To make things even smoother, organize your closet and drawers so the clothing you use most often is easy to grab.

Summary

Why Use Sock Aids

Sock aids are a helpful solution for crutch users who find dressing a challenge. These tools let you put on socks without bending down or risking your balance. Here’s how they can make a difference:

Benefit How It Helps You
Reduced Fall Risk Avoids unsafe bending, keeping you stable
Independence Allows you to dress yourself without help
Energy Saving Cuts down on physical effort in daily routines
Works with Many Socks Handles different types, including compression socks

With these perks in mind, it’s easier to see how a sock aid can fit into your daily routine.

Getting Started

Pick a sock aid that suits your mobility needs and works well with the types of socks you wear, especially if you use compression stockings. Look for features like extended handles if one-handed use is important to you.

For detailed reviews and recommendations, check out World Crutches (https://worldcrutches.com). Start by practicing while seated, and if needed, consult an occupational therapist for tips on the best techniques.

Pairing a sock aid with other dressing tools can make life on crutches much more manageable. Begin with a simple model, and upgrade as you get more comfortable using it.

Related Blog Posts

How to Track Recovery Progress with Crutches

Tracking your recovery with crutches is essential to monitor progress, identify issues, and stay motivated. Here’s how you can effectively measure your healing journey:

  • Set Milestones: Track phases like basic mobility, daily activities, and independence.
  • Use Tools: Choose between mobile apps, journals, spreadsheets, or voice notes to log progress.
  • Measure Key Metrics: Record weight-bearing capacity, walking distance, range of motion, pain levels, and daily tasks.
  • Track Crutch Usage: Monitor how often and how long you rely on crutches, aiming for gradual reduction.
  • Stay Organized: Use daily logs, weekly assessments, and monthly reviews to keep data structured.
  • Collaborate with Healthcare Teams: Share your progress to adjust recovery plans and set realistic goals.

Quick Tip: Celebrate milestones like walking unassisted or completing daily tasks independently to stay motivated. For more guidance, visit World Crutches.

Walking After Injury – Non Weight Bearing to Full Weight Bearing

Creating a Progress Tracking Plan

Having a solid system to monitor your recovery while using crutches can help you stay on track and communicate effectively with your healthcare team.

Tracking Tools and Methods

Pick a tracking method that works best for your lifestyle. Digital tools are convenient, while physical journals provide a tangible way to document your progress.

Tracking Method Benefits Best For
Mobile Health Apps Offers real-time updates, visual data, reminders Tech-savvy individuals who like digital tools
Physical Journal No batteries required, easy to bring to appointments People who prefer writing things down
Digital Spreadsheet Customizable, good for data analysis, easy to share Those comfortable with spreadsheet software
Voice Notes Hands-free, quick daily updates Individuals with limited hand mobility

Once you’ve chosen your tool, focus on identifying what aspects of your recovery you want to monitor.

What to Measure

Track recovery indicators that provide clear insights into your healing progress:

Physical Metrics:

  • How much weight you can bear (in pounds or percentage)
  • Distance walked each day
  • Time spent standing
  • Improvements in range of motion
  • Pain levels (rated on a scale from 1 to 10)

Functional Progress:

  • Number of stairs climbed
  • Daily time spent using crutches
  • Level of assistance needed for tasks
  • Confidence in maintaining balance
  • Quality of sleep

After deciding what to measure, create a routine for recording these details regularly.

Recording Schedule

Set up a schedule that collects useful data without feeling overwhelming:

Daily Tracking:

  • Pain levels in the morning and evening
  • Timing and effectiveness of medication
  • Any challenges or improvements noticed
  • Duration of activities involving crutches

Weekly Assessments:

  • Progress in weight-bearing ability
  • Range of motion updates
  • General mobility improvements
  • Achievement of weekly goals
  • Independence with daily tasks

Monthly Review:

  • Photos to track physical changes
  • Detailed mobility evaluations
  • Review of long-term goals
  • Notes from medical appointments
  • Adjustments to your treatment plan

Tracking Physical Progress

Keeping tabs on your physical recovery while using crutches involves monitoring a few key areas. According to World Crutches, three main factors to track are: weight-bearing capacity, mobility, and pain management. These metrics provide a clear picture of how you’re progressing.

Weight-Bearing Progress

A simple way to track this is by using a bathroom scale to compare how much weight you’re placing on your injured versus uninjured foot. You can also perform balance tests as recommended by your healthcare provider. Always stick to the guidelines given by your medical team about how much weight you should bear and when.

Movement Improvements

To measure progress in mobility, focus on these areas:

  • Walking Distance: Use a pedometer to track how far you’re walking.
  • Range of Motion: A goniometer can help measure changes in joint flexibility, such as ankle or knee movement.
  • Balance Control: Time how long you can stand on one leg and note your ability to transfer between positions, like moving from a bed to a chair. Improved balance often means you’re relying less on crutches.

Combining these mobility metrics with pain levels gives a clearer picture of your overall recovery.

Pain and Medicine Tracking

Monitoring pain and medication use is just as important. Here’s how:

  • Daily Pain Log: Rate your pain levels on a scale of 1–10 in the morning and evening. Note any spikes related to specific activities.
  • Medication Tracking: Keep a record of the dosage, timing, and effectiveness of your medications.

Using a digital diary or an app to log this information can help you identify patterns and share updates with your healthcare provider more easily.

sbb-itb-bbf8bc0

Daily Task Progress

Keeping track of how well you manage daily activities is a great way to measure your recovery. By logging specific tasks and your level of independence, you can see how your mobility is improving over time.

Daily Activities Log

Use a log to track your daily activities and assess your independence. Focus on areas like:

  • Personal Care: Note activities like bathing, grooming, and dressing.
  • Household Tasks: Record progress in tasks such as cooking, cleaning, and doing laundry.
  • Movement: Monitor how you handle stairs, doorways, and different surfaces.

For each task, include details like:

  • The level of assistance needed
  • How long it took to complete
  • Pain level on a scale of 1 to 10
  • Any tools or modifications used

Additionally, keep an eye on how your reliance on crutches changes as your recovery progresses.

Crutch Usage Reduction

As your strength and balance improve, track how often you can reduce your use of crutches. Record details such as:

  • Duration: How long you can go without crutches during specific activities or exercises.
  • Distance: The number of steps or the time spent walking with less support.
  • Support Type: Document transitions like:
    • Using two crutches → Switching to one crutch
    • Using one crutch → Moving to a walking stick
    • Walking stick → Walking unassisted

Make daily notes of activities where you’ve reduced your dependence on crutches to see your progress clearly.

Progress Achievements

Celebrate milestones to stay motivated and recognize your success. Examples of milestones include:

Achievement Level Examples of Milestones
Basic Progress Dressing yourself, Preparing simple meals
Intermediate Climbing stairs with one crutch, Standing for over 15 minutes
Advanced Walking short distances without help, Resuming light household tasks

Tracking these achievements not only shows how far you’ve come but also helps you stay focused on your recovery goals.

Working with Medical Teams

Keep your healthcare team in the loop by sharing your progress data. This helps them make informed decisions about your treatment and ensures your consultations are more productive.

Medical Progress Reports

Bring well-organized data to your medical appointments to give a clear picture of your progress:

Progress Category Key Data Points to Share
Physical Status Weight-bearing levels, pain scores (1-10), range of motion
Daily Activities Changes in independence levels, task completion times
Medication Dosage patterns, effectiveness, any side effects
Crutch Usage Duration of use, changes in support levels

Recovery Plan Updates

Sharing your data helps streamline updates to your recovery plan. During your appointments:

  • Discuss trends in mobility and weight-bearing progress.
  • Point out areas where progress has slowed or stalled.
  • Request specific adjustments to your exercises.
  • Highlight any pain spikes or new mobility challenges.

Take notes during these discussions so you can update your recovery tracking plan afterward.

Next Recovery Steps

Collaborate with your medical team to set clear, realistic goals:

  1. Set Weekly Goals: Focus on manageable targets, like increasing weight-bearing time or using crutches less.
  2. Define Milestones: Establish benchmarks for transitioning off support or resuming specific activities.
  3. Adjust Timelines: Use your tracked data to refine your recovery schedule as needed.

Conclusion

Let’s wrap up with a quick overview of how to monitor your recovery progress effectively.

Key Areas to Track

Keeping tabs on your progress while using crutches is crucial for healing. Here’s a breakdown of what to focus on:

Area How to Track Why It Matters
Physical Progress Use weight-bearing logs and pain scales Helps identify improvement trends
Activity Level Note task completion and independence Reflects functional recovery
Medical Data Keep records of medications and exercises Assists with treatment adjustments

Staying Motivated

Tracking isn’t just practical – it keeps you motivated. Celebrate milestones, like walking longer distances or completing tasks with less help. Seeing your progress visually, like in a journal or app, can boost your confidence and help you adjust your recovery plan as needed.

Where to Get Extra Support

If you’re looking for more guidance, check out World Crutches. They offer helpful resources on:

  • Different types of crutches and how to use them
  • Recovery tips tailored to specific conditions
  • Advice on staying comfortable
  • Adapting daily activities while using crutches

Head over to World Crutches for expert tips to support your recovery.

Related Blog Posts

Ultimate Guide to Low-Impact Cardio on Crutches

Staying active on crutches is possible – and beneficial. Whether you’re recovering from an injury, surgery, or managing long-term mobility challenges, low-impact cardio can help maintain your fitness and mental well-being. Here’s what you need to know:

  • Why it matters: Low-impact cardio supports heart health, builds endurance, and aids recovery without overstraining your body.
  • Who it’s for: Anyone using crutches – whether short-term or long-term – looking for safe exercise options.
  • Key exercises: Focus on upper body workouts (like arm cycling or resistance band exercises), core strengthening, and water-based activities for a full-body approach.
  • Safety first: Get medical clearance, use crutches properly, and watch for warning signs like sharp pain or dizziness.

This guide covers practical tips, exercises, and recovery advice to help you stay fit while healing.

Chair Cardio And Strength Workout: Non Weight Bearing Seated Exercise Class

Safety Guidelines

Before diving into a cardio routine with crutches, taking the right precautions can help you avoid injuries and support your recovery. Here’s what you need to keep in mind.

Getting Medical Approval

Start by consulting your doctor or physical therapist. They can evaluate your condition, outline limitations, provide tailored exercise suggestions, and point out any warning signs to watch for.

Using Crutches Properly

Once you’ve got the green light, focus on using your crutches the right way. Adjust them for secure support: the tips should be positioned correctly, handgrips should align with your hips, and the padding should rest comfortably under your arms. Keep your shoulders back, your head up, and let your hands – not your armpits – bear your weight. Move the crutches and your injured leg together in small, controlled steps.

Need more help? World Crutches offers detailed guides on choosing and using crutches effectively.

Avoiding Exercise Risks

Pay close attention to any warning signs. Stop immediately if you feel sharp pain, worsening discomfort, dizziness, sudden fatigue, numbness in your hands or arms, or if you lose balance.

To make your workout safer:

  • Choose a clear, well-lit space
  • Remove obstacles from your workout area
  • Take breaks to prevent overexertion
  • Stay hydrated during your session

These steps can help you exercise safely while on crutches.

Best Cardio Exercises with Crutches

Now that you’re familiar with the safety guidelines, let’s look at cardio exercises you can do while using crutches. These workouts will help you stay fit without interfering with your recovery.

Upper Body Workouts

With crutches, focusing on upper-body exercises is a great way to improve cardiovascular health. An arm ergometer (arm bike) is a solid low-impact option. Start with 5–10 minutes and increase the duration as your stamina improves.

For resistance-based cardio, try these exercises:

  • Seated Band Rows: Anchor resistance bands at chest height and perform pulling motions. This works your back muscles and gets your heart rate up.
  • Modified Chest Press: Secure resistance bands behind you and press forward while seated to target your chest and shoulders.
  • Overhead Press: Use light weights or bands to perform controlled overhead presses, strengthening your shoulders.

Keep your posture in check and movements controlled to avoid unnecessary strain. You can also work on your core and the uninjured leg with seated or lying exercises.

Core and Leg Exercises

Even with limited mobility, you can engage your core and keep your uninjured leg strong. Do these exercises seated or lying down:

  • Modified Planks: Use a sturdy chair or bench for upper-body support.
  • Seated Core Rotations: Perform slow, controlled movements to work your core.
  • Single-Leg Extensions: Focus on the unaffected leg to maintain strength.

For a change of pace and less stress on your body, consider pool exercises.

Pool Exercises

Water-based workouts are an excellent way to get cardio while minimizing stress on your injury.

Key Pool Safety Tips:

  • Use pool crutches or water-safe mobility aids.
  • Have someone with you for safety.
  • Stick to shallow water where you can stand.
  • Avoid slippery pool edges.

Here are some effective water exercises:

1. Vertical Water Walking

Walk in chest-deep water, maintaining good posture as you move. The water’s resistance gives you a cardio boost while supporting your body weight.

2. Pool Edge Exercises

Hold onto the pool edge for stability and perform flutter kicks with your uninjured leg. This helps maintain endurance without putting pressure on your injury.

3. Upper Body Water Resistance

Use water weights or push against the water to work your upper body and increase your heart rate.

Always check with your healthcare provider before trying pool exercises, as not all injuries or recovery stages are suited for water activities.

sbb-itb-bbf8bc0

Creating Your Exercise Plan

Design a workout routine that fits your fitness level and recovery needs. Here’s a breakdown of plans tailored to different levels of experience.

Workout Plans by Level

  • Beginner Stage:
    Start with shorter sessions that focus on upper body exercises while maintaining proper form. Seated movements like band rows or chest presses can help build endurance. If cleared for pool activities, try gentle water-based exercises. Aim for consistency at this stage.
  • Intermediate Stage:
    Extend your workout duration and add variety. Circuit routines with short intervals and light resistance can be included to challenge your upper body. If you’re using pool exercises, gradually increase the time spent based on your recovery progress.
  • Advanced Stage:
    Push yourself with longer sessions, diverse routines, and added resistance. Any increase in intensity should be done carefully and under professional supervision to ensure safety.

Making Exercise a Habit

  • Track Progress and Set Goals:
    Use a fitness journal or app to log your workouts, track how long you exercise, and note any discomfort. Set realistic milestones based on where you are in your fitness journey.
  • Schedule Your Workouts:
    Treat your exercise time as a non-negotiable appointment. Pick consistent times that align with your daily routine, and make sure to leave enough recovery time between sessions.
  • Listen to Your Body:
    Watch for signs like increased fatigue, unusual pain, or discomfort. If these occur, dial back the intensity or add extra rest days. Adjust your plan as needed to support your recovery.

Managing Recovery

Pre and Post Exercise Care

Recovery plays a key role in your fitness routine, just like the cardio exercises mentioned earlier. Start your session with a 5–10 minute warm-up, including shoulder rolls, arm circles, and light stretches. These movements help loosen up your muscles and joints, lowering the chance of strain. After your workout, spend another 5–10 minutes cooling down, followed by stretches targeting your upper back, shoulders, forearms, wrists, and core to help release muscle tension and reduce soreness.

Recognizing When to Rest

Pay attention to your body’s signals. Persistent pain, ongoing fatigue, or discomfort during or after exercise might indicate overexertion. If these symptoms don’t improve with regular recovery, consider dialing back the intensity of your workouts and taking extra rest days. For discomfort that lingers or worsens, it’s best to consult a healthcare professional.

Next Steps and Resources

Main Points Review

Start with low-impact cardio exercises while using crutches, paying close attention to safety and proper technique. Prioritize correct crutch positioning and gradually increase your workout intensity over time.

Key steps to follow:

  • Get medical clearance: Always consult your healthcare provider before starting any exercise routine.
  • Monitor your pace: Stick to a level where you can comfortably hold a conversation.
  • Focus on posture: Keep your body stable and maintain proper alignment during all exercises.

Looking for more guidance? Check out the resources below.

Where to Find Help

World Crutches (worldcrutches.com) offers a range of expert advice tailored for crutch users, including:

  • Tips for choosing the right crutches for exercise
  • Ways to avoid discomfort in your hands and armpits
  • Modifications to adapt exercises for specific injuries
  • Strategies for recovery and rehabilitation

Their guides cover everything from pool-based workouts to upper body exercises. The recovery section is particularly helpful, addressing practical topics like managing swelling and maintaining proper nutrition during your healing process.

For more personalized support, consider working with a physical therapist. They can create a customized exercise plan based on your specific needs and recovery goals. Plus, they’ll provide hands-on guidance to ensure you’re using the right form and gradually advancing your routine while on crutches.

Related Blog Posts

Ultimate Guide to Fall Prevention for Crutch Users

Using crutches can be challenging, but preventing falls is essential for your recovery and independence. Here’s a quick summary of what you’ll learn in this guide to stay safe:

  • Proper Crutch Fit: Adjust crutches for a 1–2 inch gap below your armpits and slightly bent elbows for better posture and balance.
  • Home Safety: Remove trip hazards, secure rugs, improve lighting, and install grab bars to create a safer environment.
  • Outdoor Tips: Learn to navigate stairs, ramps, uneven surfaces, and bad weather with confidence.
  • Strength & Balance Training: Build upper body strength and practice balance exercises to improve stability.
  • Safety Equipment: Use crutch add-ons, bathroom aids, and emergency alert systems for added security.

Start by ensuring your crutches fit correctly, then focus on creating a safe space and strengthening your body for better mobility. These steps can help reduce your risk of falls significantly.

How to Walk with Crutches – Non-Weight Bearing!

Getting the Right Crutch Fit

Ensuring your crutches fit correctly is crucial for safe and comfortable mobility. Properly adjusted crutches help prevent falls, maintain good posture, and lower the risk of additional injuries.

Adjusting Your Crutches

The first step to using crutches safely is making sure they’re adjusted to fit you. When you’re standing upright, there should be a 1–2 inch gap between your armpit and the top pad of the crutch. This small gap helps avoid nerve compression. For the handgrips:

  • Stand straight with your arms relaxed.
  • Adjust the handgrips so your elbows are slightly bent and your wrists naturally align with the grips.

Basic Walking Steps

To walk with crutches, practice in a safe, controlled area until you feel confident:

  • Place your weight on your hands, not your armpits, to avoid discomfort or injury.
  • Swing your body forward between the crutches, keeping your injured leg off the ground.
  • Make sure the crutches stay steady and provide support during each step.

Once you’ve mastered these basics, it’s important to correct any common mistakes to stay safe.

Fixing Common Errors

Common Error Safety Risk Correction
Resting weight on armpits Nerve damage and poor balance Shift weight to your hands
Hunched posture Back strain and instability Keep your shoulders level
Worn crutch tips Reduced traction Replace the tips when they wear down

Making Your Home Safer

Once you’re comfortable using your crutches, it’s time to focus on making your home a safer place. A hazard-free environment is just as important as having crutches that fit properly.

Clearing Trip Hazards

Take a good look around your home and make sure pathways are clear and at least 36 inches wide. Here are some steps to help:

  • Secure or remove loose rugs: Use tape to prevent slipping or take them out completely. Make sure carpet edges are secure.
  • Keep cords out of walkways: Run them along walls, away from areas you’ll walk through.
  • Rearrange furniture and decor: Move anything that blocks or narrows your walking paths.
  • Organize pet supplies: Keep food bowls, toys, and other items in specific areas, away from your routes.

Once the space is clear, consider adding safety tools to make moving around easier.

Installing Safety Equipment

Place supportive equipment in key areas where you need extra stability. Here’s a quick guide:

Location Equipment Installation Height
Bathroom Grab bars near toilet/shower 33-36 inches from the floor
Hallways Wall-mounted handrails 34-38 inches from the floor
Stairs Dual handrails 34-38 inches from the floor
Shower/Tub Non-slip mat with suction cups At floor level

These additions can make a big difference in preventing falls and giving you peace of mind.

Improving Home Lighting

Good lighting can help you spot and avoid potential hazards. Here’s how to brighten things up:

  • Add motion-sensor lights: Ideal for hallways and stairs.
  • Use nightlights: Place them in bathrooms and along nighttime paths.
  • Light up stairs: Make sure every step is well-lit.
  • Install under-cabinet lighting: Great for kitchens.
  • Switch to bright LED bulbs: Use ones with at least 800 lumens for better visibility.

For added convenience, install light switches at both ends of hallways and stairs. Keep a flashlight by your bed in case of emergencies. These small changes can make navigating your home much safer.

sbb-itb-bbf8bc0

Outdoor Safety Tips

Navigating the outdoors on crutches requires specific approaches for different surfaces and conditions.

Using Stairs and Ramps

Stairs and ramps can be tricky, but using the right technique makes them safer:

  • Stairs (Going Up): Face the stairs, place one crutch on the current step, move your good leg to the next step, and then bring the crutch up.
  • Stairs (Going Down): Place a crutch on the step below, then carefully lower your good leg.
  • Ramps: Take small, steady steps and use handrails whenever possible for added stability.

Once you’re comfortable with stairs and ramps, use the same steady control when tackling uneven surfaces.

Walking on Uneven Ground

On rough terrain, focus on balance and make slow, deliberate movements to stay steady.

Staying Safe in Bad Weather

Rain, snow, and ice can make things more challenging. Be extra cautious, plan your route in advance, and avoid heading out if conditions are too dangerous.

Strength and Balance Training

Once you’ve set up your environment, it’s time to focus on improving your stability with targeted strength and balance exercises.

Upper Body Strength

Building strength in your arms, shoulders, and core is key to using crutches safely and effectively.

Seated Exercises

  • Push up slightly from armrests using your hands (3 sets of 5 reps).
  • Roll your shoulders forward 10 times, then backward 10 times.
  • Sit upright and twist your torso side to side, keeping your hips steady.

Standing Exercises (with support)

  • Do wall push-ups while standing about 2 feet away from the wall.
  • Use light weights (2-3 lbs to start) for shoulder presses, lifting your arms overhead.
  • Practice core bracing by standing tall, engaging your core muscles, and holding for 30 seconds.

A strong upper body helps improve balance and makes crutch use easier.

Balance Exercises

Practicing balance consistently can make a big difference:

  • Static Balance: Try standing on one point of contact (with support), shifting weight between crutches, or doing heel raises while standing.
  • Dynamic Balance: Practice small, controlled movements with your crutches, slow turning exercises, and reaching forward in a controlled manner.

Always have a spotter or stay close to a sturdy surface while practicing balance. Using proper crutch techniques during these exercises adds to your stability.

Daily Stretching Routine

Stretching regularly keeps your muscles flexible and helps ease tension caused by crutch use:

Body Area Stretch Hold Time How Often
Shoulders Overhead reach 15-20 seconds 3x daily
Upper Back Seated twist 20-30 seconds 2x daily
Forearms Wrist flexor stretch 15 seconds 4x daily
Core Standing side bend 20 seconds 2x daily

Safety Tips

  • Start slowly and increase intensity gradually.
  • Stop immediately if you feel pain.
  • Breathe steadily during all exercises.
  • Keep your crutches within arm’s reach during seated exercises.
  • Use non-slip surfaces to avoid accidents.
  • Consult a physical therapist for personalized advice if needed.

Safety Equipment Guide

Once you’ve optimized your mobility and home setup, it’s time to focus on safety devices designed specifically for crutch users. These tools can help reduce fall risks and improve your overall mobility experience.

Crutch Add-ons

Adding accessories to your crutches can improve both stability and comfort:

  • Grip Enhancers: Options like ergonomic handle covers, textured rubber grips, or adjustable hand straps can make crutches easier to use.
  • Crutch Tips: All-terrain rubber tips or wide-base tips provide better traction and stability.
  • Comfort Accessories: Underarm padding and forearm cushions can reduce discomfort during extended use.

Bathroom Safety Tools

Bathrooms can be tricky for crutch users, but the right tools can make a big difference:

Equipment Type Purpose Installation Requirements
Grab Bars Offers support during transfers Securely mounted to wall studs
Shower Chair Ensures safe, seated bathing Non-slip rubber feet
Raised Toilet Seat Eases sitting and standing Attaches securely to toilet bowl
Non-slip Mats Adds traction on wet surfaces Place on clean, dry floors

For the best results, install grab bars near the toilet and in the shower, both horizontally and vertically, at a height of 33–36 inches from the ground.

Emergency Alert Options

Emergency alert systems can provide peace of mind and quick access to help:

  • Wearable Devices: Waterproof pendants, smartwatches, or medical alert bracelets with GPS functionality.
  • Home-Based Systems: Voice-activated emergency call systems, wall-mounted buttons, or smart home integrations for emergencies.

If you’re looking for more advice on safety tools, World Crutches offers detailed reviews and tips in their resource section.

Summary

Safety Steps Review

Here’s a quick look at the key steps to prevent falls when using crutches:

Area Key Safety Actions Implementation Tips
Crutch Setup Adjust height properly and ensure secure tips Follow the adjustment instructions provided earlier
Home Safety Eliminate hazards and add grab bars Use the safety tips shared in the home section
Outdoor Mobility Use wide-base tips and avoid slippery areas Stick to the outdoor navigation advice discussed earlier
Physical Prep Focus on upper body exercises and balance Practice the exercises outlined in the training section
Emergency Plan Set up an alert system and emergency contacts Keep communication devices accessible as explained above

Make it a habit to inspect your crutches regularly, especially the rubber tips, and replace any worn parts as soon as possible.

More Help at World Crutches

Looking for more support? World Crutches offers expert reviews, step-by-step tutorials, and practical checklists to boost your crutch safety. Check out their interactive guide for advice tailored to your needs: World Crutches.

Related Blog Posts

Best Bedroom Modifications for Crutch Users

Navigating a bedroom with crutches can be challenging, but making a few simple changes can improve safety and comfort. Here’s a quick summary of the best modifications:

  • Height-Adjustable Beds: Easier transfers with adjustable bed frames or risers.
  • Grab Bars: Wall-mounted or bed-mounted for safer movement.
  • Anti-Slip Flooring: Non-slip mats, rug pads, or grip strips to prevent falls.
  • Under-Bed Storage: Use clear, shallow containers and a reacher tool for easy access.
  • Motion-Activated Lighting: Night lights for safer nighttime navigation.
  • Clear Furniture Paths: Rearrange furniture to create open, obstacle-free routes.
  • Wall Storage: Install shelves at reachable heights for easy access to essentials.

These adjustments can make your bedroom more functional and safer for crutch use. Start by clearing pathways and adding grab bars, then work on lighting, storage, and bed height for a comprehensive solution.

Tips for Improving Bedroom Safety: Optimize Bed Height

1. Height-Adjustable Bed Frames

Height-adjustable bed frames make it easier and safer for crutch users to get in and out of bed. By changing the bed’s height, you can reduce strain and make transfers more comfortable.

In the U.S., you’ll find both electric and manual models to suit different needs. If you’re looking for a budget-friendly option, adjustable bed risers can modify the height of your current bed. When choosing, focus on how easy it is to adjust and how stable the frame feels.

2. Secure Bedside Grab Bars

Adding grab bars near the bed can make getting in and out safer and easier. Here are two common types:

  • Wall-mounted: Installed on a solid wall to provide steady support.
  • Bed-mounted: Connected directly to the bed frame, perfect if wall installation isn’t an option.

Place grab bars where they’re easy to reach and won’t get in the way. For renters, tension-mounted grab bars are a great temporary solution.

These bars work well alongside other safety features to create a more secure bedroom setup.

3. Anti-Slip Floor Protection

Slippery floors can be a hazard, especially for crutch users. Adding non-slip surfaces can help prevent falls, particularly during early mornings or late nights when visibility and balance might be compromised.

Focus on areas like beside the bed, near doorways, along main walking paths, and in front of dressers or closets. These are high-traffic spots where extra caution is needed.

To secure rugs and mats effectively, you can:

  • Use heavy-duty carpet tape to keep them in place
  • Add non-slip rug pads for extra grip
  • Apply adhesive grip strips for a more permanent solution

These simple steps can make a big difference in creating a safer environment.

sbb-itb-bbf8bc0

4. Easy-Access Under-Bed Storage

Making smart use of under-bed storage can help keep your bedroom organized while reducing unnecessary bending and stretching.

Here are some tips to make under-bed storage more user-friendly:

  • Raise the Bed: Use sturdy bed risers to create enough space for storage containers underneath.
  • Pick the Right Containers: Opt for shallow, clear containers with smooth sliders to easily see and access your belongings.
  • Organize by Frequency: Arrange items based on how often you use them – daily items in the front, weekly in the middle, and seasonal or rarely used items in the back.
  • Use a Reacher Tool: A long-handled reacher can make retrieving items effortless and safe.
  • Position Smartly: Place containers perpendicular to the bed so you can access them easily while seated.

These simple adjustments can help you maximize storage while keeping everything within easy reach.

5. Automatic Night Lighting

Motion-activated night lighting makes nighttime navigation safer by removing the need to fumble for switches and reducing the risk of falls.

Where to Place Them

  • Beside the bed at waist height
  • Along the route to the bathroom
  • Near doorways and corners
  • Under cabinets for soft, guiding light

How to Set Them Up

  • Use adhesive, battery-powered LED strips for easy installation.
  • Adjust brightness to 30-50% for nighttime use.
  • Opt for warm white bulbs (2700K-3000K) for a soothing glow.
  • Position sensors 24–36 inches above the floor for better motion detection.
  • Fine-tune sensitivity to avoid accidental activations.
  • Set auto-shutoff to 1-3 minutes to conserve energy.
  • Look for gradual dimming features for a gentler transition.
  • Choose lights with battery life indicators to avoid surprises.

Pairing lighting with visual cues can further improve nighttime safety.

Add Visual Markers: Use reflective stickers or tape on furniture edges and doorframes. These subtle markers help you stay oriented, even when the lighting is dim.

Quick Tip: Keep a battery-operated light within arm’s reach for emergencies. Mount it to your headboard or place it on your nightstand for easy access.

6. Clear Paths Between Furniture

Creating open pathways in your bedroom not only enhances safety but also makes moving around with crutches easier. Keeping the space free of obstacles is key to reducing the risk of falls.

Here are some tips to keep in mind:

  • Make sure main routes like bed-to-bathroom, bed-to-closet, and bed-to-door are clear.
  • Place larger furniture, like dressers or armoires, against walls to free up more space.
  • Leave extra room in areas where you’ll need to turn.
  • Ensure there’s enough clearance around the bed for easy movement.
  • Keep doorways free from any clutter or obstructions.

To improve accessibility even further, consider these adjustments:

  • Swap floor-standing furniture for wall-mounted options to free up floor space.
  • Install floating shelves at a height you can easily reach.
  • Use over-door organizers to reduce floor clutter.
  • Opt for platform beds with fewer obstructions underneath.
  • Choose dressers with rounded corners to avoid sharp edges.
  • Go for slim-profile nightstands to save space.
  • Pick furniture that offers built-in storage to cut down on extra items.

Once your layout is set, test it out. Walk through the space with your crutches during daylight to spot any problem areas where movement feels restricted or crutches might snag. A well-thought-out layout not only improves safety but also works seamlessly with other modifications you’ve made.

7. Reachable Wall Storage

Accessible wall storage can make a big difference in creating a functional and user-friendly bedroom for crutch users. By keeping everyday items within arm’s reach, you can avoid unnecessary stretching or strain. Skip high shelves and opt for storage installed at a comfortable height. Adjustable shelving is a smart choice to accommodate changing needs over time.

Consider using clear containers or adding labels to make identifying items quick and simple. Ensure the storage is securely mounted in open areas without obstructions. Regular decluttering is also key to maintaining a safe and organized space.

Conclusion

Making bedrooms safer and easier to navigate for crutch users can greatly improve both safety and independence. By tackling the challenges discussed earlier, these changes can transform a bedroom into a more functional and secure space.

Simple additions like height-adjustable beds and grab bars make transfers safer, while anti-slip flooring helps prevent falls. Automatic lighting and clutter-free pathways improve mobility at night. Accessible storage ensures daily essentials are within reach, minimizing unnecessary movement and improving efficiency.

Even small changes, like rearranging furniture or clearing pathways, can have a big impact on safety. Affordable solutions like anti-slip materials and motion-sensor night lights offer quick and effective results without breaking the bank.

Here’s a suggested priority for implementing these changes:

  1. Clear pathways and rearrange furniture for better flow
  2. Add grab bars and anti-slip flooring
  3. Adjust bed height or consider an adjustable bed frame
  4. Install motion-activated lighting
  5. Incorporate storage solutions that are easy to reach

Keep in mind, these modifications should be tailored to fit each person’s unique needs and abilities. Regularly reviewing and updating these adjustments ensures they remain useful as circumstances change.

Related Blog Posts

5 Tips for Using Crutches in Winter

Navigating winter on crutches can be tricky, but with the right preparation, you can stay safe and mobile. Here’s a quick summary of how to tackle icy conditions:

  • Upgrade Your Crutches: Use winter-friendly crutch tips designed for better grip on ice and snow.
  • Wear the Right Shoes: Choose waterproof boots with deep treads for improved traction.
  • Dress Smart: Layer clothing for warmth and mobility, and pick gloves with good grip for handling crutches.
  • Plan Your Route: Stick to cleared paths and avoid icy areas whenever possible.
  • Maintain Your Crutches: Adjust for winter clothing, inspect tips daily, and keep them clean and dry.

60 Sec Recovery Tip: Snow and Ice Safety for Crutch Users

1. Add Winter Grips to Your Crutches

Winter weather can make using crutches tricky, especially on icy or snowy surfaces. To stay steady and reduce the risk of slipping, consider upgrading your crutch tips for the season.

Choose Ice-Friendly Crutch Tips

Look for crutch tips designed for icy conditions. Features like deep grooves, rubber that stays flexible in cold weather, and a wider base can provide better traction. Resources like World Crutches offer helpful reviews and guidance to find the best options.

How to Install and Maintain Winter Grips

Here’s a simple guide to upgrading and caring for your winter crutch tips:

  • Remove Old Tips: Use warm water to loosen the existing tips, then clean and dry the crutch ends thoroughly.
  • Attach New Tips: Push and twist the new tips onto the crutch ends until they fit securely, with no gaps between the tip and the shaft.
  • Inspect and Maintain Daily: Check for wear or built-up snow and ice before each use. Test the grip on a safe surface, and replace tips as needed. It’s a good idea to keep an extra pair handy, just in case.

With the right tips and regular upkeep, you’ll be better prepared to navigate winter conditions safely.

2. Pick the Right Winter Shoes

Wearing the right shoes is key to staying safe on crutches during winter. The footwear you choose plays a big role in keeping you steady on snowy or icy surfaces.

Choose Boots Built for Grip and Weather

When picking winter boots to use with crutches, pay attention to these key features:

  • Deep-tread soles: Opt for boots with strong tread patterns to improve traction on slippery surfaces.
  • Waterproof materials: Select boots made from waterproof or water-resistant materials to keep your feet dry and reduce the risk of slipping.
sbb-itb-bbf8bc0

3. Dress for Cold Weather Movement

When using crutches in winter, it’s crucial to dress in a way that keeps you warm without hindering your mobility.

Smart Layering Tips

The key to staying comfortable is layering your clothing effectively. Start with a moisture-wicking base layer to keep sweat away from your skin. Add a fleece or wool mid-layer for insulation, ensuring it doesn’t interfere with crutch movement.

Here’s how to layer:

  • Choose a snug, moisture-wicking base layer.
  • Add a slim, insulating mid-layer that allows easy crutch use.

Finally, make sure your outerwear and accessories, like gloves, work well with your layers to avoid restricting movement.

Selecting the Right Outerwear

Your outer layers should protect you from the elements while allowing free movement. Look for:

  • Hip-length jackets to avoid snagging on crutches.
  • Adjustable cuffs to keep sleeves in place.
  • Lightweight, water-resistant materials to stay dry without adding bulk.

Winter Gloves for Crutch Use

Choosing the right gloves can make a big difference when handling crutches in cold weather. Go for thin, insulated gloves with a textured surface for better grip.

Feature Purpose Example
Textured Palm Improves grip on crutch handles Silicone or rubber grip patterns
Fitted Design Maintains dexterity while enhancing grip Stretchable, form-fitting materials
Quick-dry Fabric Keeps hands dry for better control Synthetic moisture-wicking material

4. Map Safe Winter Routes

Planning your route is just as important as having the right gear when it comes to staying safe during winter travel. Choosing the right path can help you avoid unnecessary risks, like slipping on ice.

Check Paths Before You Go

Before you head out, pick routes that are cleared and well-maintained. Stick to walkways and building entrances that are regularly cared for to reduce the chance of falls. For longer trips, use a navigation app to check for maintained paths. If conditions suddenly change, be ready to adjust using the tips below.

Dealing with Icy or Snowy Paths

When you come across ice or snow, pause and assess the situation. Take small, steady steps while keeping your weight centered. If the path looks unsafe, find a safer alternative route.

5. Keep Crutches Winter-Ready

Once you’ve sorted your gear and planned your route, don’t forget to get your crutches ready for winter too.

Adjust for Winter Clothing

Bulky winter coats and layers can affect how your crutches fit. To stay comfortable and supported, you may need to tweak their height. Most crutches come with a push-button mechanism for easy adjustments. Try them on while wearing your winter gear to ensure the fit feels right before heading out.

Once you’ve got the fit sorted, it’s time to focus on protecting your crutches from the elements.

Protect Crutches from Snow and Ice

Winter conditions like snow, ice, and salt can take a toll on your crutches. Make it a habit to check them regularly, especially the rubber tips and metal joints. After exposure to moisture, wipe them down with a dry cloth to prevent damage, and make sure all adjustable parts are secure. Store your crutches in a dry, indoor space – avoid leaving them in cold garages or outside. Keeping an extra set of rubber tips handy is also a smart move for those tougher winter days.

Conclusion

Staying safe and mobile during winter requires thoughtful preparation and the right tools. Start by equipping your crutches with ice-friendly tips and pairing them with sturdy, weatherproof boots for better stability. Layer up with warm clothing and consider gloves designed to provide both warmth and grip.

Don’t forget to check your crutches regularly and adjust their height to accommodate bulkier winter clothing. A little planning goes a long way in avoiding slips and falls during icy conditions.

Related Blog Posts

Pre-Surgery Checklist: Preparing Your Home for Crutch Use

Preparing your home for crutch use can make recovery safer and easier. Before surgery, focus on creating clear pathways, making room-specific adjustments, and setting up essential equipment. Here’s how to get started:

  • Clear Pathways: Remove tripping hazards like rugs, secure cords, and ensure walkways are at least 36 inches wide.
  • Room Adjustments: Add grab bars in bathrooms, organize kitchen essentials at counter height, and set up a bedside "command center."
  • Safety Equipment: Install non-slip mats, use motion-sensor lighting, and test crutches on all flooring types.

Taking these steps can reduce fall risks by up to 30% and support a smoother recovery process. Let’s dive into the details!

Tips for Living with Crutches after Surgery

Making Safe Paths Through Your Home

Start by addressing the basics to ensure your home is safe and easy to navigate.

Remove Hazards and Clear Space

Take immediate steps to eliminate tripping risks:

  • Get rid of throw rugs or secure them with double-sided carpet tape.
  • Tape down or move electrical cords so they run along walls.
  • Fix loose carpeting through professional services.
  • Replace temporary door thresholds with ramps for smoother transitions.

Check Path Width and Secure Floors

Ensure pathways meet these key requirements:

  • Main walkways should be at least 36 inches wide, straight, and unobstructed.
  • Doorways should measure 32-36 inches wide; use offset hinges if needed in narrow spaces.
  • Use non-slip treatments on slippery floors.
  • Place non-slip mats with firmly secured edges near sinks and entryways.

Set Up Night Lighting

Once pathways are physically secure, focus on improving visibility:

Install motion-sensor lights in key areas like:

  • Staircases
  • Hallway intersections
  • Bathroom entrances
  • Bedroom doorways

For continuous low-level lighting, try plug-in motion-sensor night lights along baseboards. These are simple to install and don’t require altering walls.

"Patients who followed a comprehensive home preparation checklist had 47% fewer accidents during the first month of recovery compared to those who didn’t."

Room-by-Room Changes

Once the main pathways are secure, focus on making individual rooms safer and easier to navigate.

Bathroom Safety Setup

The bathroom is a high-risk area, with 80% of home falls happening here. To improve safety, install grab bars near the toilet and shower at a height of 33-36 inches. These bars should support at least 250 pounds.

Here are some tips to make showering safer:

  • Use a shower chair or transfer bench designed to handle weight safely.
  • Install a handheld showerhead for flexibility.
  • Place non-slip mats both inside and outside the shower.
  • Add suction-handle grips as temporary support if needed.

The CDC states these adjustments can lower fall risks by up to 50%. To keep essentials within reach, consider adding an over-the-toilet shelving unit.

Bedroom Setup

Set your bed height between 20-23 inches (measured from the floor to the mattress top) to make getting in and out easier, especially when using crutches.

Set up a "command center" next to your bed for convenience:

  • Use a sturdy bedside table to hold medications, water, and devices.
  • Install touch-activated lamps for better visibility at night.
  • Add charging stations for electronics.
  • Attach a bed rail to assist with transfers.

The American Occupational Therapy Association found that 78% of patients felt more independent after improving their bedroom setup.

Kitchen Setup

Arrange frequently used items on shelves at counter height (15-48 inches). According to the National Institute on Disability, this adjustment can boost independence in meal preparation by 60%.

For safer and more efficient cooking:

  • Use a rolling cart to move items without carrying them by hand.
  • Replace traditional faucet handles with lever-style ones for easier use.
  • Switch to electric appliances like can openers and kettles.
  • Stock your freezer with pre-made meals in microwave-safe containers.

"Proper kitchen modifications increased patient confidence in meal prep by 87% and reduced falls by 62% over six months (St. Joseph’s Healthcare Hamilton, 2023)."

Lastly, wear a backpack or fanny pack to carry items hands-free.

sbb-itb-bbf8bc0

Safety Checks for Crutch Use

Once you’ve adjusted your living space, it’s time to perform these final checks to ensure everything is ready:

Check Floor Safety

Test how your crutches handle different flooring types. Pay close attention to areas where floors change, as these can be tricky. Here’s what to do:

  • Test crutch tips on both dry and wet surfaces to ensure they grip well.
  • Inspect floor joints and thresholds to confirm they’re stable.
  • Make sure non-slip mats stay firmly in place and don’t slide around.

Also, check that all flooring is securely attached and free of cracks or damage that could snag your crutch tips.

Test Space for Crutch Movement

Using crutches comfortably requires enough room. Standard crutches need at least 28 inches of clearance to move through spaces easily. According to the Journal of Rehabilitation Research and Development, well-planned spaces can lower the risk of falls by up to 30% for those using mobility aids .

Evaluate the key areas in your home:

Area Type Minimum Requirements
Doorways 28-inch clearance
Turning Space 5-foot diameter circle
Reach Zone 15-48 inches from the floor

Practice moving through doorways and ensure you can reach essential controls without straining.

Set Up Emergency Contact Plan

The American Red Cross emphasizes the importance of multiple ways to call for help . Place accessible devices in key areas like living rooms, bedrooms, and bathrooms – use waterproof containers for bathroom devices.

Prepare an emergency contact card with vital information and arrange for daily check-ins. Keep a fully charged cell phone within easy reach at all times .

Required Tools and Equipment

Once room layouts are optimized, make sure to set up these key tools and equipment for added convenience and safety:

Support Bars and Rails

Install grab bars in bathrooms and showers to provide sturdy support. Place them at a height of 33-36 inches in bathrooms and about 6 inches above the tub rim in showers. For a reliable option, check out the Vive Grab Bar, which has earned a 4.6/5 star rating from over 9,000 users. It’s rust-resistant and durable, though professional installation is recommended . These bars enhance the safety measures already discussed for bathrooms.

Bathroom Safety Equipment

Handheld showerheads and raised toilet seats with armrests are must-haves for bathroom safety. A popular choice is the Drive Medical Bathroom Safety Shower Tub Bench Chair, which combines comfort with stability. With a 4.7/5 star rating from more than 37,000 reviews, it’s a trusted option for many households .

Easy-Access Storage

Make storage more accessible to avoid unnecessary bending, especially for those using crutches or other mobility aids. Here are some practical solutions:

  • Rolling carts to transport items easily between activity zones
  • Waist-level organizers for medications and daily essentials
  • Over-door storage pockets for frequently used items
  • Pull-out shelves in lower cabinets to reduce the need for bending

These adjustments can help create a safer and more convenient living environment.

Conclusion

Getting your home ready before surgery can make a big difference in your recovery. Studies show that proper preparation can lower the risk of falls by 30% and help you recover faster.

Once you’ve adjusted pathways, set up the necessary equipment, and made room modifications, it’s time to focus on the finishing touches. Here’s what to do:

  • Test your equipment thoroughly to ensure everything works as intended.
  • Double-check all installations to confirm they meet safety standards.
  • Clear all pathways to prevent any obstacles that could cause accidents.

You can also ask your hospital’s discharge team about scheduling an occupational therapy home assessment. Many senior centers and healthcare organizations offer additional resources to help you prepare.

Work closely with your surgical team and local support services to create a safe and supportive environment for your recovery.

FAQs

How do I prepare my house for after surgery?

Here are the key areas to focus on:

  1. Clearance: Ensure pathways are at least 36 inches wide for easy movement. (Check out the "Making Safe Paths" section.)
  2. Room Readiness: Add grab bars in the bathroom and adjust layouts in the kitchen and bedroom for convenience. (See "Room-by-Room Changes" for tips.)
  3. Emergency Access: Keep phones or alert devices within easy reach, and make sure your flooring is slip-resistant. (Details in "Safety Checks.")

Additional Tips:

  • Add motion-sensor nightlights in hallways and bathrooms for better visibility at night.
  • Remove any throw rugs and secure larger carpets with non-slip backing.
  • Always have a charged phone or medical alert device nearby.

For more in-depth advice, revisit the sections mentioned above.

Related Blog Posts

8 Ways to Make Crutches More Comfortable

Crutches can cause underarm soreness, wrist pain, and back strain if not used correctly. Nearly 50% of crutch users experience discomfort, and improper use leads to 41,000 emergency room visits annually. Here’s how to avoid pain and improve your recovery:

Quick Tips:

  1. Adjust Crutch Height: Leave a 2-3 finger gap under your armpits and maintain a 30° elbow bend.
  2. Add Padding: Use memory foam, gel pads, or sheepskin to reduce pressure points.
  3. Fix Handgrips: Align grips with your wrist crease and consider ergonomic replacements.
  4. Distribute Weight Properly: Avoid leaning on armpits; use hands and arms for support.
  5. Maintain Good Posture: Keep your back straight and walk with a steady rhythm.
  6. Wear Comfortable Clothes: Choose breathable fabrics and avoid abrasive materials.
  7. Use Attachments: Add tips for wet, icy, or uneven surfaces and storage bags for essentials.
  8. Explore Alternatives: Consider forearm crutches or hands-free designs for long-term use.

Quick Comparison of Crutch Types:

Crutch Type Best For Benefits
Underarm Short-term injuries Easy to use, minimal strength needed
Forearm Long-term use Better mobility, less strain
Hands-Free Active lifestyles Frees up hands, natural motion

These adjustments can make a big difference in comfort and safety. Start with proper fit and padding, then explore advanced options if discomfort persists.

1. Get the Right Crutch Fit

Setting the Correct Height

Getting the height of your crutches right is key to avoiding nerve issues and maintaining good posture. Here’s how to adjust them:

  • Leave a 2-3 finger width gap between the top pad and your armpit while standing upright.
  • Position the crutch tips 5-8 inches away from your feet to ensure stability.

Here’s a quick guide:

Adjustment Point Target Watch Out For
Armpit Gap 2-3 finger widths Pressure under the arms
Side Position 5-8 inches from feet Feeling wobbly or unsteady
Elbow Angle ~30° bend when gripping Slouching or hunching

Stand tall with your shoulders relaxed to check the fit. If you notice pressure in your armpits, lower the crutches right away.

Positioning the Handgrips

Proper handgrip placement can help distribute weight better and reduce wrist strain:

  • Align the handgrips with the crease of your wrist when your arms hang naturally.
  • Aim for a 30-degree bend in your elbows when holding the grips.
  • Make sure both grips are set at the same height.

Once adjusted, secure the spring buttons and tighten the collars to lock everything in place. Check these adjustments weekly or whenever a change in footwear alters your posture. Adding extra padding (covered in the next section) can also help ease pressure points.

2. Add Extra Padding

Types of Padding and Materials

Using the right padding can greatly ease discomfort and help prevent crutch palsy (nerve damage caused by underarm pressure). Here’s a quick comparison of popular padding materials:

Material Type Features
Memory Foam Molds to your body for a custom fit
Gel Pads Absorbs shocks effectively and keeps its shape
Sheepskin Allows airflow and manages moisture well
Neoprene Resists water, making it ideal for any weather
Silicone Non-allergenic and simple to clean

For example, the Vive Crutch Pads feature memory foam for added comfort, while the Crutcheze Comfort Kit includes underarm and hand grip covers with antimicrobial properties.

How to Install Padding

To make the most of your padding and ensure it lasts, follow these steps:

  1. Prepare the crutches: Clean the crutch surfaces thoroughly and measure the padding. Add an extra inch for underarm overlap.
  2. Attach the padding: Wrap the padding tightly around the crutch tops. Use adhesive tape or Velcro to secure it. Aim for a thickness of 1-2 inches to provide enough cushioning.
  3. Add grip covers: Slide gel grip covers snugly over the handgrips to minimize pressure.

Need a quick fix? Try wrapping foam pipe insulation or towels around the crutch tops. This temporary solution can help prevent skin irritation until you find a more permanent option.

Still feeling discomfort in your hands after padding adjustments? Check out the next section for tips on improving handgrip comfort.

How To Make Sure Your Crutches Fit Properly

3. Fix Uncomfortable Handgrips

If adjusting the padding (see Section 2) hasn’t solved your hand discomfort, it might be time to explore grip-specific options.

Best Replacement Grips

A survey of 500 crutch users revealed that 78% experienced hand discomfort with standard grips. Pairing proper grip replacements with height adjustments (see Section 1) can help avoid long-term strain.

Grip Type Features Ideal For
Gel-Based Absorbs shock, reduces fatigue Long daily use
Memory Foam Molds to hand shape for support Personalized comfort
Silicone Durable and weather-resistant All-weather use
Ergonomic Contoured Reduces strain with anatomical design Hand/wrist issues

The Ergobaum Replacement Grips are a great option, offering an ergonomic design that many users say eases palm pressure significantly. If you have arthritis or limited hand strength, consider forearm platform attachments. These devices shift weight from your hands to your forearms, offering a more comfortable experience. They also work well with the weight-balancing methods covered in Section 4.

Quick Grip Fixes

If you need immediate relief without investing in replacements, try these simple solutions:

  • Wrap the grips with tennis racket overgrip tape for extra cushioning and to absorb sweat.
  • Use talcum powder to minimize friction and reduce irritation.

For lasting comfort, check out the weight distribution strategies in Section 4.

4. Balance Your Weight Correctly

Once you’ve adjusted your grip for comfort (see Section 3), the next step is managing your weight distribution. Proper weight management works hand-in-hand with padding and grip adjustments to help avoid additional injuries.

Weight-Bearing Approaches

Your weight-bearing method should match your specific injury and your doctor’s advice. Here’s a quick breakdown:

Weight-Bearing Type What It Means
Non-Weight Bearing Your arms take all the weight – no foot contact.
Partial Weight-Bearing Only partial foot contact, as directed by your doctor.
Gradual Weight-Bearing Slowly increasing foot contact as you heal.

Important: Avoid letting your armpits carry your weight. This can cause nerve damage and block circulation.

Proper weight distribution will also tie into the posture techniques discussed in Section 5.

Weight distribution becomes even more crucial when tackling stairs. Here’s how to do it:

Going Up:

  • Step up with your stronger leg first.
  • Move the crutches and injured leg together afterward.

Going Down:

  • Place the crutches down first.
  • Follow with your injured leg.

If there’s a handrail, hold it with one hand while keeping both crutches on the opposite side.

sbb-itb-bbf8bc0

5. Keep Good Form While Moving

Building on the weight management tips from Section 4, using crutches with proper form is key to staying comfortable and promoting recovery.

Keep Your Back Straight

Maintaining good posture is crucial. Keep your spine straight and your shoulders relaxed. This helps spread the weight evenly and reduces the chance of muscle strain.

Walk Smoothly

Here’s a simple sequence to follow:

  • Place the crutches slightly ahead of you and lean forward, supporting your weight with your hands.
  • Swing your body forward between the crutches.
  • Step forward with your uninjured foot.
  • Move the crutches forward again to repeat the motion.

Helpful tips for movement:

  • Keep your elbows close to your body for better control.
  • Look forward, not down, to maintain balance.
  • Stick to a steady, even rhythm.
  • Be mindful of obstacles in your path.

Using these techniques, along with the weight distribution strategies from Section 4, can help reduce strain and avoid further discomfort. For best results, pair these methods with clothing that allows for a full range of motion (see Section 6).

6. Choose the Right Clothes

Pairing proper movement techniques (see Section 5) with the right clothing can make a big difference in comfort and mobility. The right clothing works hand-in-hand with padding (Section 2) and good posture (Section 5) to minimize irritation and improve your overall experience.

Best Fabrics to Wear

When selecting fabrics, aim for materials that reduce friction and keep you comfortable. Here are some great options:

  • Cotton blends for breathability
  • Moisture-wicking synthetics like polyester or nylon
  • Bamboo fabrics for a soft feel and moisture control

Avoid abrasive materials like wool, which can cause chafing, especially in sensitive areas like underarms. For added comfort, look for clothing with seamless underarm designs to reduce irritation.

Helpful Clothing Details

Just as grip attachments (Section 7) improve usability, certain clothing features can enhance your daily comfort. Keep an eye out for these:

Feature Benefit
Reinforced underarm areas Helps reduce friction in sensitive spots
Side zippers or Velcro closures Makes it easier to access injuries or braces
Strategically placed pockets Keeps essentials within easy reach
Adjustable sleeve lengths Simplifies dressing and adjustments
Elastic waistbands Adds flexibility and ease when dressing

Loose-fitting pants are ideal, as they won’t restrict your crutch movements. Stretchy athletic wear is another solid choice, offering both comfort and mobility.

When it comes to footwear, prioritize stability. Pick slip-resistant shoes with Velcro closures and proper arch support to keep you steady. For added comfort during longer periods of crutch use, consider layering breathable fabrics for temperature control and wearing compression socks to aid circulation.

"Prioritize comfort and ease of movement over style. Choose clothes that don’t interfere with wound sites or medical devices", recommend physical therapists who work with crutch users.

7. Add Helpful Attachments

To enhance crutch functionality, consider adding attachments that address specific challenges. These additions, much like grip replacements mentioned earlier, can improve both comfort and safety without compromising mobility.

Grip and Safety Add-ons

Attachments designed for specific surfaces can make a big difference in safety and usability. Here are some options to consider:

Surface Attachment Purpose
Wet Rain Tips Reduces slipping
Ice/Snow Retractable Picks Improves traction
Indoor Wide-Base Tips Adds stability
Uneven All-Terrain Tips Ensures better grip

Make sure attachments are securely fastened and test them for stability before use. Also, inspect tread patterns regularly to ensure they’re not worn out. These upgrades work well alongside the posture techniques discussed in Section 5.

Storage Solutions

Carrying items while using crutches can be tricky, but storage attachments can help. Options like crutch bags or clip-on accessories make it easier to keep essentials within reach. For example, the Vive Crutch Bag provides hands-free storage for daily necessities:

Attachment Type Ideal For
Crutch Bags Everyday items
Water Bottle Holders Staying hydrated
Clip-on Baskets Larger items

To maintain balance, keep the weight of attachments to no more than 10% of your body weight. Heavier items should be positioned lower on the crutch shaft for better stability.

For added safety at night, consider attaching LED strips or reflective tape. These visibility aids are easy to install and align with the safe movement strategies highlighted in Section 5.

8. Look at Other Mobility Options

If adjustments like padding and attachments (see Section 7) aren’t enough to ease discomfort, it might be time to explore different mobility aids. Modern designs cater to various injuries and lifestyles, offering options that work well alongside earlier solutions like grip replacements (Section 3) and posture improvements (Section 5).

Comparing Crutch Types

Underarm crutches aren’t the only choice. Forearm crutches, also called Lofstrand crutches, spread weight more evenly and can make extended use much more comfortable. In fact, research shows they can increase walking speed by up to 25% compared to underarm crutches.

Crutch Type Best For Key Benefits
Underarm Short-term use Easy to use, requires minimal strength
Forearm Long-term use Greater mobility and comfort
Platform Weak hands/wrists Offers forearm support, reduces hand strain

Physical therapists often suggest forearm crutches for long-term use because they allow better movement. Keep in mind, though, they require more upper body strength and practice to get the hang of.

Newer Crutch Designs

Innovative mobility aids, like hands-free crutches, offer a fresh approach to comfort and functionality. The iWALK2.0, a popular hands-free option, straps to your leg and mimics a natural walking motion.

Another option is the Freedom Leg. Here’s how these newer designs stack up against traditional crutches:

Feature Traditional Crutches Hands-Free Alternatives
Weight Distribution Focuses on upper body Supports the leg more naturally
Daily Activities Limits hand use Frees up your hands completely
Learning Curve Moderate Steeper at first
Terrain Handling Works on most surfaces Best on flat surfaces

"Studies show that ergonomic or hands-free crutches often lead to better adherence to physical therapy and a quicker return to daily activities. For example, forearm crutch users reported 15% less muscle atrophy in the injured limb compared to underarm crutch users over six weeks".

Talk to your healthcare provider to determine the best option based on your injury and mobility needs. These alternatives can be especially helpful for long-term users still experiencing strain, complementing the earlier adjustments discussed.

Conclusion: Tips for Better Crutch Use

Making crutches more comfortable involves smart adjustments and proper movement techniques. These ideas go hand in hand with the padding tips (Section 2) and grip adjustments (Section 3).

Here’s a quick look at key areas to focus on:

Focus Area Benefit
Proper Fit Helps avoid nerve pressure
Weight Management Cuts down on fatigue
Surface Prep Improves stability

When using crutches, keep your back straight and avoid pressing into the armpit pads too much. Pair these basics with the movement tips from Section 5 for the best experience. Don’t forget to inspect your crutches regularly, as outlined in Section 7.

If comfort remains an issue, consider the alternative crutch options detailed in Section 8. Ongoing discomfort might mean another mobility aid could work better for you.

Related Blog Posts

Ultimate Guide to Choosing the Right Crutch Size

  • Key Measurements: Ensure a 5 cm gap between crutch pads and armpits to prevent nerve damage. Hand grips should align with hips, allowing a 20-30° elbow bend for stability.
  • Types of Crutches:
    • Underarm Crutches: Best for short-term use. Suitable for users 4’8" to 6’8". Ensure 2-3 finger widths between the armpit and crutch pad.
    • Forearm Crutches: Ideal for long-term use. Fit users 5’0" to 6’2" with cuffs 1-2 inches below the elbow.
  • Common Sizing Errors: Incorrect height or grip placement can lead to falls, wrist strain, or spinal issues.
  • Maintenance Tips: Regularly check crutch tips, grips, and adjustment mechanisms to ensure safety and usability.

Quick Comparison

Feature Underarm Crutches Forearm Crutches
User Height 4’8" – 6’8" 5’0" – 6’2"
Key Measurement 2-3 fingers below armpit 1-2 inches below elbow
Primary Use Short-term recovery Long-term mobility
Weight Capacity Up to 300 lbs (standard) 200-250 lbs

Proper sizing and regular adjustments ensure crutches provide support without discomfort. Read on for step-by-step instructions and tips for maintaining your crutches.

Types of Crutches and Size Requirements

Underarm vs. Forearm Crutches

When choosing between underarm (axillary) and forearm (Lofstrand) crutches, understanding their differences is key to proper sizing. Underarm crutches are adjustable, with heights ranging from 48 to 60 inches, making them suitable for users between 4’8" and 6’8" . The axilla pad should sit 2-3 finger widths below your armpit to avoid nerve compression .

Forearm crutches, also called Canadian or Lofstrand crutches, are sized differently. These measure 29 to 35 inches from the handgrip to the floor and work for users between 5’0" and 6’2". The cuff should rest 1-2 inches below the bend of your elbow .

These structural differences influence their use and weight capacity, which is covered in the next section.

Feature Underarm Crutches Forearm Crutches
Height Range 48-60 inches 29-35 inches
User Height 4’8" – 6’8" 5’0" – 6’2"
Key Measurement 2-3 fingers below armpit 1-2 inches below elbow
Primary Use Short-term recovery Long-term mobility

Size and Weight Limits

The weight capacity of crutches varies depending on their material and design. Standard aluminum underarm crutches can support 250-300 pounds , while reinforced steel models can hold over 400 pounds . Meanwhile, forearm crutches generally have a lower weight capacity, ranging from 200 to 250 pounds .

Material Considerations: ISO standards require underarm pads to be 38mm thick . Additionally, all crutch tips must comply with ASTM F1637 slip resistance standards and have a 1.5-inch diameter for safety and stability .

Measuring for the Right Fit: Professionals use specific techniques to ensure proper sizing. For underarm crutches, they check hand pressure distribution and use the finger-width method. For forearm crutches, sizing is determined by measuring from the wrist to the floor .

Measuring and Adjusting Your Crutches

Taking Body Measurements

Getting the right fit for your crutches starts with accurate body measurements. Make sure you’re wearing the shoes you’ll normally use, as even a small heel difference (like 0.5 inches) can affect stability. For example, switching from 1-inch sneakers to 1.5-inch dress shoes means you’ll need to adjust your crutches by 0.5 inches .

Here’s what to measure:

  • Your height while wearing shoes
  • Distance from your armpit to the floor
  • Wrist position when standing naturally

Interestingly, nearly 70% of users need adjustments after their initial fitting . To help you get started, use this height-to-crutch-length guide:

User Height Crutch Length
Below 5’1" 37.4"
5’1"-5’5" 40.55"
5’5"-5’9" 41.73"
Above 5’9" 42.72"

These measurements are just the starting point for setting up your crutches properly.

Setting Crutch Height and Grip

Adjusting your crutches involves two key steps: setting the overall height and positioning the handgrip. Start by adjusting the height, making sure your shoulders stay level and relaxed.

For handgrip positioning, keep these points in mind:

  • Your wrists should stay neutral when bearing weight.
  • Your shoulders should feel relaxed, not lifted .

If adjustments are off, it can lead to issues like these:

Grip Position Health Impact Pain Location Fatigue Onset
Too High Carpal tunnel syndrome Forearm flexors 15-20 minutes
Too Low Wrist hyperextension Extensor tendons 30-45 minutes

To maintain stability and comfort, check all adjustment mechanisms weekly . Feeling fatigued within 30 minutes of use? That’s often a sign you need to tweak the grip height.

How to Properly Adjust or Fit Your Crutches

Common Sizing Errors to Avoid

Even with accurate measurements, mistakes in crutch adjustments are surprisingly common. According to Alberta Health Services, 68% of first-time users make errors that could lead to harm when adjusting their crutches . Let’s break down the most frequent issues and how to address them.

Problems with Wrong Crutch Height

Adjusting crutches to the wrong height can result in both immediate discomfort and long-term complications. If the crutches are positioned less than 2 inches below the armpits, users risk developing "crutch palsy", a condition that causes hand numbness due to pressure on the axillary nerve .

Height Issue Health Risk
Too High Axillary nerve damage
Too Low 37% increased fall risk
Uneven Spinal misalignment

Here’s an example: A 28-year-old patient using poorly adjusted crutches experienced a 15° increase in thoracic spine curvature within just six weeks of use .

Grip and Tip Position Mistakes

Grip Height Issues
Incorrect handgrip placement can make movement much harder. When grips are set too low, users may experience a 15° wrist hyperextension, which increases carpal tunnel pressure by 42%, and raises energy use by 23% during movement .

Tip Placement Errors
Crutch tips need to be positioned correctly for stability. The ideal placement is:

  • 6 inches forward from your toes
  • 6 inches out to the side while standing

Studies on mobility aids found that proper tip spacing reduces lateral sway by 58% compared to incorrect placements .

To ensure proper alignment, follow these steps:

  • Confirm crutch tips are directly below the handgrips.
  • Test stability by shifting weight in a controlled manner.
  • Check elbow positioning while bearing weight.

These adjustments are key to improving both comfort and safety during use.

sbb-itb-bbf8bc0

Sizing for Specific Users

While general sizing guidelines work for most people, certain groups need extra attention to avoid the common issues mentioned earlier.

Children’s and Heavy-Duty Crutches

Pediatric Sizing Needs
Children aged 4-12 require crutches tailored to their growing bodies, using key measurements like wrist-to-floor distance and elbow angle . Here’s a breakdown of sizing:

Age Group Height Range Crutch Length
4-7 years 3’6" – 4’2" 24-36"
8-10 years 4’3" – 4’8" 37-48"
11-12 years 4’9" – 5’2" 49-54"

For example, the Mobileg Junior series offers a 12-inch height adjustment range, compared to the standard 8-inch range in adult models . This flexibility ensures the crutches can accommodate growth, something standard adult models can’t handle.

Heavy-Duty Requirements
Heavy-duty crutches need to handle greater weight and stress. Key features include:

  • Thicker aluminum frames with 0.095-inch walls
  • Larger rubber tips (1.5 inches or more)
  • Reinforced joint connectors for durability

Short-Term vs. Extended Use

Short-Term Use
For those using crutches for less than two weeks, basic adjustability is usually sufficient .

Extended Use Needs
For users needing crutches for longer periods, additional adjustments become important:

  • For use beyond six weeks, increase elbow bend to 35-45°, switch to contoured handgrips, and replace standard tips with wider, shock-absorbing ones .
  • For daily use exceeding four hours, physical therapists recommend 15° angled footplates to improve push-off mechanics .

Keeping Crutches in Good Shape

Ensuring your crutches stay in top condition requires more than just proper sizing at the start. Regular upkeep is key to maintaining support and avoiding safety issues. In fact, research from the American Journal of Physical Medicine & Rehabilitation shows that consistent maintenance can cut crutch-related accidents by up to 60% . It also helps preserve the alignment achieved with proper sizing.

This is especially important for those who rely on crutches for extended periods.

Checking Parts and Tips

Inspecting your crutches regularly can catch potential problems before they affect performance or safety. Build a simple routine focusing on these key areas:

Component What to Check Replacement Timing
Crutch Tips Look for wear, cracks, or grip loss Replace every 3-6 months
Hand Grips Check for tears, looseness, or compression Replace every 6-12 months
Height Mechanisms Ensure secure locking and smooth adjustment Check monthly
Bolts & Screws Tightness and signs of rust Tighten monthly

Daily Quick Check: Before using your crutches, look at the tips for wear and make sure all parts feel secure. Even a slightly worn tip can lower the crutch height by 0.6 cm, which can throw off your walking posture .

Weekly Thorough Inspection: Cleaning your crutches weekly can help maintain grip and overall condition. Studies show users with maintenance kits keep their crutches in better shape by 40% . This helps maintain the critical 5 cm gap under the armpit and the 20-30° elbow bend needed for safe use.

When to Readjust Your Crutches

Sometimes, physical or environmental changes mean your crutches need to be readjusted.

Key Times to Check Fit:

  • After gaining or losing 10+ pounds
  • When switching to shoes with different heel heights
  • If your muscle strength changes significantly
  • Every 3-6 months for long-term users

Seasonal Adjustments: In snowy winters, crutch tips wear out 30% faster . Consider using ice-specific tips during winter and checking your crutches more often during seasonal changes.

To keep your crutches in good condition, store tools like Allen wrenches, measuring tape, and spare parts. These simple habits ensure your crutches stay safe and effective for everyday use.

Summary

This guide highlights the key steps for proper crutch sizing, focusing on three essential measurements:

  • Position crutch tips 5-8 inches away from the feet to maintain balance .
  • Ensure safety by checking armpit clearance, elbow angle, and tip placement .

Research indicates that improper crutch sizing leads to over 11,000 emergency room visits each year in the U.S. . Correctly sized crutches can lower the risk of falls by 30% , as they ensure weight is supported by the hands rather than the armpits.

Usage Type Sizing Focus Adjustment Frequency
Short-term Comfort and basic fit Weekly check
Long-term Fit and durability Monthly assessment

Different crutch styles require specific attention:

  • Underarm crutches: Prioritize armpit clearance and proper grip height .
  • Regular checks are essential to maintain support and prevent issues.

FAQs

Are there different sizes of crutches?

Yes, crutches come in various sizes to suit different users. Here’s a quick breakdown:

Adult Models:

  • Standard aluminum crutches can handle 250-300 lbs (113-136 kg).
  • Heavy-duty versions, built with reinforced frames, support 500-600 lbs (227-272 kg).

Pediatric Models:

  • Designed for kids and smaller adults, these adjust between 36-52 inches and typically support up to 250 lbs (113 kg) .
Crutch Type Weight Capacity
Standard Aluminum 250-300 lbs (113-136 kg)
Heavy-Duty 500-600 lbs (227-272 kg)
Pediatric 250 lbs (113 kg)

Different crutch styles cater to specific mobility needs:

Underarm Crutches: These are the most commonly prescribed type .

Forearm (Lofstrand) Crutches: Ideal for those needing long-term support .

It’s essential to ensure your crutches are correctly fitted to provide proper support. For tips on maintaining your crutches, check out the ‘Keeping Crutches in Good Shape’ section above.

Related Blog Posts