Elvira

Founder and editor at Worldcrtutches.com.We write about all crutches information.

How To Talk To Your Physical Therapist

How To Talk To Your Physical Therapist

Clear communication with your physical therapist can speed up your recovery and improve your results. Here’s how to get the most out of your sessions:

  • Be prepared: Bring medical records, list your symptoms, and set clear recovery goals.
  • Describe pain clearly: Use terms like sharp, dull, or burning, and share what triggers or relieves it.
  • Ask questions: Clarify your treatment plan, progress tracking, and at-home care.
  • Give feedback: Report how exercises feel, any new pain, or changes in your daily activities.
  • Track progress: Use a journal or online portals to log symptoms, exercises, and improvements.

How to Communicate Effectively in Physical Therapy

Getting Ready for Your PT Session

Before heading to your physical therapy session, take some time to gather the right information and materials. This will help your therapist get a complete picture of your condition and ensure your sessions are as effective as possible.

Medical Records to Bring

Make sure to bring the necessary documents so your therapist can better understand your medical history and current condition. Here’s what to include:

Document Type Details to Include
Medical Reports Recent X-rays, scans, or lab results
Prescriptions List of current medications, dosages, and supplements
Referral Papers Doctor’s referral or prescription for therapy
Health History Information on past injuries, surgeries, or family medical conditions

If possible, keep digital copies of these records for easy access. If you’re using paper documents, organize them in chronological order to make reviewing them quicker and easier.

Writing Down Symptoms and Goals

Before your appointment, jot down notes about your symptoms and what you hope to achieve through therapy. Be as specific as possible by noting:

  • Activities that trigger discomfort or pain
  • Times of day when symptoms tend to worsen
  • Things that provide relief
  • How these symptoms impact your daily life

When it comes to setting recovery goals, clarity is key. General goals are a great start, but try to refine them into SMART goals – those that are Specific, Measurable, Attainable, Realistic, and Time-related. This approach gives your therapist something concrete to work with.

Here’s an example of how to turn a broad goal into something actionable:

Type Actionable Example
Basic Goal Return to running
SMART Goal Run 2 miles without pain, 3 times a week, within 3 months
Functional Goal Walk the dog for 30 minutes daily without knee pain

The best goals are tied to activities that matter to you personally. As one patient shared:

"The questions were to the point and it made me aware of what I myself hoped and expected of my rehabilitation. Every patient should have a conversation like this, this is what rehabilitation is all about." – Client M10

Speaking Up During Your Sessions

How to Describe Pain Accurately

Being able to describe your pain clearly and precisely can make a big difference in how effectively it’s treated. The more specific you are about the type of discomfort and how it affects you, the better your therapist can tailor your treatment.

Here’s a quick guide to help you describe pain more effectively:

Pain Type Description Examples Impact Level
Sharp Stabbing, shooting, piercing Often stops activities immediately
Dull Achy, throbbing, tender May allow for limited movement
Burning Hot sensation, radiating Typically affects larger areas
Cramping Tight, squeezing, pressure Can come and go

When discussing your pain, include details like:

  • What triggers the pain, how long it lasts, and what makes it feel better or worse
  • When the pain occurs (specific times or activities)
  • The impact on your daily life and routine

"The better you can describe that pain, though, the quicker and more successful they’ll be in matching you with a treatment that will help you feel better." – Tristan Weaver, MD

Once you’ve shared your pain details, don’t hesitate to ask follow-up questions to refine your therapy approach.

Questions You Should Ask

After describing your pain, asking the right questions can help you and your therapist align on a treatment plan that works for you. These questions should focus on both short-term relief and long-term recovery.

Here are some key questions to consider:

Topic Questions to Ask
Treatment Plan What type of therapy will address my condition? How often should I schedule sessions?
Progress Tracking How will we measure improvement? When might I start noticing results?
Home Care Should I use ice or heat? Are there activities I should avoid?
Exercise Protocol How many repetitions should I aim for? What level of discomfort is acceptable?

"Open dialogue with your therapist delivers clearer guidance for treatment."

Reporting Exercise Results

Providing detailed feedback about your exercises is essential for your therapist to fine-tune your treatment plan. When sharing your experience, make sure to:

  • Highlight the difference between normal discomfort and pain that might require adjustments
  • Mention any lasting effects, improvements, or setbacks after completing exercises
  • Note changes in your range of motion or strength
  • Share which activities have become easier or more challenging

It’s also helpful to keep track of your progress between sessions. Record details such as:

  • Which exercises feel manageable and which are more difficult
  • Any noticeable changes in mobility or strength
  • New symptoms that arise
  • Activities you’re finding easier or harder to do

This kind of feedback allows your therapist to adjust your plan and keep you moving steadily toward your recovery goals.

Managing Recovery Problems

Talking About Slow Progress

If your recovery feels slower than expected, it’s important to talk openly with your therapist. Recovery doesn’t follow a strict timeline – it can vary widely from person to person. Here’s how you can approach these conversations effectively:

Progress Concern Action Steps Key Details
Slower Than Expected Share specific examples Highlight activities that are still challenging and discuss your concerns about the timeline.
Plateau in Recovery Compare to initial goals Reflect on what worked earlier and identify current limitations.
Motivation Issues Discuss honestly Talk about the emotional toll and how it’s affecting your daily life.
Goal Adjustments Request a timeline review Work on setting realistic expectations and adjusting targets as needed.

It’s also helpful to remember that recovery isn’t always a straight path. Dr. Liam Bryant, PT, DPT, OCS, FAAOMPT, explains:

"When facing a setback, it’s essential to communicate openly and honestly with your provider. We are there to support you and help you navigate through the challenges."

When discussing slow progress, focus on these points:

  • Specific activities that are still difficult to perform.
  • How your daily routine has been affected by your limitations.
  • Any new concerns about achieving your recovery goals.
  • Questions about whether your treatment plan needs adjustments.

Next, we’ll look at how to address new pain signals that might arise during recovery.

Telling Your Therapist About New Pain

If your recovery hits a roadblock, it’s crucial to pay attention to any new pain or discomfort. Reporting these issues early can prevent minor problems from escalating. Park North Physical Therapy advises:

"Your physical therapist doesn’t want you to downplay or mask your symptoms. They want to know exactly how you’re feeling to help you feel comfortable during your session."

When describing new pain to your therapist, include the following details:

Pain Aspect What to Share
Timing & Intensity When the pain started, how severe it is (rate it), and how it’s affecting your daily activities.
Location The exact area of the pain and whether it radiates to other parts of your body.
Triggers Describe what activities or movements make the pain worse.
Relief Methods Share what helps ease the discomfort, such as rest, ice, or specific positions.

If you’re using mobility aids like crutches or walkers, be sure to mention:

  • Any pressure points or discomfort caused by the device.
  • Muscle fatigue from altered movement patterns.
  • Changes in pain levels during or after using the aid.

It’s essential not to skip your appointment if you experience new pain. Instead, inform your therapist right away so they can adjust your treatment plan to address the issue effectively.

sbb-itb-bbf8bc0

Staying in Touch Between Sessions

Using Online Health Portals

Secure patient portals make it easier to stay connected between appointments. In fact, a recent study found that 77% of patients feel more engaged with their healthcare providers when using secure messaging through these portals.

Here’s how you can make the most of your therapy practice’s online portal:

Portal Feature How to Use Benefits
Secure Messaging Send specific questions about exercises or symptoms Get answers without waiting for your next session
Progress Updates Share detailed notes about your recovery journey Allows therapists to adjust treatment promptly based on your updates
Appointment Management Schedule or modify sessions as needed Helps maintain consistent care and avoid treatment gaps
Document Access Review exercise instructions and treatment plans Ensures accuracy in your home exercise program

In addition to using digital tools, keeping your own personal records can further improve communication with your therapist. Tracking your progress between sessions plays a key role in your recovery.

Keeping a Recovery Journal

A recovery journal is a great way to track your progress and provide your therapist with valuable insights. While exercise logs are helpful, a journal can capture additional details – like mood and sleep – that might otherwise go unnoticed. These extra details can help your therapist make more informed decisions about your treatment plan.

Here are some key elements to include in your journal:

Category What to Track Why It Matters
Exercise Details Sets, reps, resistance levels Tracks your strength and endurance progress
Pain Levels Intensity, timing, triggers Identifies patterns and potential concerns
Daily Activities Tasks and limitations Highlights functional improvements
Sleep & Recovery Sleep duration and quality Reflects your overall recovery status

Take Nicole Odell, for example. As a USA Cycling, USA Triathlon, and TrainingPeaks Level 2 Certified Coach, she began a detailed tracking system after undergoing hip surgery. By monitoring metrics like injury level, soreness, mood, and sleep quality, she provided her rehabilitation team with crucial data.

"The more information is available for you, your coach, and even your doctor, the better informed everyone will be to make decisions about your rehab program." – Nicole Odell, USA Cycling, USA Triathlon, and TrainingPeaks Level 2 Certified Coach

Recording these details consistently throughout the day can reveal patterns that help your therapist fine-tune your treatment plan between visits. The more detailed and consistent your notes, the better equipped your care team will be to guide your recovery.

Conclusion: Working Together for Better Results

Main Communication Tips

Clear and open communication can make a big difference in recovery. Studies show that patients who maintain an ongoing dialogue with their therapists tend to see better results and report greater satisfaction with their treatment.

Here are some key communication strategies that have been shown to work effectively:

Communication Element Best Practice Impact on Recovery
Active Listening Focus on your therapist by maintaining eye contact, nodding, and summarizing their points Helps ensure you fully understand treatment instructions
Goal Setting Discuss specific recovery goals and timelines Allows for tailored treatment plans that align with your needs
Progress Reporting Be upfront about successes, struggles, and exercise completion Helps your therapist adjust your recovery plan as needed
Question Asking Seek clarification about exercises and the reasoning behind treatments Boosts understanding and commitment to the process

These strategies are essential for building trust and fostering a productive therapist-patient relationship.

"Communication is a currency for a therapist." – Jimmy McKay, PT, DPT, Director of Communications

Next Steps in Your Recovery

Being proactive with communication is key. With 30.3% of people around the world dealing with chronic pain, applying these strategies can make your recovery journey smoother and more effective. Here’s how you can prepare:

Before Your Sessions:

  • Look over your recovery journal to track progress and note any concerns.
  • Write down specific questions about your therapy or exercises.
  • Bring updated medical records or test results, if available.

During Treatment:

  • Be specific when describing symptoms, and try to use the same terms your therapist uses.
  • Share any concerns about how exercises feel or if something isn’t working for you.

Building a strong relationship with your therapist takes effort from both sides. By keeping communication open – whether through in-person conversations, your recovery journal, or patient portals – you’re setting yourself up for the best possible recovery outcomes.

FAQs

What’s the best way to track my progress between physical therapy sessions?

Tracking Your Progress Between Physical Therapy Sessions

A great way to stay on top of your recovery journey is by keeping a simple journal. Use it to jot down important details like your pain levels, range of motion, strength, and the exercises you’ve completed. By consistently tracking these factors, you and your physical therapist can clearly see how much progress you’re making over time.

It’s also helpful to document any challenges or discomfort you encounter during your exercises. Sharing these notes with your therapist allows them to tweak your treatment plan as needed, ensuring it aligns with your recovery goals. Staying consistent with this habit can make your sessions more effective and personalized to your needs.

What should I do if I feel unexpected pain or discomfort during recovery?

If you experience unexpected or unusual pain during your recovery, make sure to inform your physical therapist immediately. It’s essential to distinguish between typical post-exercise soreness and pain that might indicate a problem. While mild soreness is a normal part of recovery, sharp, intense, or lingering pain could mean your treatment plan needs to be adjusted.

When speaking with your therapist, be as honest and detailed as possible about your symptoms. This helps them modify your exercises to keep them both safe and effective. In the meantime, you can try easing discomfort with ice or heat, staying hydrated, and giving your body enough rest. Open communication is key to ensuring your recovery stays on track.

How can I set recovery goals that are realistic and achievable?

To set recovery goals that you can genuinely work toward, consider using the SMART framework: Specific, Measurable, Achievable, Relevant, and Time-bound. For instance, instead of a vague goal like "I want to walk better", try something more precise: "Walk unassisted for 30 minutes, five times a week." This approach breaks your goals into clear, actionable steps, making it easier to measure progress along the way.

Collaborate with your physical therapist to develop and refine these goals as your recovery advances. Regular check-ins will help ensure your objectives match your current abilities, keeping you motivated and focused on your path to recovery.

Related posts

5 Signs You Need Ergonomic Crutch Handles

5 Signs You Need Ergonomic Crutch Handles

Using crutches shouldn’t leave you in pain or discomfort. If you’re experiencing hand pain, numbness, muscle fatigue, or skin irritation, it might be time to upgrade to ergonomic crutch handles. Designed to reduce strain and improve comfort, these handles offer features like contoured grips, better weight distribution, and shock-absorbing materials – all for around $29.99 per pair. Here’s a quick summary of the signs and benefits:

  • Hand and Wrist Pain: Standard handles force awkward wrist angles, causing strain. Ergonomic handles promote natural alignment and reduce pressure.
  • Finger Numbness: Nerve compression from traditional handles can lead to tingling. Ergonomic designs spread pressure evenly to protect sensitive nerves.
  • Muscle Fatigue: Narrow grips require more effort, leading to tired hands. Wider ergonomic handles reduce strain and improve endurance.
  • Skin Damage: Blisters and calluses are common with hard, unpadded handles. Soft, padded ergonomic grips protect your skin.
  • Health Conditions: Issues like arthritis or carpal tunnel worsen with standard handles. Ergonomic designs provide relief by easing joint and nerve stress.

Quick Comparison:

Feature Standard Handles Ergonomic Handles
Wrist Position Awkward, unnatural angles Neutral and natural alignment
Pressure Distribution Focused on small palm areas Evenly spread across the hand
Grip Effort Requires tight grip Relaxed grip with less effort
Materials Hard plastic or rubber Soft, shock-absorbing materials
Skin Protection Causes blisters and irritation Padded, smooth, and skin-friendly

Switching to ergonomic crutch handles can make a big difference in your comfort, mobility, and recovery. If you’re dealing with any of these signs, it’s time to upgrade.

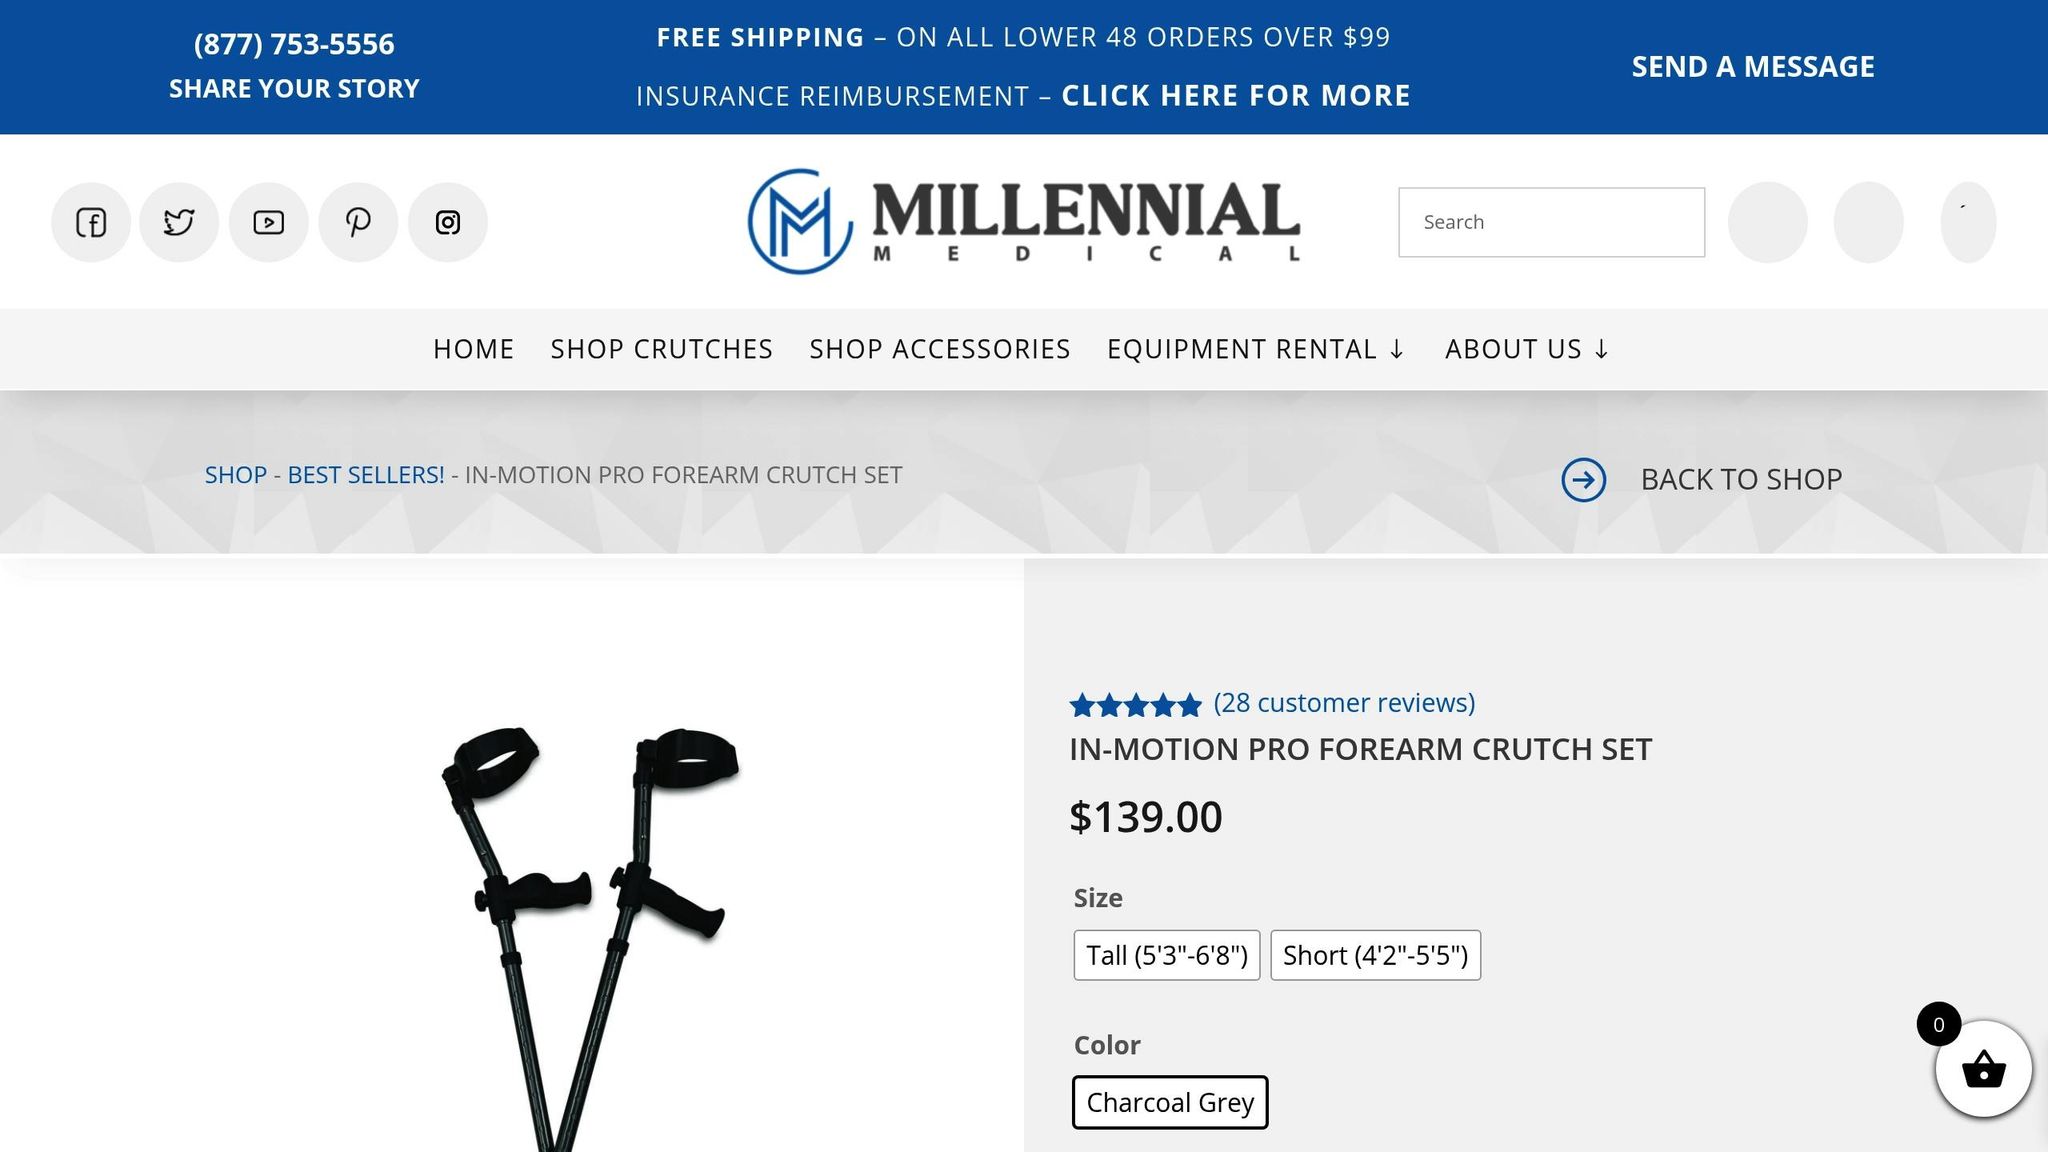
IN-MOTION CRUTCH (Finally, a crutch that works with you, not against you)

IN-MOTION CRUTCH

1. Hand and Wrist Pain

Experiencing hand and wrist pain while using crutches is often a sign that the handles aren’t doing their job. Traditional crutch handles are typically straight and rigid, forcing your wrists into awkward angles while bearing your body weight. This setup can create concentrated pressure on small areas of your hands, leading to discomfort or even injury over time.

Why Pain Develops

Here’s how standard crutch handles contribute to pain:

  • Concentrated Pressure: The hard, straight design channels your weight into small sections of your palms instead of spreading it out evenly.
  • Awkward Wrist Angles: Standard handles force your wrists into unnatural flexion, putting strain on tendons and ligaments.
  • Extra Muscle Effort: With a small diameter (about 0.8 in. or 20mm), these handles require a tighter grip, increasing muscle strain.

Over time, this stress can lead to more serious issues, including early arthritis.

How Ergonomic Handles Help

Ergonomic crutch handles are designed to address these problems head-on. Here’s what makes them different:

Feature Benefit
Angled Grip Design Keeps your wrist in a neutral, comfortable position
Contoured Shape Spreads pressure across a larger area of your palm
Wider Diameter Reduces the effort needed to grip the handle
Shock-Absorbing Materials Softens the impact, making movement smoother

These features work together to keep your wrists in a natural position and evenly distribute weight across your hands. By reducing strain on muscles and joints, they also help prevent excessive fatigue.

For individuals with conditions like arthritis, ergonomic handles can be a game-changer. They ease joint stress, reduce inflammation risks, and make day-to-day mobility more comfortable.

Beyond easing wrist pain, these improvements can also help with other common issues like finger numbness and muscle fatigue, which we’ll explore next.

2. Finger Numbness and Tingling

If you’ve noticed tingling or numbness in your fingers while using crutches, it might be a sign that the handles are putting too much pressure on key nerves. This happens when the design of the handles compresses nerve pathways in your hands, leading to discomfort and potential long-term issues.

Nerve Pressure Points

Standard crutch handles tend to focus pressure on specific nerves in your hand, which can cause noticeable symptoms:

Nerve Location Common Symptoms
Median Nerve Center of the palm to thumb side Numbness in the thumb, index, and middle fingers
Ulnar Nerve Center of the palm to pinky side Tingling in the ring and little fingers

Because traditional handles require a firm grip to support your body weight, they often create intense pressure on these nerve pathways. Over time, this can lead to muscle weakness, reduced hand coordination, or even permanent loss of sensation in your fingers.

Pressure-Relief Features

Modern ergonomic crutch handles are designed to reduce nerve pressure and improve comfort. Here’s how they help:

  • Contoured Grip Design: These handles are shaped to fit the natural curves of your hand, spreading pressure evenly across your palm and avoiding concentrated stress on nerve pathways.
  • Wider Grip with Slope: A broader grip with a slight downward angle reduces the force needed to maintain control, easing strain on sensitive nerve areas.
  • Advanced Materials: Many newer handles use cushioning materials that provide extra support where nerves are most vulnerable. Some designs also feature enlarged ends to prevent direct contact with the metal frame, offering additional protection.

If you’re experiencing tingling or numbness, especially after extended crutch use, it’s essential to address these symptoms right away. Left unchecked, prolonged nerve compression can lead to chronic issues like nerve damage or reduced hand function. These ergonomic improvements not only protect your nerves but also reduce hand muscle fatigue – something we’ll cover in the next section.

3. Rapid Hand Muscle Tiredness

If your hand muscles feel worn out quickly, it’s often a sign that your handles aren’t providing enough support. This kind of fatigue isn’t related to nerve issues – it’s a direct result of overworked muscles and can seriously limit your endurance during everyday tasks.

Why Do Hand Muscles Tire So Quickly?

As mentioned earlier, nerve and wrist concerns can play a role, but the design of standard handles is a major culprit when it comes to muscle fatigue. Handles with a narrow diameter – around 20mm – force your hand to grip tightly, which restricts blood flow and leads to quicker exhaustion.

Here’s how this strain shows up:

Symptom Timeframe What It Means
Hand Weakness Within 15–30 minutes of use Struggling to maintain a firm grip
Muscle Cramping During use Painful spasms in the palm and fingers
Lingering Soreness After use Ongoing discomfort in the forearm
Decreased Mobility Over time Shorter walking periods before needing a break

These symptoms tend to worsen as the day goes on, showing how cumulative strain builds up over time. For anyone who relies on extended mobility for work or daily life, this can quickly become a major problem.

How Ergonomic Handles Help

Ergonomic handles are designed to address these issues by reducing the effort your hand muscles need to exert. Handles with a diameter of 30–40mm distribute pressure more evenly across your hand, meaning you don’t have to grip as hard to maintain control.

Key ergonomic features include:

Feature Benefit How It Eases Fatigue
Contoured Shape Matches the natural curves of your hand Requires less grip strength
Neutral Wrist Position Keeps your wrist in a relaxed angle Reduces strain on your forearm
Shock-Absorbing Materials Cushions impact Lessens overall muscle effort
Textured Surface Improves grip security Prevents slipping without extra squeezing

Upgrading to ergonomic handles, which typically cost around $29.99 per pair, can significantly improve comfort and mobility. Beyond just reducing fatigue, these handles may also help prevent chronic conditions like tendonitis or carpal tunnel syndrome that can arise from prolonged use of poorly designed handles. This simple change can make a big difference in your daily comfort and long-term hand health.

sbb-itb-bbf8bc0

4. Skin Damage and Blisters

Dealing with skin problems from crutch use often points to one thing: standard crutch handles aren’t doing their job. These issues don’t just cause discomfort – they can slow down your recovery and make mobility even more challenging.

Why Skin Problems Happen

Most standard crutch handles are made with hard plastic or uncoated metal, often featuring sharp edges that do more harm than good. This design leads to common skin issues like:

Skin Issue Cause
Blisters Friction from repetitive contact with hard surfaces
Calluses Constant pressure on specific areas of the hand
Abrasions Sharp edges and seams irritating the skin

The concentrated pressure on certain parts of the palm only makes matters worse. Research shows that the design of crutch handles – things like material, size, and shape – plays a big role in preventing these problems and reducing the risk of injuries to the upper limbs.

Features That Protect Your Skin

Modern ergonomic crutch handles are designed to avoid these issues by including features that protect your skin and improve comfort:

Feature Benefit How It Helps Your Skin
Medical-Grade Silicone Soft and flexible material Reduces friction and pressure points
Memory Foam Padding Adapts to your hand’s shape Spreads out pressure evenly
Antimicrobial Coating Stops bacteria from growing Lowers the risk of skin infections
Moisture-Wicking Surface Keeps hands dry Prevents skin breakdown caused by moisture

These ergonomic handles don’t just stop at comfort – they’re built with thoughtful details like smooth, rounded edges and textured grips to prevent slipping and micro-tears. Many also use hypoallergenic materials to ensure they’re safe for sensitive skin.

Some designs even include a slight downward slope to better distribute pressure across the hand, reducing strain and improving grip. By combining these skin-protecting features with better grip and less nerve pressure, ergonomic handles provide a well-rounded solution for crutch users. The result? Better comfort, less pain, and improved mobility during your recovery journey.

5. Medical Conditions and Crutch Use

For individuals with pre-existing medical conditions, traditional crutch handles can often worsen pain and discomfort. As mentioned earlier, better crutch designs are essential for enhancing comfort and usability.

Impact on Health Issues

Standard crutch handles can create serious challenges for those with certain health conditions:

Condition How Standard Handles Affect Users Risk Level
Arthritis Force wrists into unnatural positions, increasing joint inflammation. High
Carpal Tunnel Compress the median nerve, intensifying numbness and pain. Severe
Tendonitis Add repetitive stress to already affected tendons. Moderate
Fibromyalgia Increase pressure on sensitive areas, potentially triggering pain flares. High

Studies show that conventional crutch handles often require excessive grip strength and force the wrist into awkward positions, which can worsen arthritis symptoms and other conditions. These risks highlight the importance of ergonomic alternatives.

Medical-Grade Options

To address these challenges, modern ergonomic crutch designs incorporate features specifically tailored to alleviate discomfort and reduce health risks:

Feature Benefit to Users Conditions Addressed
Adjustable Handle Angles Keeps the wrist in a neutral position Arthritis, Carpal Tunnel
Variable Grip Diameters Reduces the effort needed to hold the crutch Muscle Weakness
Customizable Padding Lessens pressure on sensitive areas Fibromyalgia, Neuropathy
Weight Distribution Design Decreases stress on joints Multiple Conditions

These ergonomic designs are particularly beneficial for long-term crutch users. Research confirms that such improvements help protect joint health and prevent further complications. For individuals with muscle weakness or progressive conditions, the reduced grip effort required can significantly improve daily mobility.

When recommending ergonomic crutches, healthcare providers should consider factors like the user’s primary condition, the interaction of multiple health issues, expected disease progression, upper body strength, and the environments where the crutches will be used. While these options may require an initial investment, they can greatly enhance mobility and reduce pain for those managing chronic conditions.

Basic vs. Ergonomic Handles

Basic handles get the job done, but ergonomic handles take things up a notch by focusing on comfort and ease of use. Here’s a side-by-side comparison of how these two types of handles differ in design and functionality:

Feature Basic Handles Ergonomic Handles
Design Straight, cylindrical shape Contoured to fit the hand’s natural shape
Material Hard rubber or plastic Soft, pressure-absorbing materials
Weight Distribution Focused in the palm’s center Evenly distributed across the grip
Grip Requirements Needs a firm grip Allows for a more relaxed hold
Wrist Position May cause awkward angles Promotes neutral wrist alignment
Long-term Comfort Limited cushioning and support Better pressure distribution for added comfort

Switching to ergonomic handles isn’t just about convenience – it’s about reducing strain and improving overall mobility. Studies indicate that ergonomic designs help decrease muscle strain and reduce the effort needed to grip, thanks to their contoured surfaces that better support the hand and fingers.

Ergonomic handles also come with additional perks:

  • Durability: Built to withstand extended use with materials that resist wear and tear.
  • Ease of Maintenance: High-quality materials ensure long-lasting support with minimal upkeep.
  • Health Benefits: By lowering the risk of repetitive strain injuries, they can contribute to reduced healthcare costs over time.

For individuals dealing with medical conditions or chronic discomfort in their hands or wrists, ergonomic handles offer much-needed relief. Their superior grip and pressure distribution can help prevent further irritation while improving mobility. Choosing ergonomic handles isn’t just about enhancing daily tasks – it’s an investment in long-term comfort and wellness.

Conclusion: Choose Better Handles for More Comfort

There’s no need to put up with crutch discomfort when ergonomic handles are available. The warning signs we’ve covered – like ongoing hand pain or skin irritation – are clear indicators that it’s time to consider an upgrade. Research shows that well-designed handles can greatly reduce strain on your upper limbs and ease muscle fatigue during extended use.

Experts at Twin Cities Orthopedics report that ergonomic handles not only enhance comfort but also improve mobility. Making this simple and budget-friendly change can significantly improve your recovery experience and daily routine.

If you’re noticing any of these issues, it’s worth exploring ergonomic options. Key handle features to look for include:

  • Contoured grips that align with your hand’s natural shape
  • Pressure-absorbing materials to protect your skin
  • Weight distribution technology that eases strain
  • Shock-absorbing systems to reduce impact

These features highlight why upgrading your crutch handles is a smart choice. For more guidance, World Crutches offers detailed reviews and selection tips to help you find the handles that best suit your needs and medical requirements.

Prioritizing comfort not only supports your recovery but also safeguards your overall health. Pay attention to these signs, and make the switch to ergonomic handles to enhance your mobility and well-being.

FAQs

How can ergonomic crutch handles help reduce wrist pain compared to standard handles?

Ergonomic crutch handles are crafted to offer better support and evenly spread pressure across your hands and wrists. Unlike traditional straight or basic handles that can create uncomfortable pressure points and strain, these handles are shaped to fit the natural contours of your hand. This design reduces stress on your joints and soft tissues.

By keeping your wrist in a more neutral position, ergonomic handles can help lower the chances of long-term discomfort, pain, or even conditions like carpal tunnel syndrome. They’re particularly helpful for anyone who needs crutches for extended periods or deals with pre-existing wrist problems. If wrist pain is affecting your mobility, upgrading to ergonomic handles might greatly improve your comfort and overall experience.

What should I consider when choosing ergonomic crutch handles to ensure comfort and support?

When choosing ergonomic crutch handles, it’s essential to prioritize comfort, support, and durability. Handles with padded grips are a great option, as they help reduce hand fatigue and ease pressure during long periods of use. Opt for contoured designs to encourage proper wrist alignment and lessen strain. Materials like silicone or gel padding add an extra layer of cushioning while also preventing slipping.

Make sure the handles are adjustable to suit your specific needs and compatible with your crutches. For those dealing with persistent discomfort or hand pain, upgrading to ergonomic handles can make a noticeable difference in your overall mobility and ease of use.

Can ergonomic crutch handles help with conditions like arthritis or carpal tunnel syndrome?

Switching to ergonomic crutch handles can make a big difference for those dealing with conditions like arthritis or carpal tunnel syndrome. These handles are crafted to ease pressure on your hands, wrists, and joints by distributing weight more evenly and providing a grip that feels more natural.

This design helps reduce strain and discomfort, which can prevent further irritation in sensitive areas. Plus, it enhances overall comfort while using crutches. If standard crutch handles are causing you ongoing pain or discomfort, ergonomic handles could be a smart option to consider.

Related posts

Ultimate Guide to Hotel Accessibility

Ultimate Guide to Hotel Accessibility

  • ADA Standards: Hotels must meet accessibility requirements like 32" wide doorways, grab bars in bathrooms, and clear pathways for easy navigation.
  • Booking Tips: Use accessibility filters on booking sites, confirm features directly with the hotel, and request photos or written confirmation to avoid surprises.
  • Room Setup: Look for features like roll-in showers, non-slip floors, and beds 17–19" high for easier transfers.
  • Emergency Readiness: Choose lower-floor rooms, ensure visual alarms are available, and familiarize yourself with evacuation routes.
  • Advocacy: Report ADA violations or provide detailed feedback to hotels to encourage improvements.

Quick Comparison of Accessible Room Types

Feature Basic Accessible Room Full ADA-Compliant Room
Doorway Width Minimum 32 inches Minimum 32 inches
Bathroom Setup Standard grab bars Full accessibility setup
Turning Space Limited 60-inch diameter
Bed Height Standard 17–19 inches
Controls Standard height Max 48 inches high

Pro Tip: Call the hotel 48 hours in advance to confirm your needs. Accessible travel starts with planning!

What Makes a Hotel Room Wheelchair Accessible?

Hotel Accessibility Standards

The Americans with Disabilities Act (ADA) lays out detailed guidelines that hotels must follow to ensure their spaces are accessible to guests with mobility challenges. These rules are designed to create safe and independent navigation for everyone.

ADA Hotel Requirements

Hotels are required to include features that accommodate guests using crutches or other mobility aids. Some key dimensions include:

  • Doorways: Minimum clear width of 32 inches
  • Hallways and pathways: At least 36 inches wide
  • Ramps: Maximum slope of 1:12 (one inch of rise for every 12 inches of length)
  • Clear floor space: 30 by 48 inches near accessible elements

The number of accessible rooms a hotel must provide depends on its size. For instance, a hotel with 200 rooms must have at least six accessible rooms, while a 500-room property requires nine accessible rooms.

Bathrooms in accessible rooms must meet specific criteria, such as:

  • Grab bars around toilets and in showers
  • Sinks installed no higher than 34 inches from the floor
  • Transfer seats available in showers or tubs
  • Handheld shower wands operable from a seated position

These physical standards are the foundation for how hotels design and categorize accessible accommodations.

Room Types and Standards

Hotels implement ADA requirements across two main categories of accessible rooms:

Feature Type Basic Accessible Room Full ADA-Compliant Room
Doorway Width Minimum 32 inches Minimum 32 inches
Bathroom Setup Standard grab bars Complete accessibility features
Turning Space Limited 60-inch diameter minimum
Bed Height Standard 17–19 inches from the floor
Controls Standard height Maximum 48 inches from the floor

Fully ADA-compliant rooms go a step further with safety features like securely anchored grab bars, slip-resistant flooring throughout, and furniture arranged to maintain clear pathways.

To ensure equal access, accessible rooms must be distributed across different room types and price ranges. This includes providing access to varied amenities and views. Additionally, these rooms must have clear pathways, including a turning space of at least 60 inches, so crutch users can move safely. Controls for thermostats, light switches, and window treatments must be operable with one hand and placed no higher than 48 inches from the floor.

Typical compliance issues include:

  • Bathrooms lacking enough maneuvering space
  • Missing or improperly installed grab bars
  • Furniture that obstructs pathways
  • Beds positioned at heights that make transfers difficult

To stay compliant with ADA standards, hotels need regular inspections, ongoing maintenance of accessibility features, and training for staff on these requirements.

How to Book Accessible Rooms

Booking an accessible hotel room that meets your mobility needs takes some effort, but with the right approach, you can simplify the process. Many booking websites now offer tools to help you identify rooms with the features you need.

Search Filters and Tools

Most online booking platforms include filters specifically designed for accessibility. Look for options like "Accessible Room", "ADA Compliant", or "Mobility Accessible" to narrow down your search to rooms equipped with features like adapted bathrooms or other accommodations essential for crutch users.

Once you’ve found potential options, it’s crucial to confirm their accessibility by digging a little deeper.

Pre-Booking Checklist

Before finalizing your reservation, take a moment to verify the room’s accessibility features directly with the hotel. Use this checklist to guide your conversation:

Feature Category Key Questions
Room Access • Is there elevator access to all floors?
• How far is the room from parking?
• Are the entrance doors automatic?
Bathroom Setup • Are there grab bars in the shower and toilet area?
• Is the shower walk-in or roll-in?
• What is the sink height?
Bed & Furniture • What is the height of the bed (ideally 20–24 inches)?
• Is there enough space between furniture for crutch navigation?
Emergency Features • Where are the emergency exits located?
• Is there 24-hour staff assistance available?

Ask for written confirmation of these details via email. This provides documentation of your requirements, which can be helpful if issues arise.

Common Booking Issues

Even with preparation, challenges can come up during the booking process. Here are some common problems and how to tackle them:

  1. Misleading Room Descriptions
    Some hotels may label rooms as "accessible", even if they only have minor modifications. To avoid unpleasant surprises, ask for specific details about the room’s features. Whenever possible, request recent photos of the room and bathroom.
  2. Outdated Accessibility Information
    Hotels may not update their accessibility details after renovations. To ensure accuracy:
    • Request current photos of the room and bathroom.
    • Check reviews from other travelers, especially those mentioning accessibility.
    • Get confirmation of specific features in writing.
  3. Limited Availability
    Accessible rooms can sometimes be in short supply. If your preferred choice isn’t available, try these alternatives:
    • Ask about other accessible rooms in the hotel.
    • Inquire about temporary modifications that can make a standard room suitable.
    • Request ground-floor accommodations or portable accessibility equipment.

"Hotels must identify and describe accessible features in enough detail for people with disabilities to independently assess whether the facility meets their needs", according to the ADA National Network.

For more tips on booking accessible accommodations, check out World Crutches. Their website offers detailed checklists and expert advice to help travelers with mobility challenges ensure their hotel stay is as comfortable as possible.

Moving Through Hotel Areas

Planning your movements and understanding the accessible features of a hotel can make a big difference in ensuring a safe and comfortable stay. Once you’ve secured your room, it’s time to focus on the external and internal elements of the hotel that can shape your experience.

Parking and Entry Points

Your journey starts in the parking lot. According to ADA standards, hotels are required to provide accessible parking spaces located along the shortest accessible route to the entrance. This ensures easier and safer access for all guests.

Feature ADA Requirement Benefit for Crutch Users
Parking Location Positioned along the shortest accessible route to the entrance Reduces the walking distance significantly
Access Aisle Wide enough to allow safe exit from vehicles Makes getting in and out of cars simpler
Entry Ramp Slope Gentle slope (not steeper than a 1:12 ratio) Ensures a stable and manageable incline
Door Width Minimum 32 inches of clear width Provides ample space for easy passage

It’s a good idea to call the hotel in advance to reserve an accessible parking space, ensuring it’s ready upon your arrival.

Common Area Access

Once inside, navigating the hotel’s common areas becomes the next priority. The ADA requires hallways to be at least 36 inches wide, but many modern hotels go beyond this standard. Here are some key features to keep in mind:

Elevator Accessibility:

  • Door Width: At least 36 inches to allow smooth entry.
  • Control Panel Height: Positioned no higher than 48 inches from the floor for easy reach.
  • Cab Size: Spacious enough to allow turning while using crutches.

Lobby Navigation:

  • Look for clear pathways, often marked with high-contrast signs for better visibility.
  • Be cautious of thick carpeting or other surfaces that may make movement more difficult.
  • Don’t hesitate to ask hotel staff for assistance with luggage or other needs.

"Hotels must identify and describe accessible features in enough detail for people with disabilities to independently assess whether the facility meets their needs", says the ADA National Network.

Room Layout Tips

Once in your room, a few adjustments can make it more functional and safer for crutch users:

  • Survey the Room: Upon arrival, take a quick look around. If needed, ask staff to remove unnecessary furniture to create open pathways.
  • Organize Strategically: Keep crutches near the bed, store luggage out of walkways, and position chairs as convenient resting spots.
  • Bathroom Safety: Make sure the bathroom setup promotes ease of use:
    • Keep a clear path to the toilet and shower.
    • Place toiletries within easy reach.
    • Ensure the floor stays dry to prevent slipping.

For more detailed advice on navigating hotels and setting up your room, World Crutches provides helpful resources like printable guides and mobility tips tailored specifically for crutch users.

sbb-itb-bbf8bc0

Safety and Comfort Tips

Creating a safe and comfortable hotel stay involves paying attention to bathroom safety, room arrangement, and being prepared for emergencies.

Bathroom Safety

Bathrooms can pose unique challenges for crutch users, so having the right features in place is crucial to avoid accidents.

Safety Feature Requirement Purpose
Grab Bars Install 33–36 inches above the floor Provide support during transfers
Shower Seat Height of 17–19 inches Offer a stable bathing position
Clear Floor Space Minimum 30 x 48 inches Allow safe maneuvering
Non-slip Surfaces Use textured flooring or mats Reduce the risk of falls

You can also ask for additional items like a handheld showerhead with an extended hose, a portable shower bench, extra towels, and rubber-backed bath mats to make the space more functional.

Room Setup Guide

After ensuring bathroom safety, focus on arranging the room to promote ease of movement and reduce potential hazards.

Clearance Recommendations:

  • Maintain pathways at least 36 inches wide between furniture.
  • Provide a clear space of 30 x 48 inches next to the bed.
  • Position the bed so the mattress top is 20–23 inches from the floor.

Safety Tips:

  • Secure electrical cords along walls to prevent tripping.
  • Remove unnecessary decorative items that clutter the space.
  • Request stable chairs without wheels for added support.
  • Place nightstands within easy reach for storing crutches or other essentials.

For added nighttime safety, use motion-activated nightlights to illuminate the path between the bed and bathroom. According to World Crutches, setting up "rest spots" with sturdy furniture can be helpful for longer distances, offering a place to pause if needed.

Emergency Planning

Once your room is set up for comfort, take steps to prepare for emergencies.

Room Selection Tips:

  • Choose a room on a lower floor, ideally the first or second.
  • Ensure your room is near emergency exits.
  • Confirm the room is equipped with visual alarm systems.

Emergency Kit Essentials:

  • Spare crutch tips
  • A small flashlight
  • Necessary medications
  • The hotel’s direct phone number
  • A list of emergency contacts

When you check in, inform the front desk about your mobility needs so they can update their emergency response system. Familiarize yourself with the hotel’s evacuation routes and identify accessible exits that can accommodate crutch use.

Improving Hotel Access

Once you’ve secured accessible accommodations and ensured personal safety, the next step is advocating for better hotel accessibility standards.

Filing ADA Reports

Filing a complaint under the Americans with Disabilities Act (ADA) can help address serious accessibility issues. These reports not only highlight specific barriers but can also push for meaningful change.

What to Document:

Element Details to Include Purpose
Location Room number, floor, exact spot Pinpoint the problem area
Measurements Door widths, counter heights, clearances Compare against ADA standards
Timeline Dates of stay, time of incidents Establish a clear violation timeline
Impact How the barrier affected your stay Show the practical consequences
Communication Staff responses, management interaction Demonstrate attempts at resolution

When documenting, focus on specific violations like doors that are narrower than 32 inches or grab bars that are improperly installed.

Steps for Filing an ADA Complaint:

  • Take clear photos and videos of the accessibility barriers.
  • Record exact measurements and compare them to ADA standards.
  • Submit your complaint through ada.gov within 180 days of the incident.
  • Follow up to ensure your complaint is acknowledged within 30 days.

For those who prefer a less formal approach, the next section explains how to provide constructive feedback directly to hotels.

Hotel Feedback Guide

Direct feedback to hotels is another way to encourage accessibility improvements. Sharing your observations can lead to immediate action or long-term changes.

Tips for Providing Feedback:

  • Be Specific
    Provide clear measurements and details about the issue. For example: "The bathroom door in Room 304 is only 27 inches wide, which made it impossible to enter with crutches. ADA standards require a minimum width of 32 inches."
  • Offer Practical Solutions
    Suggest changes that align with ADA guidelines. For instance: "Installing offset hinges could widen the door clearance without requiring extensive renovations."
  • Set Priorities
Priority Issue Type Response Time
Critical Safety hazards, clear ADA violations Immediate action needed
Important Access limitations Address within 30 days
Recommended Comfort improvements Consider for future updates

When writing feedback, keep your tone constructive. Highlight positive aspects of your stay alongside areas needing improvement.

You can share your feedback through various channels, including emails, post-stay surveys, online reviews, or corporate feedback forms.

Conclusion

This guide has outlined the key factors to consider for a safe and accessible hotel stay, emphasizing how ADA standards play a crucial role in ensuring accommodations meet accessibility needs.

Key Takeaways:

A smooth and comfortable stay starts with careful planning and pre-booking checks. Here are some critical features to look for:

Feature Requirement Why It Matters
Doorway 32" width Allows easy navigation
Bathroom Roll-in access Ensures safe routines
Floor Non-slip Reduces fall risks
Emergency Alert system Enables quick assistance

For example, the Hotel Bel-Air incorporates thoughtful design elements like lowered door viewers, emergency assistance buttons, and roll-in showers, setting a high standard for accessibility.

To advocate for better accommodations, provide feedback directly to hotel management or through formal ADA reporting channels. Knowing your rights and being aware of available accessibility features can help you secure a safe and enjoyable stay.

For more resources, reviews, and travel tips, check out the guides available at World Crutches.

FAQs

How can I confirm that a hotel room meets my accessibility needs before booking?

To make sure a hotel room meets accessibility needs, it’s best to contact the hotel directly. Ask specific questions about features like door widths, bathroom setup, and whether amenities like grab bars or a roll-in shower are available. If possible, request photos or videos of the room to confirm the layout matches your requirements.

It’s also helpful to read online reviews from guests who use mobility aids. Their experiences can provide insight into how well the hotel accommodates accessibility needs. When booking, clearly outline your requirements and get confirmation in writing to avoid any surprises. These steps can make your stay more comfortable and hassle-free.

What should I do if I experience accessibility issues at a hotel that violate ADA standards?

If you come across accessibility problems at a hotel that may conflict with the Americans with Disabilities Act (ADA), here’s what you can do:

  • Speak with hotel staff or management: Bring the issue to their attention during your stay. Clearly explain the problem and give them a chance to resolve it. A polite and direct approach often works best.
  • Keep a record of the issue: Take photos, videos, or write detailed notes about the situation. Be sure to include dates, times, and any conversations you’ve had with hotel staff about the matter. This documentation can be helpful if further action is needed.
  • Submit a complaint to the U.S. Department of Justice (DOJ): If the hotel doesn’t address the problem, you can file an ADA complaint online or by mail. Provide a clear description of the accessibility issue and any supporting evidence.

Taking these steps not only addresses your immediate concerns but also contributes to improving accessibility for others.

What important features should crutch users look for in an accessible hotel room to ensure safety and comfort?

When booking a hotel room as a crutch user, it’s essential to focus on features that enhance safety, mobility, and comfort. Here are a few things to keep in mind:

  • Room layout: Opt for a space with plenty of room to move around without obstacles.
  • Slip-resistant flooring: Check that the floors, especially in the bathroom, are designed to reduce the risk of slipping.
  • Grab bars: These should be strategically placed near the toilet, shower, and bathtub to provide extra support.
  • Walk-in or roll-in showers: A shower with easy access and a handheld showerhead can make bathing more convenient.
  • Comfortable furniture height: Beds and chairs at an appropriate height can simplify transfers and reduce strain.

By verifying these details in advance, you can ensure a safer, more comfortable stay that meets your mobility needs.

Related posts

Crutch Fitting Checklist for Beginners

Crutch Fitting Checklist for Beginners

Getting the right fit for crutches is essential for safety and comfort. Improperly adjusted crutches can cause discomfort, strain, and even injuries. Here’s a quick guide to ensure your crutches fit correctly:

  • Choose the right type of crutch: Axillary crutches for short-term use; forearm crutches for long-term needs.
  • Wear your everyday shoes: Adjust crutches while wearing the shoes you’ll use most often.
  • Set the height: Crutch pads should be 1.5–2 inches below your armpits, with 2–3 finger widths of space.
  • Adjust handgrips: Align with your wrist crease when arms hang naturally, keeping a slight elbow bend (15–30°).
  • Test and maintain: Ensure weight rests on your hands, not armpits. Regularly check rubber tips, padding, and grips for wear.

Properly fitted crutches improve mobility, reduce strain, and support recovery. Always consult a healthcare professional for personalized adjustments.

HOW TO Walk with Crutches Safely and EASILY | Fit, Use, Gait Patterns

1. Before You Start

Getting ready with these initial steps ensures your crutches are set up correctly for a comfortable and safe fit. You’ll be better prepared for the adjustments outlined in the next sections.

Select Your Crutch Type

Picking the right type of crutch is key to meeting your mobility needs. Here’s a quick guide to help you decide:

Axillary Crutches are best suited for:

  • Short-term injuries requiring weight off your leg
  • Recovery periods after surgery
  • Temporary mobility support
  • Those who need underarm assistance

Forearm Crutches are ideal for:

  • Long-term mobility challenges
  • Conditions where added stability is necessary
  • Greater ease in maneuvering
  • Support without underarm pressure

Put On Regular Shoes

Before adjusting your crutches, wear the shoes you’ll use most often during recovery. This ensures the crutches are set to the right height and fit. Here’s what to do:

  • Slip on your everyday shoes
  • Make sure your shoelaces are tied securely
  • Check that the heel height matches what you typically wear
  • Confirm the shoes provide solid support and comfort

Know Your Crutch Parts

Familiarizing yourself with the parts of your crutches makes adjustments much easier. Locate the adjustment mechanisms – these are often spring-loaded buttons or wing nuts – on each section of the crutch.

Component Purpose Adjustment
Underarm Pad Offers upper body support Adjustable for height
Handgrip Helps bear body weight through arms Adjustable for proper grip
Shaft Main structural support Adjustable for overall length
Rubber Tip Ensures traction on the ground Replaceable when worn out

Understanding these parts now will save you time and effort when fine-tuning your crutches later.

2. Set the Height

Getting the height just right is key to avoiding discomfort and potential injuries. A proper adjustment helps distribute your weight evenly and supports good posture.

Measure the Space Under Your Armpit

Stand up straight with your arms relaxed by your sides:

  • Place the top of the crutch about 1.5–2 inches below your armpit.
  • Check that there’s enough room for 2–3 finger widths between your armpit and the crutch pad.

Signs Your Crutches Are the Wrong Height:

  • If fewer than two fingers fit between your armpit and the pad, the crutches are likely too tall.
  • If you’re hunching or leaning forward while using them, they might be set too low.

Once the armpit spacing feels right, move on to positioning the crutches for optimal support.

Position the Crutches

Positioning the crutches correctly improves stability and balance. Use these tips:

Position Check Correct Setup Common Mistake
Side Distance 6 inches away from your body Too close or too far away
Forward Angle Slightly ahead of your body Positioned directly under your arms

Stand with the crutch tips about 6 inches to the side of your feet and slightly ahead of you for better stability.

Quick Tip for Height Check: When holding the handgrips, your elbows should have a slight bend. If they’re fully straight or bending too much, adjust the crutch height accordingly.

3. Adjust the Handgrips

Getting the handgrips set up correctly is key to avoiding wrist strain and ensuring stable support.

Match Wrist Height

Use the following checks to ensure proper alignment:

Position Check Correct Setup Warning Signs
Wrist Level Handgrips align with the wrist crease when arms hang naturally Wrists bent upward or downward
Elbow Angle 15-30° bend when gripping Elbows locked straight or overly bent
Arm Position Arms hang relaxed and naturally Shoulders are raised or hunched

Pro Tip: Stand naturally with your arms at your sides. The handgrips should line up with your wrist crease without forcing your arms into an awkward position.

Make sure your wrists are properly aligned before testing how comfortable the grips feel.

Check Grip Comfort

Once the handgrips are positioned, take a moment to confirm they’re secure and comfortable for long-term use:

  • Grip Security: Shake each handgrip gently to check for any wobbling or looseness.
  • Wrist Alignment and Pressure: Hold the grips and ensure your wrists stay straight, with pressure evenly distributed.

Tighten any loose adjustments to avoid accidents.

If you notice discomfort or your wrists bending unnaturally, make small tweaks until your arms feel naturally supported. For extra comfort during prolonged use, consider adding padded grip covers. Properly adjusted grips not only improve control but also help reduce fatigue over time.

sbb-itb-bbf8bc0

4. Test the Fit

Once you’ve adjusted your crutches, it’s time to test them out. This step is crucial to ensure they’re safe, comfortable, and properly fitted. A good fit not only helps avoid injuries but also makes your recovery process more manageable.

Check Weight Distribution

When using crutches, most of your weight should rest on your hands – not your armpits. Stand still and gradually shift your weight onto the crutches. If you feel any discomfort under your arms, adjust the height so your hands take the load. Also, double-check that all parts of your crutches are in good condition for added safety.

Inspect the Components

Before you move around, take a moment to check these key parts:

  • Rubber Tips: Look for wear, cracks, or any damage. Damaged tips can reduce traction, so replace them if needed.
  • Hardware: Make sure all bolts, screws, and nuts are secure and tight.
  • Handgrips: Ensure the grips are securely attached and feel comfortable in your hands.

Once everything is in good shape, you’re ready to test how they perform.

Practice Basic Movements

Start by walking slowly on a flat surface. Practice stopping in a controlled way and try both small and wide turns. Pay attention to how your weight shifts – your hands should bear the load, and your movements should feel stable and smooth.

If you experience any discomfort or feel unsteady, revisit the adjustment steps to refine the fit. Taking the time to test your crutches thoroughly is a key part of staying safe and recovering effectively.

5. Regular Upkeep

Once you’ve ensured everything fits properly, keeping up with regular maintenance is vital for both safety and performance. Consistent care helps avoid accidents and keeps everything functioning as it should.

Replace Worn Parts

Take time to inspect key components like rubber tips, padding, and hand grips for any signs of wear and tear:

  • Rubber Tips: Check for cracks, uneven wear, or reduced grip. Replace them if they no longer provide stability.
  • Padding: Look for signs of compression or damage that could affect comfort.
  • Hand Grips: Ensure they’re firmly attached and free from cracks or deterioration.

Staying on top of these checks will help maintain reliability and comfort over time.

Clean and Store

Keeping your equipment clean and properly stored is just as important as making adjustments. Here’s how:

  • Use a damp cloth to wipe down surfaces, and for tougher grime, mild soap works well. Always dry thoroughly to prevent moisture damage.
  • Store your crutches upright in a cool, dry place, away from direct sunlight, to avoid unnecessary wear.

Get Help When Needed

Don’t hesitate to seek professional advice if something feels off. Your healthcare provider can address persistent issues and ensure your setup remains safe and effective. Regular check-ins can make a big difference in long-term usability.

Conclusion

Getting the right fit for your crutches is essential for safe and comfortable movement. This involves choosing the right type of crutch, adjusting the height properly, and positioning the handgrips correctly. Each step plays a key role in ensuring a secure and comfortable experience.

Don’t forget to maintain your crutches regularly to keep them in good condition and provide reliable support. If you feel any discomfort or have doubts about your adjustments, it’s always a good idea to reach out to a healthcare professional.

For more detailed advice, check out World Crutches for helpful guides on fitting and maintaining your crutches.

FAQs

How do I decide between axillary crutches and forearm crutches for my recovery?

When deciding between axillary crutches (underarm crutches) and forearm crutches, it’s important to consider your injury, comfort, and how much mobility you need.

Axillary crutches are often the go-to option for short-term situations, like recovering from surgery or a temporary injury. They’re straightforward to use and provide solid stability, making them ideal for those new to crutches. On the flip side, forearm crutches are a better fit for long-term use or for people managing chronic conditions. They allow for greater freedom of movement and are easier on the underarms, reducing discomfort over time.

If you’re unsure which type suits you best, it’s a good idea to talk to your healthcare provider or physical therapist. They can guide you toward the option that aligns with your recovery plan and personal needs.

What should I do if my crutches cause discomfort or feel awkward to use?

If your crutches are causing discomfort or feel awkward, it’s crucial to address the problem quickly to prevent strain or injury. Start by checking the height adjustment of your crutches. Your elbows should have a slight bend – about 15 to 30 degrees – when you’re holding the handgrips. Additionally, there should be around 1 to 2 inches of space between your armpits and the top of the crutches. Make sure the handgrips are positioned so that your weight is supported by your hands, not your underarms.

If you’re still uncomfortable, try adding padded covers or grips to ease pressure and make the crutches more comfortable to use. Always focus on maintaining proper posture and using the correct technique while walking with crutches, and don’t hesitate to take breaks when needed. If the discomfort continues, it’s a good idea to consult a healthcare professional for advice tailored to your situation.

How often should I inspect and adjust my crutches to ensure they are safe and comfortable to use?

To keep your crutches in good condition and safe to use, make it a habit to inspect them regularly. Start by checking the rubber tips – if they’re cracked or worn thin, replace them immediately, as they’re essential for grip and stability. Next, examine the hand grips to ensure they’re secure and haven’t become too worn. Lastly, double-check that the height adjustments are properly locked and correctly aligned.

A quick daily check is a smart practice, especially if you rely on your crutches often. For a more thorough inspection, aim to examine them every couple of weeks. This routine maintenance not only helps you avoid accidents but also keeps your crutches comfortable and dependable.

Related posts

5 Steps to Appeal Denied Mobility Equipment Claims

5 Steps to Appeal Denied Mobility Equipment Claims


Key Steps to Appeal a Denial:

  1. Understand the Denial Letter: Identify why your claim was rejected, note deadlines, and gather missing documents.
  2. Collect Documents: Get prescriptions, medical records, diagnostic results, and a detailed letter from your doctor explaining why the equipment is necessary.
  3. Submit an Appeal: Write a clear appeal letter addressing the denial reasons and include all supporting documents.
  4. Request External Review: If the internal appeal fails, seek an independent review for a second opinion.
  5. Explore Legal Help: Consult legal aid, insurance attorneys, or your state’s insurance department if other options don’t work.

Quick Tips:

  • Always meet deadlines (usually within 180 days).
  • Keep detailed records of all submissions and correspondence.
  • Work closely with your doctor to ensure strong documentation.

By following these steps, you can challenge the denial and potentially secure the mobility equipment you need.

How to Turn Insurance Claim Denials Into Payouts: The Ultimate Step-by-Step Guide!

Step 1: Read and Understand Your Denial Letter

When your claim is denied, the first thing to do is carefully review the denial letter. It contains crucial information you’ll need to craft a strong appeal.

What to Look for in Your Denial Letter

Pay close attention to these key details:

  • Reason for Denial: Understand why your claim was rejected. Common reasons include missing medical documentation, coding errors, or specific exclusions in your policy.
  • Policy References: Check for any policy sections or codes mentioned in the letter. These citations will guide you in addressing the insurer’s requirements in your appeal.
  • Required Documentation: Identify any additional documents or forms the insurer is requesting. This could include updated statements from your doctor, forms proving medical necessity, detailed prescriptions, or results from diagnostic tests.
  • Appeal Deadline: Look for phrases like "Appeal must be received by [date]" or "within X days of this letter." Note the exact deadline to ensure your appeal is submitted on time.

Once you’ve gathered this information, create a plan to meet the appeal deadline without delay.

Staying on Top of Appeal Deadlines

After identifying the deadline, take these steps to stay organized:

  • Set Up a Timeline: Mark the deadline on your calendar and set multiple reminders to avoid missing it.
  • Keep Detailed Records: Save copies of everything, including:
    • The denial letter
    • Proof of delivery or submission confirmations
    • Receipts for your appeal submission
    • Any correspondence with your insurance provider
  • Follow Submission Instructions: Verify how the insurer accepts appeals – whether through certified mail, fax, or electronic submission – and stick to their guidelines.

Step 2: Collect Required Documents

After understanding your denial letter, the next step is gathering all the necessary documents to strengthen your appeal. A well-organized file with thorough documentation can make all the difference.

Essential Medical Records

Start by assembling these key medical records:

  • Physician’s Prescription: A prescription that outlines the specific mobility equipment needed and its specifications.
  • Clinical Documentation: Medical records that detail your diagnosis, treatment plan, and any mobility limitations.
  • Progress Notes: Records showing your response to treatment and current mobility challenges.
  • Diagnostic Results: Include test results, X-rays, or imaging that support the need for the equipment.
  • Insurance Forms: Any appeal forms required by your insurance provider.

These records provide the foundation for your appeal, but additional evidence can further demonstrate the medical necessity of the equipment.

Supporting Medical Evidence

To bolster your case, include evidence that underscores why the equipment is essential:

  • Letter of Medical Necessity: Your healthcare provider should explain:
    • The medical condition requiring the equipment.
    • How the equipment will improve your daily life.
    • Why other options are not suitable.
    • How long the equipment will likely be needed.
  • Expert Documentation: Secure statements from:
    • Physical therapists
    • Occupational therapists
    • Specialist physicians
    • Other relevant healthcare professionals

Here’s a quick breakdown of the types of documents and their purposes:

Document Type Purpose Essential Details
Medical Records Establish diagnosis Includes condition, treatment history, and mobility limitations.
Clinical Evidence Prove necessity Features test results, therapy assessments, and records of failed treatments.
Expert Opinions Professional support Includes evaluations, therapy recommendations, and expected outcomes.

These materials, combined with your medical records, create a comprehensive appeal package.

Additional Supporting Materials

To further strengthen your appeal, consider including:

  • Logs of daily activities showing your mobility challenges.
  • Photos or videos that illustrate difficulties with everyday tasks.
  • Documentation of treatments that didn’t work.
  • Research or studies that highlight the effectiveness of the equipment.

Make sure to submit all documents as a complete package.

"If your doctor is willing to advocate strongly on your behalf by providing detailed documentation and participating in peer-to-peer reviews when necessary, this significantly increases chances of successful appeal", says Dr. Michael Roberts, Director of Medical Appeals at Central State Healthcare.

Step 3: File Your First Appeal

Once you’ve gathered all your documentation, it’s time to submit your initial appeal to your insurance company. This step, known as an internal review, gives you the chance to dispute the denial of your claim.

Writing Your Appeal Letter

Your appeal letter is your main tool to address the reasons for denial and make your case. To create an effective letter, include these key components:

  • Header Information: Include your name, policy number, claim number, and details about the denied equipment.
  • Opening Statement: Clearly state that you’re appealing the denial decision and reference the date of the denial.
  • Medical Necessity: Explain why the mobility equipment is essential for your health, using supporting documentation.
  • Address Denial Reasons: Respond to each reason for denial with evidence to back up your claims.

Here’s a quick breakdown of what your appeal letter should include:

Appeal Letter Section Key Details Supporting Documents
Introduction Policy and claim details Denial letter
Medical Need Current condition, limitations Physician statements
Evidence Test results, medical opinions Clinical documentation
Request Specific action requested Equipment specifications

Once you’ve outlined these sections, compile them into a complete appeal package.

Required Appeal Documents

To strengthen your appeal, assemble the following documents along with your letter:

  • A formal appeal letter
  • A letter of medical necessity from your physician
  • Recent medical records
  • Relevant prescriptions
  • Specialist evaluations
  • Completed insurance appeal forms
  • A copy of the denial letter
  • Authorization forms, if required
  • Detailed equipment specifications

Submit your appeal through your insurer’s preferred method. If you’re sending it electronically, save any confirmation emails. For mailed submissions, use certified mail with a return receipt and keep the tracking information for your records.

sbb-itb-bbf8bc0

Step 4: Request Outside Review

If your internal appeal doesn’t go your way, the next step is to ask for an external review. This process allows an independent organization to take a fresh look at your claim, ensuring a fair and unbiased decision.

Who Qualifies for an External Review

You’re generally eligible for an external review if your claim has been denied after completing the internal appeal process. The advantage here is clear: an independent organization, separate from your insurer, will handle the review. Now, let’s go over how to collaborate effectively with the review organization.

How to Work with Review Organizations

To give your claim the best chance, make sure to provide all the necessary documents, including:

  • Your original claim records
  • Any correspondence related to your internal appeal
  • Supporting medical records and evidence

Submitting a complete set of documents ensures the review is as thorough and fair as possible.

Step 5: Next Steps After Denial

If your claim is denied after an external review, don’t lose hope – there are still avenues to explore. It might be time to seek advice from healthcare and insurance claim specialists to determine if pursuing legal action makes sense for your situation.

Here are a few resources that can provide additional support:

  • Legal Aid Organizations: Many states have legal aid offices that offer free or low-cost assistance for disputes involving insurance claims. Reaching out to them can be a good starting point.
  • Insurance Attorneys: Consider consulting attorneys who specialize in medical equipment claims. Many of them provide a free initial consultation, which can help you understand your options better.
  • State Insurance Department: Filing a complaint with your state’s insurance department could lead to an investigation into whether the insurance company violated any regulations.

Conclusion: Steps for Success

Summary of Appeal Steps

Appealing a denied mobility equipment claim requires determination and careful attention to detail. Here’s a quick recap of the process:

  • Review Your Denial Letter: Understand the reasons for the denial and note any deadlines.
  • Gather Documentation: Collect all necessary medical records and supporting evidence.
  • Submit Your Initial Appeal: Ensure your appeal includes complete and accurate documentation.
  • Request an External Review: If needed, seek an independent review of your case.
  • Consider Additional Options: Look into legal assistance or alternative payment solutions if other steps fail.

Following these steps methodically gives you a solid foundation for moving forward.

Getting Started

Start by organizing all your documents in one place. Keep a detailed log of every interaction with your insurance company – include dates, reference numbers, and any deadlines mentioned. Staying on top of communication is key. For more tips and resources, check out World Crutches.

FAQs

What are common reasons for denied mobility equipment claims, and how can I address them when appealing?

Insurance claims for mobility equipment, such as crutches, often get denied for a few common reasons. These can include errors or missing details in the paperwork, the insurer deciding the equipment isn’t medically necessary, or the item simply not being included in your policy’s coverage.

To strengthen your appeal, start by double-checking that all forms and medical records are complete and accurate. Collaborate with your doctor to include a detailed explanation of why the equipment is essential for your health. Also, take a close look at your insurance policy to verify whether the equipment is covered and highlight the relevant terms in your appeal. A well-organized and detailed submission can significantly improve your chances of approval.

How can I work with my healthcare provider to strengthen my appeal for a denied mobility equipment claim?

If your insurance claim has been denied, the first step is to have a conversation with your healthcare provider. Share the specifics of the denial and get their perspective on why the mobility aid, like crutches, is critical for your recovery or treatment. Ask them to provide a detailed letter of medical necessity that outlines how the equipment directly supports your medical needs.

Make sure this letter is accompanied by supporting documents such as medical records, test results, or prescriptions that reinforce your case. The more comprehensive the documentation, the better your chances of overturning the denial. Maintaining clear and open communication with your provider is essential for building a strong case.

What can I do if my appeal for mobility equipment coverage is denied?

If your requests for mobility equipment coverage, like crutches, are denied both internally and externally, don’t lose hope – there are still steps you can take:

  • Ask for a detailed denial explanation: Reach out to your insurance provider and request a written breakdown of why your claim was denied. Knowing the exact reasons can help you figure out how to address them.
  • Get expert help: A patient advocate, attorney, or healthcare provider experienced in insurance appeals can guide you through the process and help strengthen your case.
  • Look into other resources: Nonprofit organizations, local charities, or government programs might offer financial help or even provide mobility equipment at little to no cost.

Though the process can feel overwhelming, staying persistent and informed about your rights can improve your chances of getting the equipment you need.

Related posts

How to Prevent Falls While Using Crutches

How to Prevent Falls While Using Crutches

Using crutches can be tricky, but staying safe is all about proper technique, preparation, and awareness. Here’s how to avoid falls and make your recovery smoother:

  • Adjust your crutches properly: Leave a 1–2 inch gap below your armpits and set handgrips for a 30-degree elbow bend.
  • Practice in safe spaces: Start in controlled areas to build confidence.
  • Check your crutches regularly: Inspect rubber tips, handgrips, and screws for wear and replace them as needed.
  • Maintain good posture: Keep your back straight, shoulders relaxed, and look ahead while walking.
  • Prepare your environment: Remove loose rugs, secure cords, and ensure good lighting indoors. Outside, avoid slippery or uneven surfaces.
  • Learn walking techniques: Use the swing-through method for no weight on the injured leg or the three-point method for partial weight-bearing.
  • Tackle stairs carefully: Lead with your uninjured leg going up and with your crutches going down.

HOW TO Walk with Crutches Safely and EASILY | Fit, Use, Gait Patterns

Setting Up Your Crutches Correctly

Getting your crutches set up the right way is key to staying stable and comfortable during recovery. Here’s how to do it:

Finding the Right Height

Adjust the crutches so there’s a small gap – about 1–2 inches – between the top of the crutch and your armpit. Stand naturally with your arms relaxed to make sure the fit feels right. This simple adjustment helps you stay comfortable and in control.

Positioning the Handgrips

Set the handgrips so your elbows are slightly bent, roughly at a 30-degree angle, when you’re holding the crutches. This setup ensures your weight is distributed properly and gives you better control as you move. These small tweaks go a long way toward making your recovery safer and easier.

Adjustment Point Correct Position Why It Matters
Top of Crutch 1–2 inches below the armpit Prevents discomfort and ensures stability
Handgrip Allows for a 30-degree elbow bend Helps distribute weight effectively

Basic Walking Steps

Once your crutches are adjusted correctly, learning the proper walking techniques is key to staying steady and safe.

Walking Without Weight

For situations where you can’t put any weight on your injured leg, the swing-through method is your go-to. Start by placing your crutches firmly on the ground in front of you. Grip the handgrips tightly, lift your injured leg off the floor, and swing your body forward, landing on your uninjured leg. This method takes some upper-body strength, so take your time and build up your confidence gradually.

Walking With Some Weight

If you’re allowed to put a little weight on your injured leg, the three-point walking method offers a stable solution. Begin by moving your crutches a short distance ahead. Next, step forward with your injured leg, applying just a small amount of weight. Finally, bring your healthy leg forward. The sequence – crutches, injured leg, then healthy leg – helps you stay balanced throughout.

Keeping Good Posture

Good posture is essential for balance and safety. Keep your back straight, relax your shoulders, and look ahead rather than down at your feet. Take smaller, steady steps as you get used to the movement. Proper posture not only improves stability but also reduces the risk of losing your balance while using crutches.

Moving on Stairs and Rough Ground

When tackling stairs, start by moving your crutches one step ahead. Use the handrails for extra support and take each step carefully. If you’re going up the stairs, lead with your uninjured leg. When heading down, begin with your crutches and injured leg.

For rough or uneven ground, focus on finding solid footing with every step and adjust your crutches as needed to keep your balance steady. On slopes or hills, angle your crutches to match the incline, which helps you stay stable as you move. These techniques can help you navigate tricky surfaces more safely and confidently.

sbb-itb-bbf8bc0

Making Your Space Safe

Creating a safe environment is key when you’re navigating life with crutches. A few thoughtful adjustments can help reduce the risk of falls and make moving around much easier.

Home Safety Tips

Start by organizing your living space to allow for smooth and easy movement. Push furniture against walls to open up wide, clear paths, especially in areas like hallways and living rooms. Here are some additional tips to keep your home safe:

  • Remove loose rugs and mats: These can easily become tripping hazards.
  • Tidy up electrical cords: Secure them along walls or use cord covers to keep them out of the way.
  • Brighten your space: Install proper lighting in hallways and stairwells to improve visibility.
  • Keep floors clear: Clean up spills immediately and remove any clutter that could cause you to trip.

Once your indoor space is secure, don’t forget to think about your safety when stepping outside.

Outdoor Safety Tips

The outdoors can present unique challenges, so take extra care when navigating external spaces with crutches. Here are some practical precautions to keep in mind:

  • Avoid slippery surfaces: Steer clear of wet, icy, or slick areas whenever possible.
  • Choose the right footwear: Shoes with non-slip soles can provide better grip and stability.
  • Be mindful of uneven terrain: Watch out for cracks, potholes, or sudden changes in elevation.

Planning your routes ahead of time can also help you avoid potential hazards and make your journey safer.

Checking Your Crutches

Keeping your crutches in good shape is just as important as learning to use them properly. Regular checks can help you catch any issues before they compromise your safety.

Weekly Safety Checks

Take a few minutes each week to inspect your crutches. Pay attention to these areas:

  • Rubber Tips: Look for cracks, worn spots, or missing tread.
  • Handgrips: Make sure they’re securely in place and free from damage.
  • Screws and Bolts: Check that all connections are tight and stable.
  • Frame: Look for any visible cracks, bends, or other signs of wear.

When to Replace Parts

If you notice any damage, replace the affected parts right away:

  • Swap out rubber tips if they’re cracked, worn down, or missing their tread.
  • Replace handgrips if they’re torn or feel loose.
  • Address any issues with the frame or hardware immediately to avoid further problems.

Conclusion

Staying safe while using crutches involves a mix of proper posture, a well-prepared environment, and deliberate, controlled movement. Once you’ve adjusted your crutches and learned the basic walking techniques, your next priority is to prevent falls by focusing on your posture and surroundings. Keep your back straight, your shoulders relaxed, and your head upright for better stability.

Preparing your environment is just as important as your technique. Before you start moving around, take a moment to remove common hazards that could lead to accidents, such as:

  • Loose rugs or electrical cords
  • Extra furniture cluttering walkways
  • Items that could cause slipping or tripping

When walking on different surfaces, take small, cautious steps and engage your core muscles to maintain balance. For additional safety, consider adding grab bars in the bathroom and ensuring handrails on stairs are secure. These small adjustments can make navigating your home much safer, especially when you’re just getting used to crutches.

Finally, practice your walking technique in a safe, open space before tackling more challenging areas. These precautions can greatly reduce your risk of falling and help make your recovery smoother.

FAQs

What are common mistakes that can cause falls when using crutches, and how can I avoid them?

Using crutches can feel awkward at first, and certain missteps might raise the risk of falling. Here are some common mistakes and how to steer clear of them:

  • Incorrect crutch height: Adjust your crutches so they’re the right fit. The top should sit about 1–2 inches below your armpit, and the handgrips should allow a slight bend in your elbows when you’re standing upright.
  • Relying on your armpits: Resist the urge to rest your weight on your armpits. This can lead to discomfort or even nerve damage. Instead, let your hands and arms do the work of supporting your weight.
  • Moving too fast or losing focus: Take your time and stay alert, especially on uneven ground or stairs. A steady pace helps you maintain control and balance.
  • Wearing slippery shoes: Opt for footwear with solid traction to avoid slipping, particularly on wet or smooth surfaces.

By paying attention to these details and practicing good technique, you can move with greater confidence and reduce the risk of accidents while using crutches.

How can I strengthen my upper body to use crutches more safely?

Building strength in your upper body is key for using crutches safely and effectively. The muscles in your arms, shoulders, back, and core play a vital role in providing the stability and support you need to move with crutches.

Here are a few exercises that can help:

  • Push-ups: These work your chest, shoulders, and arms, building the strength needed for crutch use.
  • Pull-ups or resistance band rows: Excellent for targeting your back and biceps, which assist in pulling and stabilizing.
  • Planks: A great way to enhance core stability, which is essential for maintaining balance.
  • Tricep dips: These focus on your triceps, the muscles you rely on when pushing yourself forward.

Start with light exercises and gradually increase the intensity as you build strength. If you’re recovering from an injury, it’s a good idea to check in with your doctor or physical therapist before beginning any new workout routine to ensure it aligns with your recovery plan.

How can I safely navigate difficult outdoor surfaces while using crutches?

When dealing with uneven or tricky outdoor surfaces like gravel, grass, or icy paths, it’s important to be extra cautious to avoid losing your balance. Take your time and move carefully, making sure each crutch is securely planted before stepping forward. If you can, steer clear of slippery or unstable areas altogether.

To improve safety, you might want to use crutch tips specifically designed for outdoor conditions – some offer better grip or even spikes for icy terrain. Always keep your weight evenly distributed between the crutches and your stronger leg, and avoid stretching or reaching too far. If a surface seems too risky, don’t hesitate to ask for help or find a safer route. Staying cautious can make all the difference.

Related posts

Foam vs. Gel Crutch Pads: Which Is Better?

Foam vs. Gel Crutch Pads: Which Is Better?

Gel crutch pads are better for long-term comfort, while foam pads work well for short-term use. Choosing between them depends on how long you’ll need crutches and your activity level. Here’s a quick breakdown:

  • Foam Pads: Lightweight, lower cost, good for short-term recovery (2–4 weeks), but compress quickly and need frequent replacement.
  • Gel Pads: Durable, better pressure relief, ideal for extended use (2+ months), higher upfront cost but lasts longer.

Quick Comparison

Feature Foam Pads Gel Pads
Best Use Case Short-term (2–4 weeks) Long-term (2+ months)
Pressure Relief Basic cushioning Superior distribution
Comfort Level Adequate for short periods Great for extended use
Durability Compresses quickly Lasts 12–24 months
Cost Efficiency Lower upfront cost Better long-term value

If you need crutches for a short time, foam pads are affordable and sufficient. For extended use, gel pads offer better support and durability, making them worth the investment.

✅ Best Pads For Crutches In 2023 ✨ Top 5 Tested & Buying Guide

Materials and Design Features

The materials and structure of foam and gel pads play a major role in their comfort and functionality. Let’s break down the basics of foam pads before diving into the more intricate design of gel pads.

Foam Pads: The Basics

Foam pads are crafted from medical-grade polyurethane foam. They come in two main types: open-cell foam for better airflow and closed-cell foam for enhanced moisture resistance and durability. These pads are lightweight, making them easy to handle and transport. However, they tend to compress quickly under pressure, which can limit their long-term comfort.

Gel Pads: Layered Design

Gel pads are made using medical-grade silicone or polyurethane gel encased in a tough outer shell. Their design often includes multiple layers, such as:

  • A protective outer membrane
  • A dense gel core for pressure relief
  • A supportive base layer for stability
  • A non-slip finish to keep the pad securely in place

This layered construction helps gel pads distribute pressure evenly and absorb shocks effectively. While this makes them slightly heavier than foam pads, the added support and comfort can be worth the trade-off.

Pressure Relief and Comfort

Foam Performance: Short-Term Use

Foam pads can provide decent comfort for short recovery periods. In fact, 72% of users report adequate relief during the first two weeks of use [5]. However, their cushioning tends to wear out quickly. With just 4–6 hours of daily use, foam pads experience 15–20% compression within 14 days. High-density polyethylene foam does help reduce vibration transfer at hand grips by 43%, but its protection remains fairly basic. For instance, the axillary region endures 22% higher median pressure, and while foam offers some ulnar nerve protection, it’s only temporary. Additionally, foam struggles to distribute pressure effectively across the metacarpal region.

In short, foam is a reasonable option for short-term comfort but falls short when it comes to durability and extended use.

Gel Performance: Extended Use

Gel padding, on the other hand, excels in long-term pressure management. A 2020 study revealed that gel reduces peak pressure points by 28% compared to standard foam. Over an 8-hour period, gel pads maintain a mean pressure of 68.6mmHg, far outperforming foam, which averages 87.6mmHg. Additionally, polyurethane solid gel shows remarkable durability, with less than 5% density change even after 500,000 compression cycles.

The advantages of gel padding extend to targeted anatomical relief:

  • Gel reduces peak pressures at the brachial plexus by 37%.
  • Designs with integrated airflow channels lead to a 29% decrease in metacarpal pressure.

For those requiring support for more than 8 hours daily, gel pads are a game-changer. A 2024 survey found a 76% reduction in pressure ulcers among paraplegic patients using gel pads. Additionally, 89% of long-term users reported less axillary numbness compared to those using foam alternatives.

Pressure Management Feature Foam Performance Gel Performance
Initial Pressure Relief Effective for ≤2 weeks Consistent beyond 30 days
Peak Pressure Reduction Basic level 28% better than foam
Daily Effective Use 4–6 hours 8+ hours
Compression Rate 15–20% within 14 days <5% after 500,000 cycles
Nerve Protection Good ulnar protection Superior brachial plexus protection

Lifespan and Care

Foam Durability Issues

Foam pads aren’t known for their longevity. Studies show that they can lose up to 83% of their compression resistance within just 60 days. For users weighing over 200 pounds, the situation worsens, as foam compresses 2.5 times faster compared to gel alternatives. Add humidity into the mix, and foam degrades 40% faster, soaking up to 300% of its weight in moisture. This not only weakens its structure but also increases the risk of bacterial growth.

Usage Factor Impact on Foam Lifespan
Daily Use Average lifespan of 1-3 months
High Activity (>5,000 steps/day) Needs replacement 3x more often
Humid Environment Degrades 40% faster
Regular Cleaning Loses 12% durability per wash cycle

In comparison, gel pads are far more durable and require less frequent maintenance, making them a more reliable choice over time.

Gel Pad Maintenance

Gel pads shine when it comes to durability and ease of care. They retain 89% of their thickness even after 1,000 hours of simulated use and maintain their structural integrity for 12 to 24 months.

Their non-porous surface makes them less prone to microbial growth – 78% less than foam – allowing for quick and effective cleaning. A simple monthly wipe-down with 70% isopropyl alcohol does the trick. Hospitals and healthcare facilities also report that gel pads require 73% less maintenance time compared to foam.

"Lasted 8x longer than hospital foam", shared a verified reviewer on CaregiverProducts.

Unlike foam pads, which need to be stored in climate-controlled conditions (40–80°F), gel pads are built to withstand a wide temperature range, from –20°F to 120°F. This ensures they stay reliable no matter the season or environment.

To maximize the lifespan of gel pads, follow these tips:

  • Store flat to avoid deformation.
  • Clean with disinfectant wipes, as they can endure over 200 cleaning cycles.
  • Inspect monthly for wear and tear.
  • Knead the pad monthly during storage to maintain flexibility.

With proper care, gel pads offer a long-lasting and low-maintenance solution, outperforming foam in nearly every aspect.

sbb-itb-bbf8bc0

Price Comparison

Foam: Lower Initial Cost

Foam crutch pads are typically more affordable upfront, making them a budget-friendly choice for short-term use. However, they tend to wear out quicker, meaning you’ll need to replace them more often. Over time, these frequent replacements can add up, potentially increasing the total expense.

Gel: Long-Term Value

Gel crutch pads come with a higher initial price tag, but their durable materials make them last significantly longer. If you depend on crutches for an extended period, the longevity of gel pads means fewer replacements, saving you both money and the hassle of frequent maintenance. This balance between durability and cost makes gel pads an appealing option for long-term use.

Selecting Your Crutch Pads

Selection Criteria

When it comes to crutch pads, finding the right fit depends on how long you’ll use them, your activity level, and your specific cushioning needs. The type of injury and your sensitivity to pressure play a big role in this decision. For instance, if you have arthritis or other conditions that make you more sensitive to pressure, gel pads are a great option because they distribute weight more evenly. On the other hand, if you’re not as sensitive and need crutches for a shorter period, foam pads might do the trick.

Your activity level is another important factor. If you’re moving around a lot, especially on uneven surfaces, gel pads offer better stability and shock absorption. For less intense, indoor use, foam pads are often sufficient.

Here’s a quick comparison to help you decide:

Factor Foam Pads Gel Pads
Usage Duration Best for short-term use Great for extended use
Activity Level Works for light activity Ideal for high daily activity
Pressure Sensitivity Suitable for lower sensitivity Better for higher sensitivity
Cost Lower upfront cost Higher upfront cost, better value over time

Usage Guidelines

Once you’ve considered the selection criteria, match your choice to your daily routine. Foam pads are perfect for short recoveries or if you’re mostly moving indoors on even surfaces. However, if your lifestyle involves navigating uneven terrain or staying on your feet for long hours, gel pads are the better option. Their added cushioning and stability can make a noticeable difference in comfort and support.

Final Comparison

After diving into the details of materials, pressure relief, and costs, here’s a clear summary to help you decide which option fits your needs best.

Gel pads are the go-to choice for those needing long-term comfort and support. They shine when it comes to distributing pressure evenly, which helps reduce skin irritation – a critical factor for anyone recovering from major surgery or managing chronic conditions. If you’re planning on extended crutch use, gel pads are worth the investment.

On the other hand, foam pads are a practical option for short-term recovery. They provide enough cushioning for temporary use, making them a cost-effective solution for minor injuries or post-surgery recovery lasting just a few weeks.

Here’s a quick breakdown to help you compare:

Feature Foam Pads Gel Pads
Best Use Case Short-term recovery (2-4 weeks) Long-term use (2+ months)
Pressure Relief Basic cushioning Advanced weight distribution
Comfort Level Adequate for short periods Superior for extended use
Skin Protection Basic protection Enhanced irritation prevention
Cost Efficiency Lower upfront cost Better value for long-term needs

Ultimately, your choice depends on your recovery timeline and comfort priorities. If you need crutches for an extended period, gel pads offer unmatched support and durability. For shorter recovery periods, foam pads provide a budget-friendly solution. Always check with your healthcare provider to ensure your choice aligns with your recovery plan and activity levels.

FAQs

What should I consider when deciding between foam and gel crutch pads?

Choosing between foam and gel crutch pads comes down to your comfort needs, activity level, and personal preferences.

Foam crutch pads are lightweight, easy on the wallet, and provide a basic level of cushioning. They’re a solid choice if you’re using crutches for a short period or engaging in lighter activities.

On the flip side, gel crutch pads are built for more demanding use. They’re great at relieving pressure and offering long-lasting comfort, making them ideal if you rely on crutches frequently or for extended stretches of time. Gel pads also conform to your body, helping to reduce friction and discomfort, which can be a game-changer if pressure points are an issue.

When deciding, think about factors like how durable the pads need to be, how easy they are to clean, and how often you’ll be using your crutches. If affordability and simplicity are your priorities, foam pads might do the trick. But for maximum comfort and support, gel pads are worth considering.

What are the differences in maintenance and durability between foam and gel crutch pads?

Foam and gel crutch pads offer different benefits when it comes to upkeep and lifespan.

Foam pads are low-maintenance and simple to clean – just a quick wipe with a damp cloth or mild soap usually does the trick. That said, they don’t hold up as well over time. With frequent use, foam can compress or even tear, meaning you might need to replace them sooner.

Gel pads, in contrast, are built to last. They’re tougher and more resistant to wear, making them a solid choice for heavy or long-term use. Cleaning them takes a bit more care to avoid harming the gel material, but their durability often makes the extra effort worthwhile. Deciding between the two comes down to what matters more to you: easier cleaning or a longer-lasting option.

Do gel crutch pads help reduce skin irritation and prevent pressure sores during long-term use?

Gel crutch pads are a great option for reducing skin irritation and preventing pressure sores, especially if you’re using crutches for long periods. Their soft, flexible design helps distribute pressure more evenly and cuts down on friction – two major culprits behind discomfort and skin problems.

Unlike foam pads, gel pads tend to offer better cushioning and adjust more naturally to the shape of your body. This makes them an excellent choice if you’re looking for added comfort and support while recovering.

Related posts

Hand Pain Relief Products for Crutch Users

Hand Pain Relief Products for Crutch Users

Using crutches can strain your hands, causing discomfort that makes daily tasks harder. Thankfully, there are three main products to help reduce hand pain:

  • Gel Cushion Systems: Provide up to 40% pressure relief with shock-absorbing materials. Cost: $16.95–$34.99. Best for short-term recovery.
  • Ergonomic Handles: Reduce strain by 35% with natural grip designs. Cost: $34.99–$249. Ideal for chronic conditions.
  • Handle Covers: Offer 20% pressure relief with easy-to-install padding. Cost: $10.49–$24.45. Great for occasional use.

Quick Comparison:

Feature Gel Cushions Ergonomic Handles Handle Covers
Pressure Relief Up to 40% Up to 35% Up to 20%
Durability 3–6 months 1–2 years 1–3 months
Cost $16.95–$34.99 $34.99–$249 $10.49–$24.45
Best For Short-term use Chronic conditions Occasional use

Choose the product that fits your needs, crutch type, and usage frequency. For chronic conditions, ergonomic handles offer the best long-term value. For short-term recovery, gel cushions provide immediate comfort. Handle covers are a budget-friendly option for temporary relief.

1. Gel Cushion Systems

Pressure Relief

Gel cushion systems are a game-changer for crutch users dealing with hand pain. A 2023 University of Michigan rehabilitation study found that these cushions reduce peak pressure points by 30–40% compared to standard crutch handles. This is thanks to viscoelastic materials that mold to the shape of your hand, providing steady support as you move.

Take the Vive Health Gel Crutch Pad, for example. Priced at $19.99, it features a 0.6-inch layer of medical-grade silicone that evenly distributes pressure across your palm. For those needing extra support, like users over 250 pounds, the Able Life Comfort Gel Series ($34.99) steps up with a thicker 0.8-inch cushion and reinforced sidewalls.

Now, let’s look at how these cushions hold up over time.

Durability

When cared for properly, high-quality gel cushions can last a long time. The Carex Gel Crutch Grip ($24.95) boasts a 2mm reinforced nylon exterior, rated for over 1,000 hours of use. On the flip side, budget options under $15 might need replacing every three months with daily use.

For added longevity, the Titan Gel Crutch Pad ($22.50) includes an antimicrobial treatment, which helps maintain elasticity 25% longer than untreated models. This makes it a solid choice for those who rely on crutches for extended periods.

Next, let’s see how easy it is to set these up.

Ease of Installation

Modern gel cushion designs make installation a breeze. The Dr. Arthritis Crutch Pads ($29.95) feature a color-coded strap system that cuts installation time dramatically – from an average of 8 minutes to under 2 minutes, as shown in 2024 product testing.

Product Type Installation Time Compatibility
Standard Gel Pads 5–8 minutes 1" diameter handles
Color-Coded Systems 1–2 minutes Universal fit

Finally, let’s talk about cost and value.

Cost

Gel cushions are a smart investment over time. Spending $25 on a quality gel pad can save you about $23 over six months compared to buying $8 foam grips monthly.

The benefits are backed by science. A 2024 Johns Hopkins study found that patients using the Ergoactives Gel Pro ($28.99) reported a 58% drop in hand numbness during six-week recovery periods. MRI scans even showed reduced carpal tunnel inflammation, proving the long-term value of these cushions.

2. Ergonomic Handle Designs

Pressure Relief

Ergonomic grips are a game-changer for crutch users, offering a noticeable reduction in pressure on the hands. Compared to standard cylindrical handles, these designs lower peak pressure points by 15–20%. Take the ND Products Ergo Grip, for instance. Its thoughtful features, like a thumb groove and a contoured surface, reduce focal pressures from 45 psi to about 28 psi while increasing the hand contact area by 32%. This expanded contact area helps alleviate strain on sensitive spots such as the ulnar nerve and carpal tunnel.

Durability

When it comes to durability, ergonomic handles stand out thanks to the use of advanced materials. The ND Products Ergo Grip, made from high-grade thermoplastic rubber, retains its elasticity even after more than 500,000 compression cycles. For heavier-duty needs, INDESmed‘s aerospace aluminum handles can support up to 350 pounds without bending or deforming.

Material Type Durability Metric Weight Capacity
Thermoplastic Rubber 500,000+ compression cycles 300 lbs
Aerospace Aluminum Not specified 350 lbs
Carbon Fiber 10-year lifespan 300 lbs

Cost

The price of ergonomic handles varies depending on the materials and design. Basic foam covers are the most affordable, priced between $16.40 and $24.45. Mid-range options, like the ND Products Ergo Grip, are available for $29.99, discounted from the original MSRP of $39.99. For premium choices, INDESmed offers medical-certified handles with a 5-year warranty, priced between $79.90 and $249.

Clinical research highlights the benefits of these designs. In a 6-week study involving 45 participants, 78% reported a reduction in carpal tunnel symptoms. EMG tests also showed an 18% decrease in flexor digitorum muscle activity when using ergonomic handles with a 32mm diameter. Additionally, pressure mapping revealed that forearm pressure dropped from 8.0 psi with standard handles to 5.4 psi with ergonomic alternatives.

Next, we’ll explore handle cover options for added comfort.

How to make your crutches more comfortable 🩼

sbb-itb-bbf8bc0

3. Handle Cover Options

Handle covers are a simple yet effective way to make crutches more comfortable, especially for those using them for extended periods.

Pressure Relief

These covers act as a cushion for your hands, helping to reduce the pressure on your palms. This added padding can make a noticeable difference during long-term use.

Durability

Well-made handle covers are designed to hold up over time, maintaining their softness and support even with regular use.

Easy to Install

No tools? No problem. Most handle covers can be installed quickly and effortlessly, making it easy to upgrade your crutches in just a few minutes.

Budget-Friendly Comfort

Handle covers are an affordable way to enhance your comfort and mobility. They’re a small investment that can make a big difference in your daily experience with crutches.

Product Comparison

This section brings together performance, cost, and clinical insights to help you make an informed choice.

Performance Overview

According to the Journal of Rehabilitation Medicine, the effectiveness of pressure relief varies significantly across products. Gel cushions reduce pressure by up to 40%, ergonomic handles achieve 30–35%, and handle covers provide a more modest 15–20% reduction.

Here’s a side-by-side comparison of the three options:

Feature Gel Cushions Ergonomic Handles Handle Covers
Pressure Relief 40% reduction 35% reduction 20% reduction
Durability 3–6 months 1–2 years 1–3 months
Installation Time 1–2 minutes 5–10 minutes Under 1 minute
Average Cost $16.95 $34.99 $10.49
Best Use Case Short-term recovery Chronic conditions Temporary relief

Now, let’s assess how these factors impact cost and long-term value.

Cost-Effectiveness Analysis

Ergonomic handles, priced at $34.99, are a better investment over time compared to the annual costs of gel cushions ($50.85) and handle covers ($52.45). While handle covers are rated highly for ease of installation (4.7/5), ergonomic handles score lower (3.1/5) but provide greater long-term benefits.

Clinical Performance

Clinical studies highlight the effectiveness of these products:

  • Gel Cushions: Trials show a 35–40% improvement in hand comfort during use.
  • Ergonomic Handles: Designed for long-term users, they reduce hand pain by up to 50%.
  • Handle Covers: Foam-based covers offer immediate comfort, though their cushioning wears out quickly.

These findings underline the practical advantages of each product.

Temperature and Environmental Factors

Environmental conditions can influence product performance:

  • Gel Cushions: May retain heat in warmer weather.
  • Handle Covers: Compress faster in humid conditions.
  • Ergonomic Handles: Perform consistently across various climates but add 0.5–1 lb to the crutch weight.

Professional Recommendations

Physical therapists generally suggest:

  • Gel Cushions for recovery periods of up to 3 months.
  • Ergonomic Handles for individuals with chronic conditions or carpal tunnel syndrome.
  • Handle Covers as a quick, budget-friendly option for temporary comfort.

For added flexibility, hybrid solutions that combine gel padding with a slip-on design are available. However, these typically last 2–4 months with regular use.

Recommendations

Based on the performance data, it’s important to select a product that complements your crutch model and caters to your specific needs. Your choice should reflect how often you use crutches and the type of support your recovery requires:

For short-term recovery (like post-surgery or an injury):

  • Gel cushion systems provide quick and effective comfort.
  • Focus on ensuring a snug and secure fit.

For chronic conditions:

  • Ergonomic handle designs deliver long-term comfort.
  • Adjust support settings to suit your personal needs.

For occasional crutch users:

  • Handle covers are an affordable and simple way to add comfort.
  • They’re also easy to install and replace whenever needed.

Here’s a handy summary of recommendations:

User Profile Primary Recommendation Alternative Option
Post-Surgery Recovery Gel Cushion Systems Handle Covers
Chronic Condition Ergonomic Handle Designs Gel Cushion Systems
Occasional Use Handle Covers Gel Cushion Systems

Make sure to regularly check the condition of your crutch accessories. If you experience ongoing discomfort, consult a healthcare professional for advice. For more in-depth product reviews and guidance, visit World Crutches.

FAQs

What should I consider when choosing a hand pain relief product for crutches?

When choosing a product to ease hand pain from crutches, focus on the type of discomfort you’re dealing with and how frequently you rely on your crutches. Options like gel pads can help by adding extra cushioning to relieve pressure, ergonomic grips improve hand positioning to minimize strain, and handle covers enhance both comfort and grip.

Think about your daily routine – how long you use your crutches and the activities you engage in – to pick features that will best alleviate your pain and make using crutches more comfortable.

What are some tips to maintain and extend the lifespan of hand pain relief products for crutch users?

To keep your hand pain relief products – like gel pads, ergonomic grips, and handle covers – in great shape, a little maintenance goes a long way. Here’s how you can make them last longer:

  • Keep them clean: Use a damp cloth with mild soap to gently wipe away dirt, sweat, and oils. This helps prevent material breakdown over time.
  • Check for wear and tear: Look for cracks, tears, or thinning areas, especially on gel pads and grips. Replace them if they show signs of damage to maintain their comfort and support.
  • Store smartly: When not in use, place your items in a cool, dry spot. Avoid exposing them to direct sunlight, excessive heat, or moisture, as these can weaken the materials.

By following these simple steps, you’ll keep your hand pain relief products comfortable and effective for longer.

How can I adjust to using crutches for long-term support when managing a chronic condition?

Transitioning from using crutches temporarily to relying on them for long-term support due to a chronic condition involves more than just sticking with your current pair. Comfort, durability, and proper ergonomics become essential to ensure your mobility aid works for you, not against you.

Products like gel pads, ergonomic grips, and handle covers can make a world of difference by reducing strain on your hands and providing much-needed relief from pain. These accessories are designed to improve your overall experience, especially when crutches become a daily necessity.

When choosing crutches for extended use, look for models with adjustable height and weight capacity to ensure they fit you properly and provide adequate support. Pairing these with accessories that ease pressure on your hands and wrists can help you avoid long-term discomfort. Also, don’t overlook maintenance – regularly check your crutches and any add-ons for signs of wear to keep them safe and functional.

If you’re feeling uncertain about which products or features are right for you, resources like World Crutches offer detailed reviews and practical tips to guide you in selecting the best options for your mobility needs.

Related posts

What to Wear with Crutches: Everyday Outfits

What to Wear with Crutches: Everyday Outfits

When you’re on crutches, dressing comfortably and safely is key. Here’s a quick guide to help you choose the right clothing and accessories:

  • Footwear: Opt for slip-on shoes for ease or lace-up shoes for extra support. Always choose non-slip soles to avoid falls.
  • Pants/Shorts: Go for loose-fitting styles with elastic or drawstring waistbands. Avoid long or baggy pants that could snag on crutches.
  • Tops: Pick lightweight, breathable fabrics like V-neck t-shirts or button-up shirts for easy movement. Sleeveless or three-quarter sleeves work well.
  • Accessories: Hands-free bags like backpacks or fanny packs keep essentials within reach. Choose minimal jewelry to avoid snagging.
  • Outerwear: Capes, ponchos, or zip-up jackets provide warmth without restricting arm movement.

Quick Tips for Dressing:

  • Sit down while dressing for better balance.
  • Use tools like a long-handled shoe horn or sock aid to make the process easier.
  • Keep your closet organized with frequently used items at waist level to avoid bending or stretching.

Staying comfortable and safe while on crutches doesn’t mean giving up on style. Choose practical, well-fitting outfits that let you move freely and feel confident.

How to Use Crutches Correctly

Safe and Easy Footwear Options

Choosing the right shoes is crucial for staying safe and comfortable when using crutches.

Slip-On vs. Lace-Up Shoes

When mobility is limited, having shoes that are easy to put on and take off is key. Slip-on shoes are a great option because they:

  • Are simple to slide on and off
  • Don’t require bending over
  • Minimize the risk of tripping

On the other hand, lace-up shoes offer more ankle support and a secure fit. To make them easier to use, look for:

  • Elastic or locking laces for convenience
  • Locking laces that hold tension well
  • Wide-mouth designs that make it easier to get your foot in

Shoes with Non-Slip Soles

Traction is essential when using crutches. Shoes with rubber soles, deep treads, and weather-resistant materials can help prevent slips.

Look for soles that are flexible enough to move naturally with your foot but firm enough to provide stability. Avoid shoes with smooth or worn soles, as they can make balancing harder.

Best Everyday Shoe Types

Some shoe styles are particularly well-suited for daily use with crutches. Here’s a quick guide:

Shoe Type Benefits
Athletic Sneakers Lightweight, supportive, and great traction
Slip-on Loafers Easy to wear and work in casual settings
Walking Shoes Extra stability with cushioned comfort
Hook-and-Loop Sandals Adjustable fit and breathable design

When picking shoes, focus on these features:

  • Proper fit: Shoes should feel snug but not overly tight.
  • Lightweight materials: Helps reduce fatigue.
  • Good support: Look for cushioning in areas that take the most impact.
  • Wide base: Adds extra balance and stability.

Keep in mind that your uninjured foot will carry more weight while using crutches, so both shoes need to provide excellent comfort and support. If you’re unsure about sizing or style, consider getting a professional fitting.

Next, we’ll look at clothing options that can make moving with crutches even easier.

Pants and Shorts Selection

Wearing the right pants or shorts can make daily activities easier and safer when you’re using crutches. A good fit improves mobility and helps prevent accidents.

Loose-Fit Options

Loose-fitting pants and shorts are a smart choice for unrestricted movement. Athletic pants and joggers provide comfort without tight fabric getting in the way. For warmer days, go for loose-fitting shorts or capris that keep you cool and leave enough room around the thighs and knees for easier crutch use.

Easy-Adjust Waistbands

Adjustable waistbands make dressing simpler when you’re managing crutches. Look for these options:

Waistband Type Benefits
Elastic Quick to put on and comfortable all day
Drawstring Easy to tighten or loosen while seated

A good waistband should stay in place and avoid rolling or bunching as you move.

Length and Fit Guidelines

Length and fit matter when you’re on crutches. Full-length pants should stop above the floor and have tapered legs to avoid snagging on crutches. For shorts or capris, pick a length that reduces extra fabric around the leg openings to prevent interference with movement.

sbb-itb-bbf8bc0

Best Shirts and Tops

The right shirts and tops can make a big difference in comfort and ease of movement, especially when using crutches. Let’s dive into some styles and fabric options that work well.

Loose-Fit Shirt Options

Shirts with extra room around the shoulders and armpits are ideal, but avoid those with too much fabric that might snag on crutches. Here are some great choices:

Shirt Style Why It Works for Crutch Users
V-neck t-shirts Simple to put on and allows free arm movement
Raglan sleeve tops Minimizes underarm friction and improves mobility
Button-up shirts Offers an adjustable fit and convenient temperature control
Athletic performance tops Made with stretchable, moisture-wicking fabric for comfort

Easy Temperature Control

Lightweight fabrics that wick away moisture are key for staying comfortable throughout the day. Here are some tips:

  • Go for materials that help regulate your body temperature, especially during movement.
  • Pick shirts that are easy to adjust, even when seated.
  • Choose tops that can be layered without restricting your range of motion.

Sleeve Types to Choose

Sleeve style matters more than you might think. The right option can prevent irritation and stay out of the way of crutch pads. Here’s what works well:

Sleeve Type Best Use
Short sleeve Great for everyday use; avoids fabric bunching
Three-quarter length Perfect for cooler days; stays clear of crutch handles
Roll-up sleeves Offers flexibility and versatility
Sleeveless Ideal for warm weather and maximum arm movement

When picking sleeves, make sure they aren’t too tight around your biceps, and avoid anything that might snag or catch on your crutches.

Helpful Accessories and Outerwear

Accessories and outerwear can make using crutches more comfortable and convenient.

Hands-Free Bags

Bags that leave your hands free are a must when you’re on crutches. Here are some options to consider:

Bag Type Key Features Best For
Backpack Balanced weight, multiple compartments Everyday use, carrying larger items
Crossbody Easy to grab items, adjustable strap Errands, casual outings
Fanny Pack Compact and secure Quick trips, carrying essentials
Messenger Bag Wide strap, front-access design Work, carrying a laptop

Wide straps are ideal because they distribute weight evenly and help keep the bag in place.

Easy-Wear Coats

Outerwear should keep you warm while allowing easy movement with crutches. Look for coats that have front closures, wider armholes, and shorter lengths to avoid restricting your mobility.

Style Why It Works for Crutch Users
Cape-Style Coats No sleeves to restrict arm movement
Quarter-Zip Pullovers Easy to slip on, adjustable warmth
Front-Zip Jackets Simple to put on and take off
Ponchos Maximum arm freedom and weather coverage

These designs make it easier to stay comfortable without getting tangled up in your outerwear.

Jewelry Tips

Keep jewelry simple to avoid snagging or getting in the way while using crutches.

Jewelry Type Good Options What to Avoid
Necklaces Short chains, simple pendants Long or dangling styles
Bracelets Fitted cuffs, stretchy bands Loose bangles, charm-heavy designs
Rings Smooth, low-profile bands Large, bulky statement rings
Earrings Studs, small hoops Long, heavy dangling styles

Stick to minimal designs that won’t interfere with your movement or catch on clothing.

Getting Dressed with Crutches

Dressing while using crutches requires some planning and focus on stability. Sitting down while dressing can help you stay balanced and keep everything you need within arm’s reach. Here are some practical steps, useful tools, and organization tips to make your routine easier.

Seated Dressing Steps

Sitting down to get dressed is safer and more stable. Keep your crutches nearby and use a sturdy chair for support. Here’s a quick guide for different clothing items:

Clothing Item How to Put It On Safety Tips
Pants/Shorts Sit down, slide in each leg, and adjust Keep crutches and tools within reach; use a stable chair
Shirts/Tops Insert arms one at a time while seated Use a chair with a sturdy back for support
Socks/Shoes Use a sock aid and long-handled shoe horn Ensure your chair is secure and the area is clear
Undergarments Pull them on while seated Keep everything organized and close by

Dressing Tools That Can Help

Certain tools can make dressing easier by reducing how much you need to move or bend:

Tool What It Does How It Helps
Reacher/Grabber Picks up dropped items or clothes Reduces bending and keeps you steady
Sock Aid Helps slide on socks without bending Keeps you stable while seated
Long-Handled Shoe Horn Makes it easier to put on shoes Prevents leaning too far forward
Button Hook Helps fasten buttons with one hand Makes dressing more independent

Closet Organization Tips

A well-organized closet can make dressing quicker and safer. Arrange items so you don’t need to bend or stretch too much:

Storage Area What to Store How to Organize
Waist Level Everyday clothes Hang items at an easy-to-reach height; use labeled or color-coded hangers
Lower Rod Pants, skirts, or similar garments Add extension hooks or adjustable rods
Drawers Undergarments and accessories Use clear containers and label drawers
Shelves Seasonal or rarely used items Store in labeled bins for visibility

Keep your most-used outfits grouped together and remove any clutter from the floor to prevent tripping. If needed, place a small, sturdy chair or stool near your closet to help with seated dressing.

Conclusion

When using crutches, it’s important to choose clothing that prioritizes safety and makes movement easier. Your outfits should focus on comfort and practicality to help you stay mobile and independent.

Here are some key clothing tips to keep in mind:

Clothing Category Key Features Benefits for Safety and Comfort
Footwear Non-slip soles, easy slip-on designs Reduces the risk of slipping and makes putting shoes on simpler
Pants/Shorts Loose-fitting styles, adjustable waistbands Allows for easier movement and quicker dressing
Tops Lightweight, breathable fabrics, easy-to-wear designs Keeps you comfortable and reduces effort when dressing
Accessories Hands-free bags, minimalistic designs Improves balance and avoids unnecessary distractions

Related posts

5 Steps for Setting Recovery Goals

Recovering from an injury or surgery can be challenging, but having clear goals simplifies the process. Here’s how to set recovery goals that keep you on track and motivated:

  1. Assess Your Starting Point: Understand your current abilities by tracking pain, range of motion, and daily functions.
  2. Set SMART Goals: Create goals that are Specific, Measurable, Achievable, Relevant, and Time-bound.
  3. Plan Actions: Break goals into manageable daily or weekly tasks.
  4. Monitor Progress: Regularly evaluate and adjust goals based on your progress.
  5. Celebrate Milestones: Recognize achievements to stay motivated.

Setting Goals After an Injury

Step 1: Check Your Starting Point

Start by assessing your current physical condition to set recovery goals that are both safe and realistic.

Measure Your Current Abilities

Track important details about your physical state, such as:

  • Pain Levels: Rate your pain from 0–10 during daily tasks.
  • Range of Motion: Measure how far you can move affected joints or limbs.
  • Strength: Note what activities you can do and for how long.
  • Daily Functions: Record which everyday tasks you can handle on your own.

If you’re using crutches, sites like World Crutches can offer helpful measurement tips.

Once you’ve gathered this information, share it with your healthcare team to fine-tune your recovery plan.

Consult Your Healthcare Team

After documenting your abilities, meet with healthcare professionals to create a plan tailored to your needs. They can provide:

  • Detailed Assessments: A thorough evaluation of your condition.
  • Recovery Timeline: A breakdown of the phases in your healing process.
  • Safety Recommendations: Clear advice on what activities are safe to try.
  • Milestones: Indicators that show when it’s time to move to the next stage.

Make sure to schedule regular check-ins, keep track of their advice, and stay in close contact with your medical team. This will help you adjust your goals as needed and ensure you’re progressing safely and steadily.

Step 2: Set SMART Goals

Creating SMART goals helps you establish clear, measurable steps to guide your recovery process.

What Are SMART Goals?

SMART goals consist of five key elements:

  • Specific: Clearly define what you aim to accomplish.
  • Measurable: Include numbers or metrics to track progress.
  • Achievable: Set goals that are realistic given your current condition.
  • Relevant: Focus on goals that align with your recovery journey.
  • Time-bound: Assign a deadline to each goal.

Using these guidelines, you can create personalized recovery objectives.

Examples of SMART Recovery Goals

Below are examples of SMART goals that fit different stages of recovery:

Timeframe Goal Example How to Measure
Week 1-2 Walk 50 feet with crutches by March 29, 2025 Use a distance tracker and timer
Week 2-4 Increase weight-bearing by 10% weekly through April 12, 2025 Physical therapist feedback
Week 4-6 Complete 3 sets of 10 ankle pumps daily Keep a daily exercise log

Feel free to adjust these examples to match your own recovery needs.

Tailoring Goals to Your Recovery

Your SMART goals should reflect your personal situation and challenges. Here are some ideas:

  • Pain Management Goals: Use a pain scale to monitor progress. For example, aim to reduce pain from 7/10 to 4/10 within two weeks by following your treatment plan and using ice therapy.
  • Functional Goals: Set practical targets, like preparing a simple meal on your own while using crutches within three weeks.
  • Mobility Goals: Start small and build up. Begin with short indoor walks, then progress to outdoor mobility milestones.
sbb-itb-bbf8bc0

Step 3: Plan Your Actions

Once you’ve set your SMART goals, it’s time to outline daily actions that will help you achieve them.

Break It Down Into Smaller Steps

Divide your bigger goals into manageable daily tasks. For instance, if you’re aiming to walk 50 feet with crutches by March 29, 2025, you might follow a plan like this:

Week Daily Activity Duration/Distance
Week 1 Practice standing with crutches 3-5 minutes, 3x daily
Week 2 Walk indoors 10-15 feet, 4x daily
Week 3 Walk in a hallway 25-30 feet, 3x daily
Week 4 Walk indoors and outdoors 40-50 feet, 2x daily

Focus on mastering each step with proper form before moving on to the next.

Set Deadlines to Stay on Track

Define specific checkpoints to measure your progress. Use a mix of daily, weekly, and monthly milestones to keep yourself accountable:

  • Log daily pain levels and mobility improvements
  • Review progress every Monday
  • Meet with healthcare providers regularly
  • Compare your current abilities to where you started

While deadlines are helpful, it’s important to stay flexible. Your body’s recovery pace might require adjustments along the way.

Gather Support and Tools

Equip yourself with the right tools and build a support system to make your recovery journey smoother.

Equipment You May Need:

  • Crutches or a walker adjusted to your height
  • Therapist-recommended exercise gear
  • A notebook or app to track progress
  • A timer for exercises

Your Support Network:

  • Regular sessions with your physical therapist
  • A family member or friend to assist daily
  • Reliable transportation for medical visits
  • Support groups tailored to your condition

For help choosing mobility aids, check out resources like World Crutches, which offers detailed reviews to guide your decisions.

Keep track of your daily progress, noting achievements, challenges, and any adjustments to your plan. Whether you use a digital app or a simple notebook, this record will help you stay accountable and provide useful insights for your healthcare team.

Step 4: Monitor and Update

Check in on your progress regularly – whether daily or weekly – to ensure your goals stay in sync with your current abilities.

How to Track Progress

Pick a tracking method that works best for you. This could be a recovery journal, a digital app, or any system that helps you consistently evaluate your progress and pinpoint challenges. Keeping track makes it easier to address issues as they arise.

Dealing with Setbacks

If you hit a roadblock or notice slower progress, reach out to your healthcare provider to reassess and adjust your goals. For tips on maintaining mobility aids, resources like World Crutches can be helpful.

Frequent reviews and updates help you stay focused and make better choices along the way.

Step 5: Mark Your Progress

Taking time to celebrate your achievements can help keep you motivated and focused. Recognizing milestones not only reinforces positive habits but also gives you a clear sense of how far you’ve come.

Keep Track of Your Successes

Use a notebook or an app to log every milestone. This makes your progress tangible and easy to review. Examples of achievements to track include:

  • Walking independently for the first time
  • Improved range of motion
  • Longer periods of physical activity
  • Reduced pain levels
  • Increased strength
  • Resuming everyday tasks

For instance, if you’re recovering from knee surgery, note the day you climb stairs without help or walk continuously for 15 minutes. These moments are proof of your progress and can serve as motivation to keep going. Pair these milestones with rewards to make the journey even more rewarding.

Celebrate with Purpose

Create a reward system that aligns with your recovery goals. Choose incentives that are meaningful and encourage further progress. Here’s an example of how you can structure your rewards:

Achievement Level Example Milestone Suggested Reward
Small Wins Complete daily exercises for a week Enjoy a 30-minute relaxation break
Medium Progress Walk 1/4 mile unassisted Treat yourself to new workout gear
Major Goals Return to a regular work schedule Plan a fun weekend activity

While celebrating, stay mindful of safety. For example, if you’re still using mobility aids, continue following proper guidelines to avoid setbacks.

Share your accomplishments with your healthcare provider. They can help validate your progress and suggest adjustments to your recovery plan if needed.

Conclusion

Achieving recovery goals involves careful planning and expert advice, making the process more structured and achievable.

Key Steps to Recovery

Here’s a quick breakdown of how to approach recovery:

  • Begin with a thorough self-assessment and seek professional advice.
  • Set SMART goals to provide clear direction.
  • Break goals into smaller, actionable steps with specific deadlines.
  • Regularly review and adjust your plan as needed.
  • Track your accomplishments and celebrate milestones along the way.

Remember, recovery is a personal journey, and progress will look different for everyone.

Additional Recovery Resources

Looking for more support during recovery? Check out World Crutches. This site provides helpful information on topics like:

  • Choosing the right mobility aids.
  • Using crutches safely and efficiently.
  • Recovering from various injuries.
  • Exploring different types of mobility equipment.

Before making changes to your recovery plan, always consult your healthcare provider.

To stay on track, consider using physical therapy apps, recovery journals, or even simple notes. These tools can help you stay organized, motivated, and accountable throughout your recovery process.

Related Blog Posts